• Email
    • Facebook
    • Instagram
    • Pinterest
    • Twitter

Girl and Her Kitchen

Plan. Make. Eat. Design. Craft. Create. Celebrate. Life.

  • Home
  • About the Girl
  • Recipe Index
  • We LOVE
  • Weekly Menu

Side Dishes Vegetables and Fruit Vegetarian

“Mandrake” Mash

It seems to me that the Eat-Don’t-Eat list of foods is in a perpetual state of unrest. One day eggs are bad; the next day they’re good again. I can’t keep up. And, frankly, it gets a little difficult trying. As Heather has often said, “Moderation is the key.” So today, in keeping with the most recent trend, I’m sharing a recipe for replacing the currently big, bad white potato. My vegetable of choice; the celery root. When I brought it home for the first time my daughter said, “What the heck is this? It looks like a mandrake from the Harry Potter movies!” And so this recipe was named.

I’ve found over time that there a very few vegetables that I won’t eat but, this is not true of my family. I tried using cauliflower as a replacement for mashed potatoes, and although I liked it, I heard a resounding “NO!” to that particular substitution. They said it was too grainy, which is true. It’s not the creamy, smoothness you look for in mashed potatoes.

After reading up on a few other ideas, I decided to try celery root. It’s not hard to find; usually in the produce section by the other root vegetables. You will know it instantly because, and don’t tell Mr. Mandrake I said this but, it is UGLY. I don’t know who was the brave soul who tried this vegetable first, but I’m grateful for their ability to see behind its truly rough exterior.

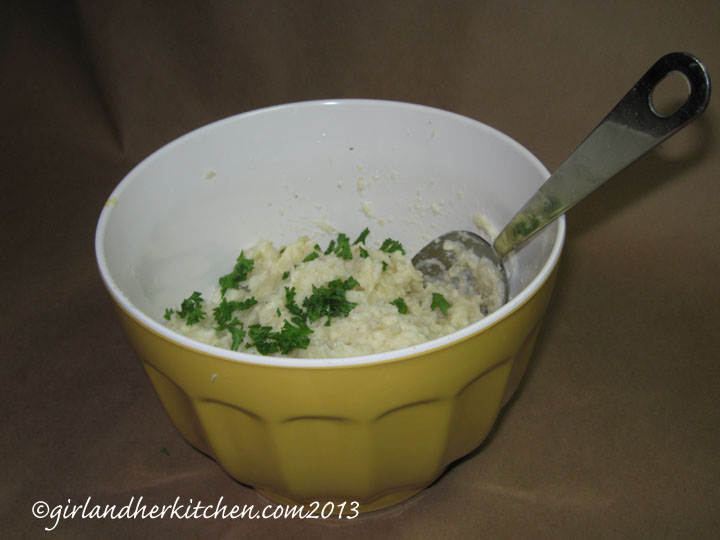
It cooks up exactly the same as a potato, and–when blended with the same ingredients–comes out a luscious, smooth, creamy, altogether perfect replacement to mashed potatoes. And, of course, it’s better for you because of its lower starch content.

Don’t be afraid of the strong celery smell you get when these are cooking. The final flavor is buttery and delicious. Even my husband, who will not let a sliver of celery pass his lips, loves this mash.

Mandrake Mash

1 large or 2 small celery roots
1/4 milk or heavy cream
4 Tbs. butter
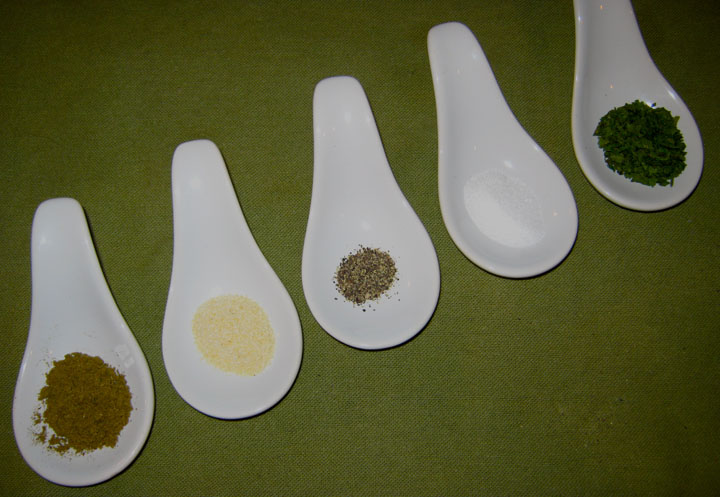
Salt and Pepper to taste

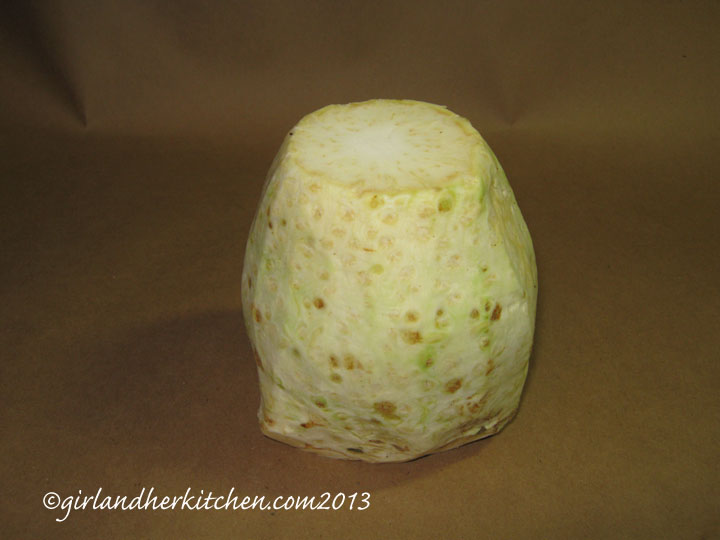
Peel the celery root completely. it will have deep crevasses of dirt at the base so make sure you remove that. Dice the root into uniform pieces. (This ensures all pieces cook at the same rate and to the same consistency.) Place them in a pot of cold, salted water and bring up to a boil. When they are tender enough to be easily smashed against the side of the pot, they’re ready to mash. This takes about 20-25 minutes.

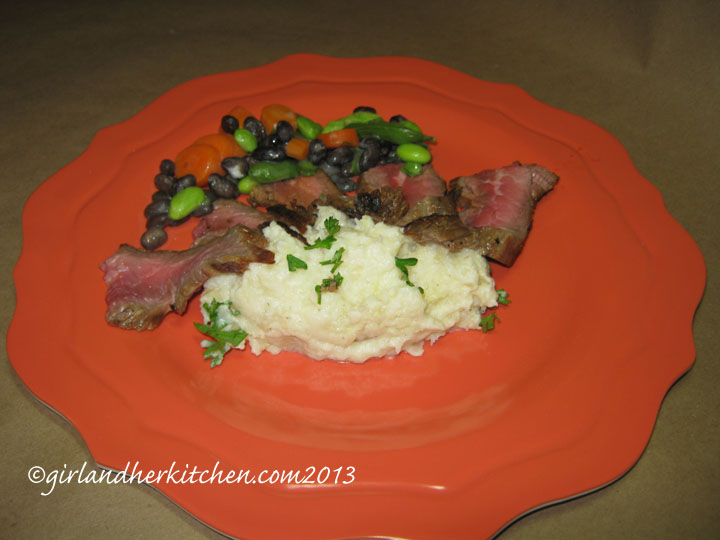
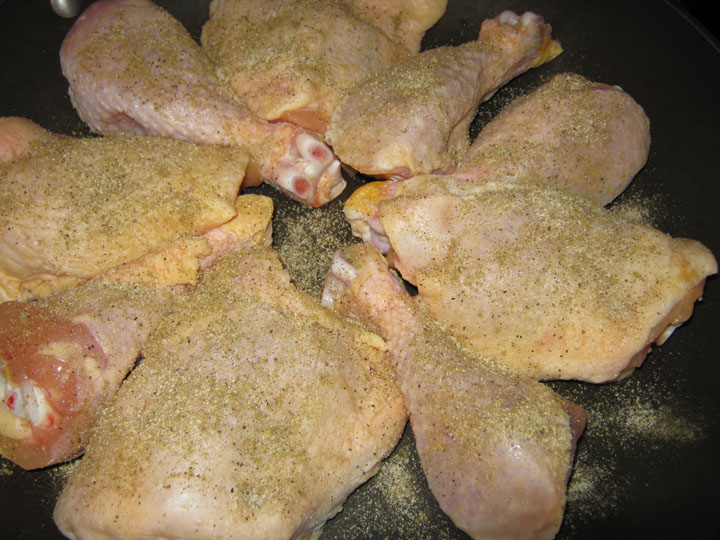
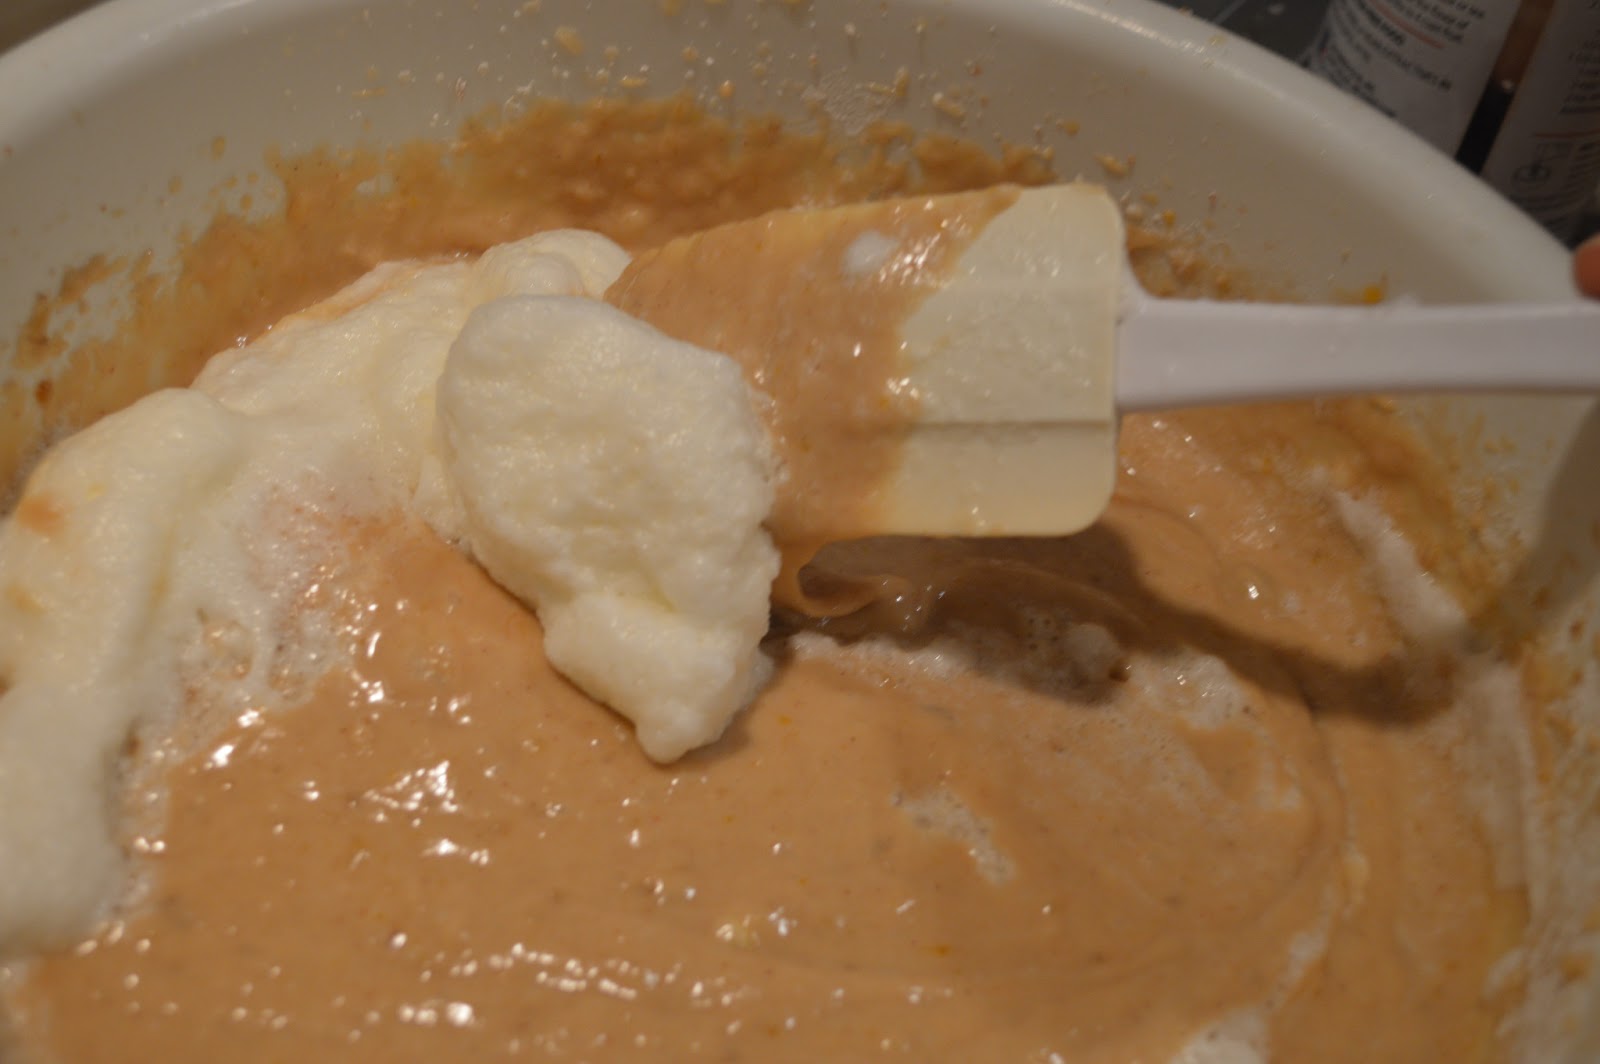
Drain and place in a food processor. (This root is fibrous, so it calls for the food processor.) Add the milk, butter, and salt and pepper. Blend until smooth. Serve with the main dish of your choice. For me it was marinated flank steak. Mostly because I liked telling my family they were having Flank Steak with Mandrake!


Heather

Leave a Comment

Cakes and Cupcakes Desserts

Eclair Cake

dsc_0356.jpg

This cake is one of my husband’s favorites. I am happy about that, because it is one of the easiest cakes in the world to make.
Not kidding.
You don’t even have to bake it.
It is THAT easy!
This cake is super kid friendly and my kids love to help me make it. It really is a great dessert to have “help” in the kitchen from the kids. You know that kind of “help” right? The kind of “help” that makes it almost ten times harder to put something together in the kitchen?
Yeeesss. That kind.
Well, this dessert is so simple, your “helpers” will magically become actual helpers. It also only takes a few ingredients too, ones that you might even have in your pantry and freezer/fridge, ready to make if you have unexpected guests.
I love making it if I have to make a meal for someone too, because it seems to appeal to all tastes, and can be popped in the fridge and and eaten through the week.
That could be good or bad I suppose.
This recipe has been around for awhile, I am not really sure where it started. You may have even made this before, but if you haven’t…you are in for a treat!

dsc_0362.jpg

Eclair Cake

1-16 oz package of honey graham crackers
2- 3.5 ounce packages of vanilla instant pudding mix
3 cups cold milk
1-8 ounce container frozen whipped topping, thawed
1 1/2 cups of chocolate chips
3 tblsp heavy cream or milk

I am not endorsing any of these particular products. I also make a version with homemade vanilla pudding and heavy whipped cream! Use what you like!

Layer the bottom of a 13×9 baking pan with one layer of graham crackers, fitting them in so they cover the entire bottom of the pan. In a medium bowl, mix the pudding mix and the cold milk, whisking until well combined about one minute. Fold in the whipped topping and gently stir until mixture is thick and creamy. Layer one half of the mixture over the graham cracker layer and spread evenly.

Cover the pudding mixture with another layer of graham crackers and repeat with the pudding. Cover with a final layer of graham crackers on the top. In a double boiler or in a microwave safe bowl, combine the chocolate chips and cream. Stir and heat until melted, smooth and creamy. Pour evenly over top graham cracker layer.


Cover with plastic wrap and chill for 2 hours or overnight. Store in the refrigerator.

*I always seem to have enough for three layers of pudding, so you decide based on your pan, etc. Some pans would not be deep enough to accomodate that many layers. *

dsc_0365.jpg

Heather

Leave a Comment

Chicken & Turkey

Cashew Chicken

Do you ever feel like every time you turn on the TV, someone is eating Chinese food? All those little containers filled with oriental delights being eaten with chopsticks. Everyone looks like they’re really enjoying it and it looks so delicious. Don’t you just want to jump into that show and get your share? Or is it just me?

I’m a huge fan of takeout food. I even have my own set of fancy chopsticks for those occasions when we order in. I love the exotic flavors, the variety, and all the fresh veggies. I even like those little boxes. It’s like opening a food present. But, I don’t like all the added salt, mono sodium glutamate, and other things in Chinese food, which I can’t even spell and, I’m not thrilled with the cost either. So, to feed my cravings, I make my own.

Long ago, I discovered a simple recipe that’s really delicious and totally under my control. I use low sodium soy sauce, organic chicken, and other fresh, healthy ingredients. I serve it over brown rice to make it even better for me and my family. And, the best part, everyone loves it.

It’s a quick recipe in terms of cooking but, it does take a little bit of prep time for the chopping of ingredients. Overall though, you will be so happy with the results that you will no longer waste your energies being jealous of those TV people, who aren’t even real, because they have the food that you want.

Cashew Chicken

Chicken Marinade:
1 egg white
1 Tbs. low sodium soy sauce
1 Tbs. corn starch

1 1/2 pounds boneless, skinless
 chicken breasts, cut into bite size
cubes
1/4 cup low sodium soy sauce
1 tsp corn starch
1 Tbs. dry sherry
2 tsp. cider vinegar
1 tsp. sugar
1/4 cup vegetable oil
2/3 cup unsalted cashews
1-inch square fresh ginger, peeled and diced
2 scallions, sliced
1-8 oz can sliced water chestnuts, drained
1 medium green bell pepper, diced


In a medium-sized bowl combine egg white, 1 Tbs. soy sauce and 1 Tbs. corn starch. Add Chicken cubes and toss to coat. Let stand 15 minutes.

In a small bowl, combine remaining soy sauce, 1 tsp. corn starch, sherry, vinegar, and sugar; set this seasoning sauce aside.

Heat a large frying pan, add cashews and toast for 1-2 minutes. Remove from pan and place on paper towel. Set aside. Add some of the oil to the pan and add the chicken. Cook until opaque, for about 2-3 minutes, or until cooked. Remove and set aside.

Add 2-3 more Tbs. of oil to the pan and add ginger, scallions, and water chestnuts; stir fry 1 minute. Add peppers and cook for 2 minutes. Add chicken back in and reserved seasoning sauce. Cook, stirring, until thickened. Add reserved cashews and serve over brown rice.

This is fresh, colorful, healthy and–I don’t need a fortune cookie to tell you–it will be delightful. So put your money back in your pocket, turn on your favorite TV show, and make those characters jealous of you for a change.

Heather

Leave a Comment

Salads and Dressings Thanksgiving

Harvest Salad

This is honestly one of my favorite salads EVER!
I love salad…but what is it about a salad that someone else makes for you? So much better right? I think it is all that chopping. Salads are hard work. No wonder people that eat salads all the time are thin…all that exercise, chopping mounds and mounds of vegetables, can be taxing.
This salad is pretty easy as far as salad making goes. You won’t even mind making it yourself. A few ingredients…unbelievable taste! I usually make this salad for Thanksgiving, but don’t let the autumn-ish sounding name fool you into thinking you can’t  go to the store RIGHT NOW and whip this up in your kitchen tonight.
It is that good.
This salad and a simple grilled chicken breast can be a complete meal.
Just be warned…if you bring this to someone’s house, you will be required to bring it every time!

Save Print
Harvest Salad with Maple Vinaigrette
Author: Heather
Recipe type: Salad
Cuisine: Dinner
 
This Harvest Salad is one of my favorites and the dressing brings it over the top!
Ingredients
  • Salad:
  • 5 cups fresh field greens, torn into bite sized pieces
  • ¼ cup toasted pine nuts (toast at 350 in the oven for 5-7 minutes until browned and fragrant)
  • ¼ cup golden raisins
  • ¼ cup blue cheese crumbles
  • 1 batch of cider vinaigrette
  • Maple Vinaigrette Recipe:
  • 1 tblsp finely chopped shallot
  • 2 tsp apple cider vinegar
  • 2 tsp dijon mustard
  • 2 tsp maple syrup
  • 3 tblsp extra virgin olive oil
  • sea salt
  • fresh ground black pepper
Instructions
  1. Wash and dry the field greens, tear into pieces, and put into a large bowl.
  2. Add the toasted pine nuts, raisins, and blue cheese.
  3. Combine all dressing ingredients in a salad dressing cruet or jar.
  4. Shake well.
  5. Add your desired amount of dressing to the salad and toss.
  6. A little of this dressing goes a long way!
  7. Serve immediately.
3.5.3251


*adapted from a recipe from The Chopping Block

Heather

Leave a Comment

Seafood

Salmon and Sweet Pea Puree

I have not always been a fan of fish. Probably because when I was younger, fish for dinner meant fish sticks. Not because my mom was a bad cook, but because she had many mouths to feed and fish sticks were a low-priced and plentiful option. So, occasionally, we would come home to a plate of grayish brown fish sticks looking like runaway, breaded Jenga pieces on my plate next to the colorless mashed potatoes. Not appealing at all.

My husband, after much cajoling, finally got me to try “real” fish, and I have been grateful ever since. Not just because fish has so many health benefits with their protein-rich omega-3’s, but because fresh fish is delicious. It’s also simple and quick to make. I try to make fish for dinner at least once a week. My mom would be surprised.

This recipe is not only beautiful in its simplicity, it’s simply beautiful when served. The coral color of the salmon against the bright green of the pea puree is the perfect pallet. It’s an elegant yet easy dinner for guests and a classy and clever dinner for two. A crusty piece of garlic bread would accompany this dish well if you are looking for something to round it out for a dinner party or a hungry man. I like it just this way, virtually unadorned and looking like a piece of art work on the plate. Yum!

Just a personal preference here but, I try to use my fresh fish within two days of purchasing. Freezing fresh fish, although not a health issue, does seem to give it a more “fishy” taste. Which is, after all, what most people don’t like about fish. Fish should not have a fishy smell or a fishy taste.

Salmon with Sweet Pea Puree

2 cups frozen sweet peas
1 clove garlic, chopped
1/4 cup heavy cream
4 salmon fillets
3 slices bacon,diced
salt and pepper

Place frozen peas and garlic in a pot, cover with water and place on medium heat. (The garlic adds flavor to the peas as they cook and as the water heats it takes away the raw flavor of the garlic) As soon as it comes to a boil and the peas have returned to their vibrant green color drain them and place them in a food processor. Add 1/4 cup cream and salt and pepper. Blend until creamy. They will be about the consistency of thin mashed potatoes. Taste to make sure they have enough salt and pepper. Add more if needed. (You could also add butter here, but I don’t think the peas need it.)

I cut my bacon into small pieces before frying so I don’t have to try to touch it when its hot. Plus, it cooks a lot faster. Fry the bacon to a good crisp. It’s going to add a crunchy element that this dish needs. With slotted spoon remove the bacon from the pan and onto a piece of paper towel to remove excess grease. Leave the bacon fat in the pan. Season the salmon on both sides with  salt and pepper, then place directly into the hot pan with bacon fat in it. Leave the fish until it forms a nice, golden crust on that side (3-5 minutes ought to do it). Turn the fish over and crust up the other side. I like my salmon to be a soft pink in the middle but if you like yours to be a little more cooked leave it in the pan for a longer period of time. A good rule of thumb is to feel it with some tongs. If it still feels loose or jiggly, it’s still rare in the middle. The firmer it feels, the more cooked it is. Of course, the thickness of your piece of salmon will be a factor, too.

To plate, scoop a generous portion of that green puree in the middle of your plate. Top with a piece of golden, crusty salmon, and sprinkle with bacon bits. Heaven on a plate!

Heather

Leave a Comment

Breakfast Muffins & Scones

Banana Blueberry Muffins

Alright, the kids are on spring break this week, so that means I have absolutely no time to myself.
Seriously. No time.
I mean, they are honestly walking in on me in the bathroom.
That is what no time actually means. When you cannot even go to the bathroom by yourself, you are getting low on the “me” time.
So, my point is that I am making this post short and sweet.
Another muffin recipe.
Yes, I did it again. You can probably count on about a million more muffin recipes during the lifespan of this blog.
I am just being honest.
This blueberry muffin is the answer to all your wishes for that perfect blueberry muffin. Moist, sweet, and perfectly homemade, without the work.
The bananas contribute to the moist factor, but don’t give it an overwhelmingly banana flavor. I personally love the banana flavor, but in a blueberry muffin, I want the blueberries to shine a little more than the banana. I integrated whole wheat pastry flour in here, along with some oats to make it a little healthier, without sacrificing flavor.
Bake up a batch of these for your Easter brunch and you will have some satisfied guests. Probably no leftovers, but that’s okay.
These are so easy…you can just make them again!
Banana Blueberry Muffins

Makes 12 muffins

4 tblsp butter, softened
1/4 cup plain, fat free, greek yogurt
1/3 cup sugar
1/3 cup brown sugar
2 large eggs
1 cup whole wheat pastry flour
3/4 cup white whole wheat flour or white flour
1/4 cup regular oats, pulsed finely in a food processor

1 teaspoon baking soda

1 teaspoon baking powder
2 ripe bananas, mashed
2 teaspoons vanilla extract
1/3 cup lowfat buttermilk
1 cup fresh or frozen blueberries
2 teaspoons flour

Preheat oven to 375 degrees. Lightly spray a 12 cup muffin tin with cooking spray. Set aside. In a large bowl, mix butter, yogurt, and sugars with a hand mixer. Add the eggs and beat well. In a small bowl, combine oats, flours, baking soda and baking powder. Add to wet mixture and beat until combined. Add mashed banana, and mix. Add milk and vanilla and beat until smooth and creamy. In a small bowl, toss blueberries with two teaspoons of flour. Slowly and carefully fold into muffin mixture. Divide evenly among 12 muffin cups. Bake 19-22 minutes or until baked through and toothpick comes out clean. Let sit in pan for 5 minutes, Remove, cool completely, or serve warm.

Heather

Leave a Comment

Chicken & Turkey

Italian Roasted Chicken

My husband and I were watching a Food Network show the other day called, “The Best Thing I Ever Made”. I asked him, “What’s the best thing I ever made? You know, what’s my go-to dish?” We thought about it for a moment and realized I rarely make the same thing twice. That’s because I love trying new recipes. I’m always on the lookout for a different twist, a new dish or, something I might never have thought of making before. I’m a gypsy in the kitchen, always moving on to the next thing.

Ok, not always. I must admit, I do have one or two go-to recipes. I usually fall back on them when I have unexpected guests. And, since my attitude is to always make guests feel welcome in my home, inviting them to stay for dinner is an unwritten rule in our house.

Here’s a recipe I get rave reviews on whenever I make it. You’ll likely look at it and think, “Big deal”. True, it’s not fancy, but it can be stretched to accommodate any number of guests and—depending on what you serve it with it—this entrée fits all tastes and seasonal surplus. Not to mention fitting your checkbook. And, because this recipe is so simple and very quick, it’s something you can whip up on a moments notice. But, most of all, it’s delicious!

I call it Italian Roast Chicken, and as soon as the smell of the spices begin to get warm the oven, your guests will begin to feel the comfort and welcome you’re hoping to convey. I don’t know if it’s because I’m Italian, but I love the smell of garlic dancing through my kitchen. This recipe is an “any day of the week” dish, or an “I’m too tired to cook” dish, or even an “I just like chicken” dish. Try it and it will soon become a go-to recipe for you as well.

Italian Roasted Chicken

1/2 tsp. poultry seasoning
1/2 tsp. garlic powder
1/4 tsp. pepper
1/2 tsp. salt
1 tsp. chopped fresh parsley
1 lb. chicken drumsticks (skin on/bone in)
1 1/2 lb chicken thighs (skin on/bone in)

Preheat oven to 350 degrees. Place chicken pieces in a roasting pan. Mix together first 4 ingredients.

Sprinkle generously over all the chicken.

Place in preheated oven and cook for 75-85 minutes. (The longer roasting time of the chicken gives you a beautiful golden brown skin and a beautifully burnished, almost caramelized bottom on the pieces. You will be digging at anything that sticks to the pan so you can savor every morsel.)

After chicken is removed from oven to platter, sprinkle with fresh chopped parsley.

In the winter, I serve this chicken over a bed of silky mashed potatoes. In the summer, a beautiful fresh and colorful salad is just the ticket. Leftover chicken makes a succulent chicken salad if removed from skin and bone and mixed with your favorite chicken salad ingredients.

Some Recipes that would go well with this:
Zucchini Salad
Summer Corn Salad

Heather

Leave a Comment

Cakes and Cupcakes Desserts

Banana Cream Cake


I am back! Did you check out our delicious Easter menu posts by Kelley last week? If you didn’t have a chance, you must do it now! With posts like this and this your holiday guests will be in awe!
So, that delicious dessert Kelley brought you last week on the tail end of her Easter series is sure to please, but if you are like me and my family, you need to have a whole buffet of desserts for it to actually be called a holiday.

My grandma passed away a few years ago, but when it came to dessert, you loved to make it for her! She just LOVED dessert! We would always have several desserts to choose from at holiday gatherings, and someone was always trying to help her out and get her a plate of dessert that she could enjoy with her must have cup of coffee.

When she was asked what she wanted, she always looked as if it was the worst question she could be asked because there was no way my sweets – loving grandma could turn down a dessert! She would usually finish up with, “umm…just give me a little sliver of each.”

My brothers and I always reply with that answer now when stuff is really good and you just cannot decide. It always makes us laugh when we have a plate filled with desserts and one of us will say, “What? It’s just a sliver of each.”

The reason it is so funny besides the fact that families should have silly inside jokes that no one else understands?

Because look closely at that plate.

It is NOT a sliver of each.

It is a huge hunk of each dessert, ready to be devoured and enjoyed.

Just like grandma’s plate.

This cake will be a sure hit as well! It is the most moist, decadent banana cake I have ever made, and, since I have a slight obsession with banana infused desserts, you know that means something. The whipped cream frosting is a delicious topping to this cake. It is a no fuss dessert that looks beautiful and is perfect for impressing guests at a holiday party, or for digging in with your family after a weekend dinner. Whatever you make it for, you will want to make it again!

This cake should be stored in the refrigerator, but it gets really, really dense. PLEASE leave it out for at least an hour before serving to allow it to come to room temperature. If you are serving it all at once, I would store the cake, minus the whipped cream frosting and fresh bananas in the fridge, covered with plastic wrap. Take out an hour before serving, and let it come to room temperature. Right before serving, slather on the whipped cream frosting and fresh bananas. Serve and enjoy!

Banana Cream Cake

2 1/2 cups all-purpose flour
2 teaspoons baking powder
1/4 teaspoon cinnamon
1/4 teaspoon salt
1/2 cup (1 stick) browned butter* or melted butter, cooled
1/2 cup brown sugar
1/4 cup granulated sugar
2 eggs, separated
2 teaspoons vanilla extract
4 very ripe bananas, mashed
2/3 cup buttermilk
1 cup sweetened condensed milk
1 cup evaporated milk
2 cups cold heavy whipping cream
1/3 cup  powdered sugar
Fresh bananas, sliced

Preheat oven to 350 degrees F. Spray an 8×8 baking dish with nonstick spray. In a small bowl, whisk together flour, baking powder, salt and cinnamon. Set aside. In another smaller bowl or using your electric mixer or hand-mixer, beat egg whites until stiff peaks form. Set aside.
With an electric mixer, combine egg yolks and sugars. Beat until creamy and combined, then add in vanilla extract and bananas. With the mixer on low speed, add in cooled butter and mix until combined. Add in the dry ingredients, and then add in the buttermilk. Mix until just combined. With a spatula, gently fold the egg whites into the batter.

Pour batter in the greased dish. Bake for 35-40 minutes, or until cake is set in the center and slightly golden. Remove from the oven. Using the handle of a wooden spoon, fork or a skewer, poke holes in the top everywhere.

In a small bowl, whisk together condensed milk and evaporated milk. Pour the milk mixture over the cake, letting it seep into the fork holes. Let set for about 45 minutes.
In order to make the frosting, add the cold whipping cream to a bowl and beat until stiff peaks form. Add in the powdered sugar and beat on medium speed to combine. If you are serving the cake immediately, spread whipped cream evenly over the top of the cake.

Slice the fresh bananas and garnish the cake with as many as you want. If you are storing the cake, refrigerate. Store whipped cream in a tightly sealed container until ready to serve. Before serving, let cake come  to room temperature, and then cover with whipped cream and fresh bananas.

*Browned butter: Cut cold butter into tablespoon sized pieces. Heat over low heat until butter begins to brown, but not burn. Watch it carefully. Browned butter should be golden in color and have a delicious, nutty aroma.


Heather

Leave a Comment

Cakes and Cupcakes Desserts Easter

Easter Dessert: Angel Food Cupcakes with Berry Sauce and Vanilla Whipped Cream  

Okay, I admit it. When it comes to the holidays I believe you should be free to overindulge. Of course, I have to temper that a bit on Easter because, more than most holidays, it tends to be overwhelmingly connected to candy. So I decided, for the sake of my children, that my Easter desserts would be on the lighter side.

This one is a great example of this philosophy and yet it’s a beautiful dessert for the holiday that’s essentially the gateway to spring. It’s light, refreshing, and so pretty. Almost too pretty to eat. And the bonus, it’s delicious too. You will feel like you’re really indulging yourself–and you will be–but with moderation.

This recipe is so intuitive, you could make it with your eyes closed. (Disclaimer: That’s not true!) It takes very little time but tastes like something that took hours. The angel food cupcakes are soft and sweet, the berry laden sauce is thick and juicy, and the vanilla whipped cream is absolutely decadent. My daughter was dragging her last piece of angel food cupcake through the pool of berry juices and whipped cream on her plate to make sure she got it all. And she is a self-proclaimed whipped cream hater. How’s that for a compliment?

Angel Food Cupcakes with Berry Sauce and Vanilla Whipped Cream

For cupcakes
1 package angel food cake mix, makes 24 cupcakes
Paper liners, (must have because Angel food cake is sticky)

For Berry Sauce
2 – 12 oz bags frozen mixed berries, thawed
1 cup pure fruit strawberry preserves or jam
1 Tbs. pure vanilla extract
2 Tbs. coconut rum, optional but adds an exotic flavor

Whipped cream;
2 cups heavy cream
1 vanilla pod, scraped
4 Tbs. powder sugar

For cupcakes:
Make cake according to package directions. Fill cupcake pan with paper liners and fill 2/3 full with cake batter. Cook according to package directions. When they’re cool enough, peel off the paper.

For Berry Sauce:
In a medium size pot, melt down the strawberry preserves. Add the coconut rum and cook for a minute to cook off the alcohol. Add the berries and the vanilla and cook for 5 minutes. It will be thick and juicy and chock full of berries.

For Whipped Cream:
In a mixing bowl place cream, vanilla scrapings, and powdered sugar. You can use a Tbs. of pure vanilla extract if you don’t have a vanilla bean but, I love the speckled effect you get with the bean. Whip, on high, until you have the consistency you like your whipped cream to be.

To assemble:
Place one or two cupcakes on a plate, pour the berry mixture over the cupcake and place a dollop of whip cream on the side. If you like you can swirl a bit of the berry juice around the cupcakes, adding an elegant touch.

There you have it. The final touch to what I hope is a unique and helpful Easter meal. Now that I’m done with all the cooking, let me take this opportunity to say Happy Easter from all of us at Girl and Her Kitchen.


Some other desserts that would work with this menu:
Incredible Carrot Cake
Strawberry Rhubarb Crisp

Heather

1 Comment

Side Dishes Vegetables and Fruit Vegetarian

Easter Menu: Candy Carrots

Picture, if you will, a bunny trail. It’s very early Easter morning, but who should we find hopping down said bunny trail but Peter Cottontail himself. He’s busy delivering his last egg of the holiday and then he can head home for a much-deserved rest. And what will he be looking forward to eating when he arrives at his humble abode? Not eggs! He’s a bunny. He is craving carrots. And you will, too, when you smell this beautifully fragrant recipe for candy carrots cooking on your stove.

I don’t think it would be proper etiquette to have an Easter dinner without having some kind of carrot dish. It’s only right to reward the Easter bunny for all his hard work. So this recipe brings together the desires for your candied carrot cravings without the thick, syrupy sauce. This sauce is light, creamy, and smells so good it could be used for potpourri.

The secret to its amazing flavor and aroma is cardamom. If you’ve never used cardamom before, you’re in for a treat. It has a beautiful citrus-like flavor that adds a distinct, but subtle flavor to everything you add it to. You will really love the bouquet the finished dish provides.

My husband brought the leftovers of these carrots to work, and while he was heating his lunch in the microwave, coworkers were asking him what smelled so good. He told them what it was and that I would soon be posting the recipe on Girl and Her Kitchen. Well here it is, and not a moment too soon because I’m sure Mr. P. Cottontail will be expecting his carrots.

Candy Carrots

1 lb package of pre-sliced carrots (feel free to slice your own)
4 Tbs. butter
1 tsp cardamom seeds
1/2 tsp cinnamon
1 Tbs. brown sugar
1 Tbs. maple syrup
1 Tbs. chopped parsley

* I used cardamom pods in my picture but, the seeds are easier to work with so go ahead and get those.

Place carrot slices in a pot of salted water. Bring water to a boil, reduce heat to a bubbly simmer and cook about 20 to 25 minutes. You don’t want mushy carrots so don’t over cook.

In a small pot melt butter. Add in the cardamom and cinnamon. Cook for 1 minute to release the fragrance and oils from the cardamom. Add in brown sugar and maple syrup. Stir and cook until the brown sugar is melted. This is not a thick sauce so don’t expect it to become syrupy. Simmer on low for about 5 minutes. Add carrots and stir to combine. Simmer together for about five more minutes to blend the flavors. Pour into your serving dish, sprinkle with chopped parsley, and enjoy.

This is a dish any carrot lover will devour and is so inviting that even non-bunnies will be tempted to try it.


Some other recipes on our site that will work well for Easter:
Sweet Cream Corn
Oven Roasted Broccoli

Heather

Leave a Comment

  • « Previous Page
  • 1
  • …
  • 22
  • 23
  • 24
  • 25
  • 26
  • …
  • 38
  • Next Page »

Heather

I am a midwestern girl who grew up in the big city, but now enjoys her days as a stay at home mom in the suburbs. Who says spending time in the kitchen has to be boring? I hope to inspire your family kitchen with some new ideas, fun recipes and great tips.

Stay Up to Date

Get all the latest tasty goodness straight to your inbox!

Girl and her Kitchen

Join us!

Hey! I am the GIRL in the kitchen and I am so glad you decided to visit. Love to cook and eat? You will find some great recipes on this site, whether you are looking to eat healthy, splurge on a dessert, make dinner or host a party-I have it all! Sometimes I’ll give you a story along with my recipe, other times, I want to take you straight to the food!  Whatever the reason that you decided to visit, I am so glad you joined me in the kitchen! Feel free to take a look around the site, and please…stay awhile!

Archives

Popular Categories

  • Appetizers
  • Breakfast
  • Crafts
  • Salads and Dressings
  • Side Dishes
  • Vegetables and Fruit

Most Popular Posts

Corner Bakery Cafe Giveaway!

Corner Bakery Cafe Giveaway!

Filed Under: Reviews

Bacon Cheddar Skillet Cornbread

Bacon Cheddar Skillet Cornbread

Filed Under: Breads, Quick Breads and Rolls, Side Dishes

Puffy Pancakes {Perfect for Valentine’s Day!}

Puffy Pancakes {Perfect for Valentine’s Day!}

Filed Under: Breakfast, Valentine's Day

100 Days of Real Food Cookbook Review {and Giveaway!}

100 Days of Real Food Cookbook Review {and Giveaway!}

Filed Under: Vegetarian

Copyright © 2026 · Divine theme by Restored 316