• Email
    • Facebook
    • Instagram
    • Pinterest
    • Twitter

Girl and Her Kitchen

Plan. Make. Eat. Design. Craft. Create. Celebrate. Life.

  • Home
  • About the Girl
  • Recipe Index
  • We LOVE
  • Weekly Menu

Cakes and Cupcakes Desserts

HealthIER Brownies

My son Nick picked up the nickname, “Picky Nicky”, almost from the first day he could talk. Although we no longer call him Nicky, (he decided that was a girl’s name), we still know him as picky. I tried tricking him once by making chili with half ground beef and half ground turkey. (He’s not a ground turkey fan.) No other changes were made. He took one bite and said, “You did something different. I don’t like it.” If it looks, smells, or even feels funny to him, he will not even taste it.

Which is why I was so surprised when he came over the other day and tried, without prompting and with fair warning of the ingredients, one of my healthy brownies! He not only tried it, he liked it. I was shocked! I think I still am.

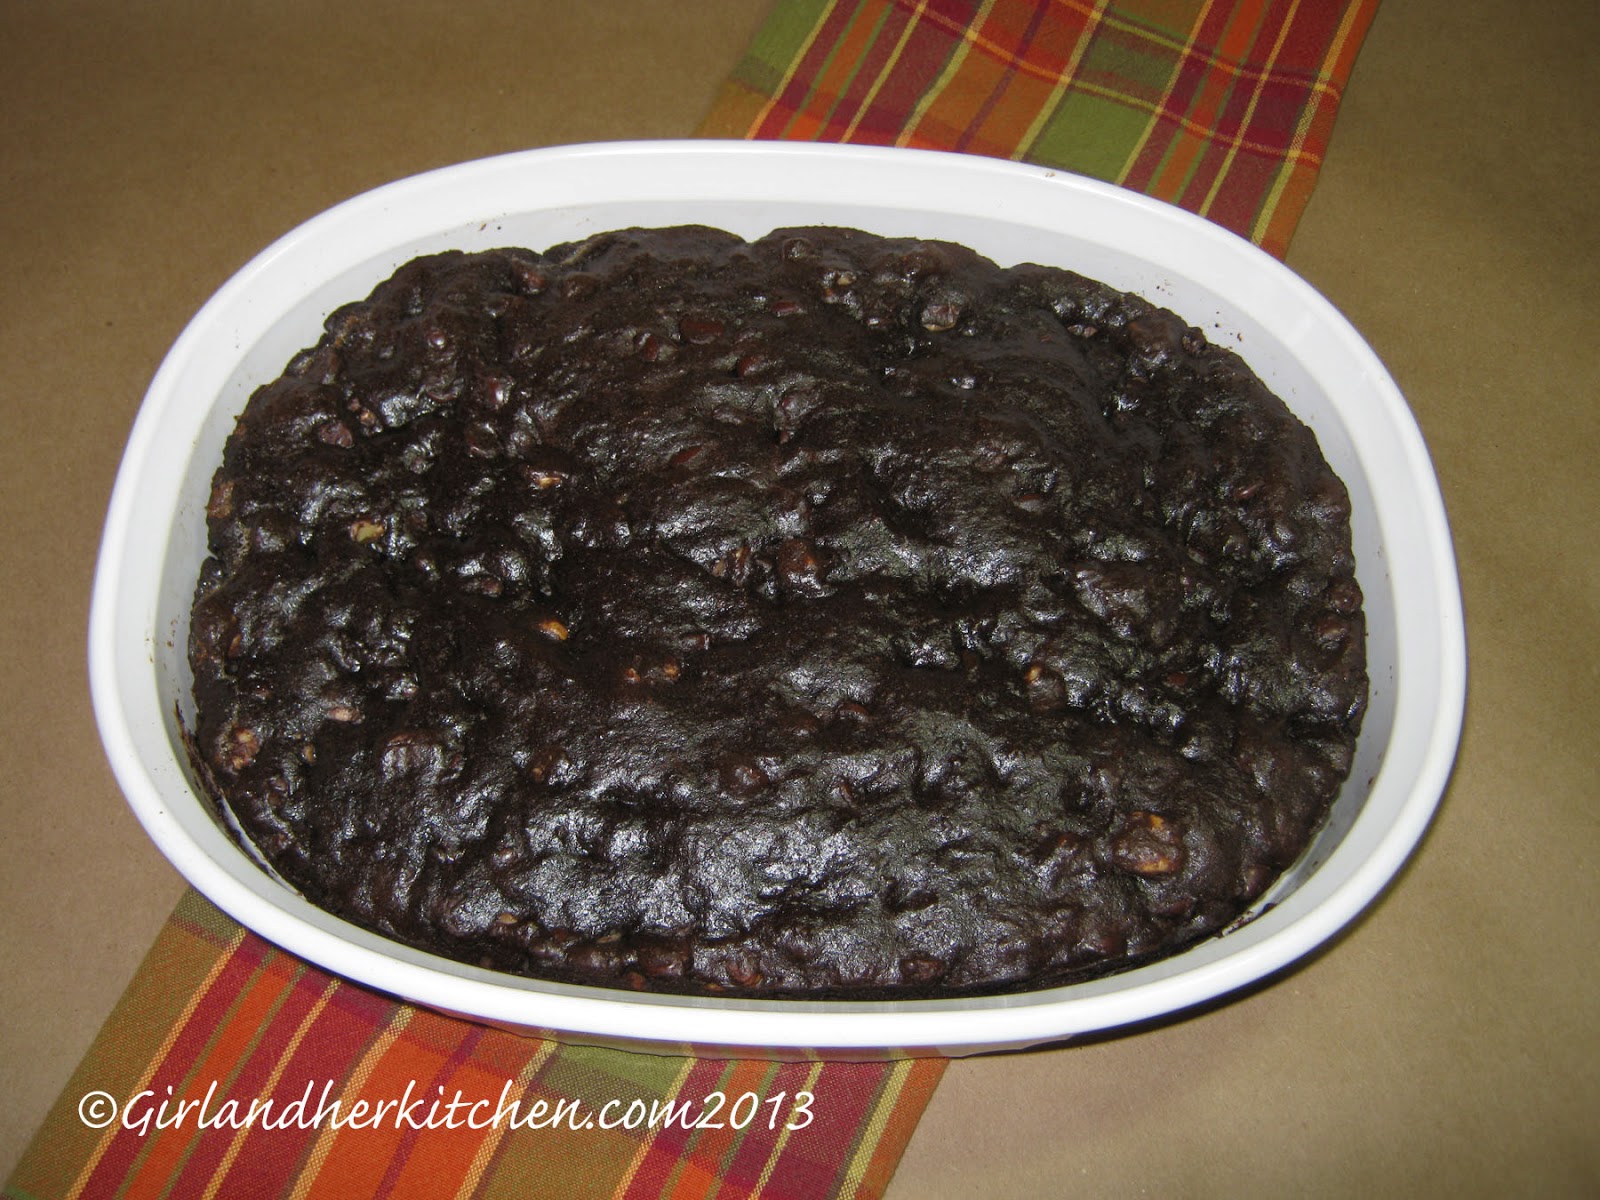
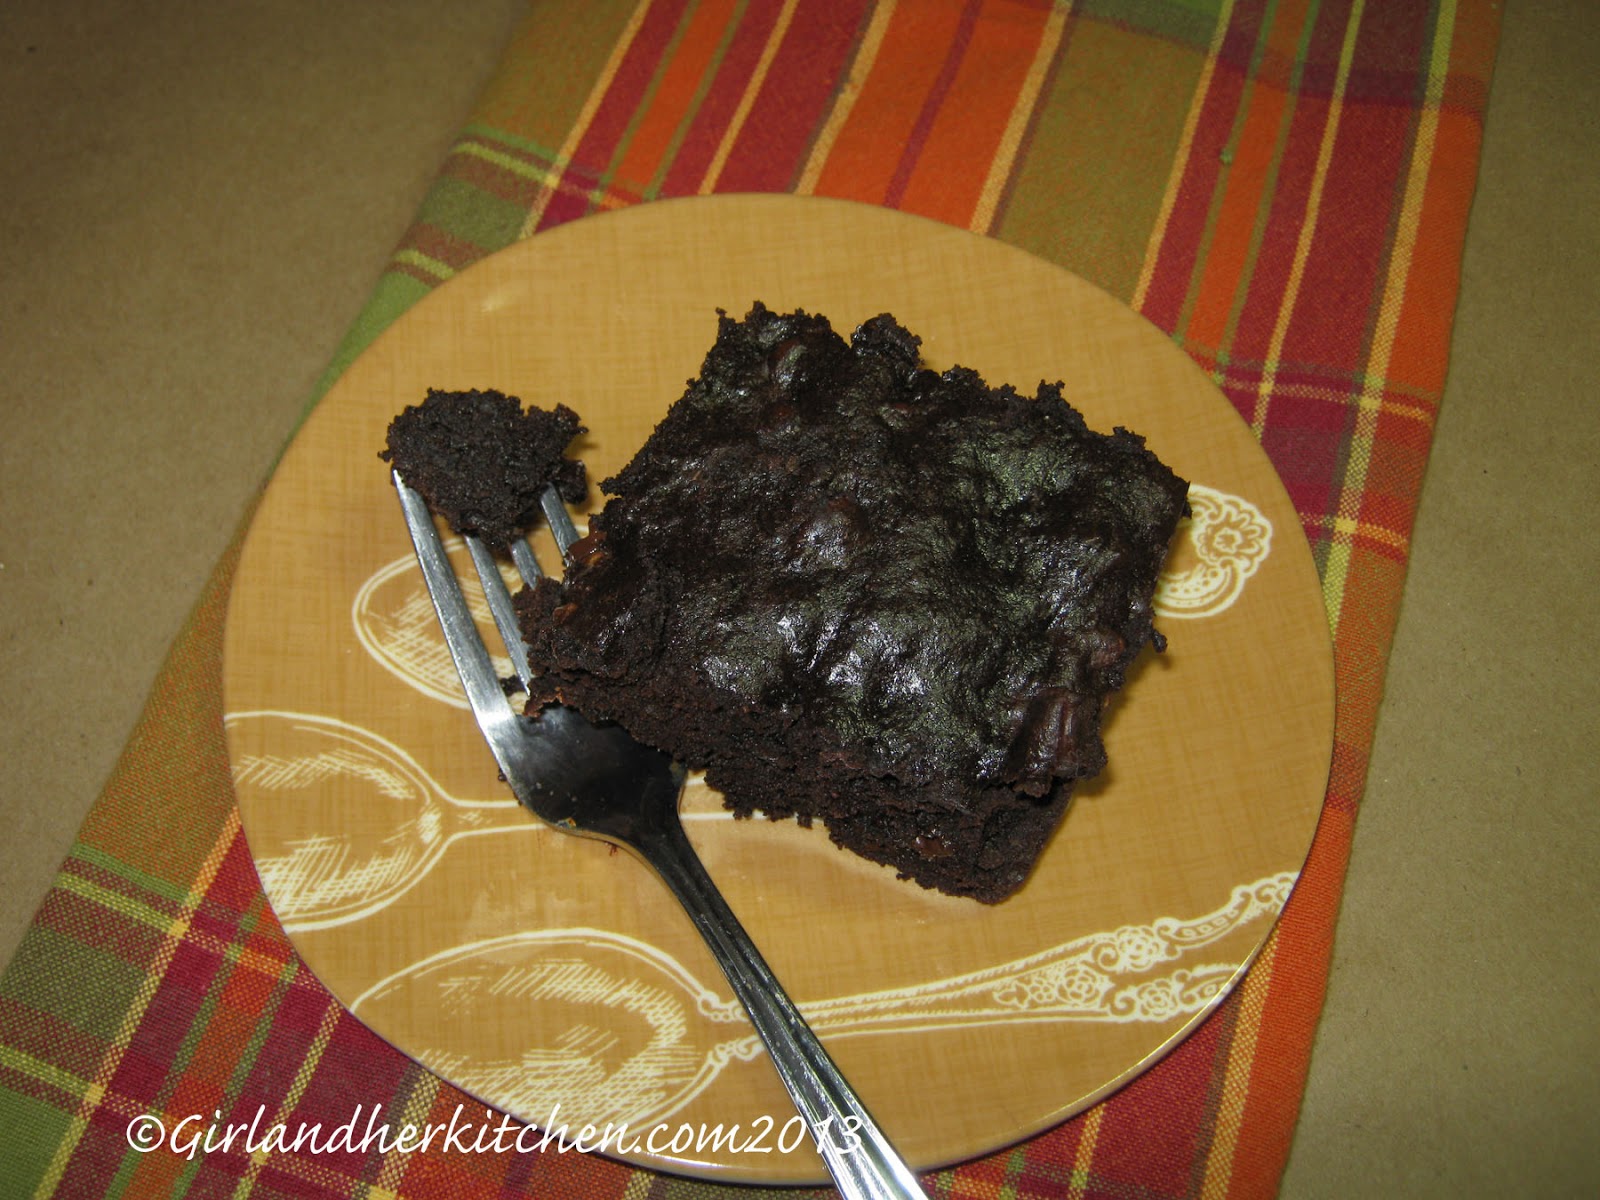
One thing that will make these brownies so irresistible, even to YOUR picky eaters, is their glossy, dark chocolate surface. You can’t help but want to dive right in. Once you do, the melting dark chocolate morsels and walnuts will keep you coming back for more.

Chocolate is a weakness for me. Although I am trying to eat better all the time, I can’t seem to give up this one true friend who has always stood by me in my hours of need. So, a healthy version was called for. Some of the ingredients may seem unfamiliar to you, but don’t let that stop you from trying this simple recipe. I want to encourage you to try new things. As I’ve said to Nick many times, at least try it. If you don’t like it, don’t eat it but, please, just try it.

And, if you can’t find some of the ingredients at your local store, look on Amazon.com. I can find almost anything I’m looking for there!

HealthIER Brownies

3 Tbs. Flax meal
9 Tbs. water
1/3 cup applesauce, unsweetened
2 eggs
1 Tbs. espresso powder mixed with 1/4 cup hot water
1 tsp vanilla
1/2 cup sucanat sweetener or white sugar
1 cup Hershey’s Dark Chocolate morsels, melted (I melt them in the microwave)
1/2 cup whole wheat pastry flour
1/4 cup Hershey’s Dark Chocolate cocoa powder
1/2 tsp baking powder
1/2 cup Hershey’s Dark Chocolate morsels
1/2 cup chopped walnuts

*This is a link to get the ingredients I used in my recipe. Just to make it a little easier for you to find.

Preheat oven to 350.
To begin with, you need to place the flax meal and 9 Tbs. of water in a small pot. Bring to boil, reduce to simmer and cook for approximately 3-4 minutes. When it’s done, it will have the consistency of egg whites, which is what they will be replacing in this recipe. Set this aside to cool.

I’m replacing some of the eggs, but not all of them, for two reasons: First, when a baking recipe calls for more than three eggs, you can’t replace all of them or the food suffers. The second reason is, although eggs, and especially whites have great benefits such as protein and omega-3’s, I just happen to think using a white and throwing the rest away is wasteful. Not to mention the fact that five eggs in one recipe (that is not an omelet), just seems like a lot of eggs to me. (If you would like to use all eggs it will take 5 whole eggs)

Flax meal is a “superfood”. It has cancer fighting lignans. It also has omega-3’s just like eggs. And, it helps with digestion. So, you see why I am so willing to use it as a substitute here.

Next, with a mixer, beat together sugar, applesauce, eggs, flax meal, and water mixture, espresso, and vanilla.

In a separate bowl, mix together flour, cocoa (I always sift my cocoa after measuring just to get out any lumps), and baking powder.

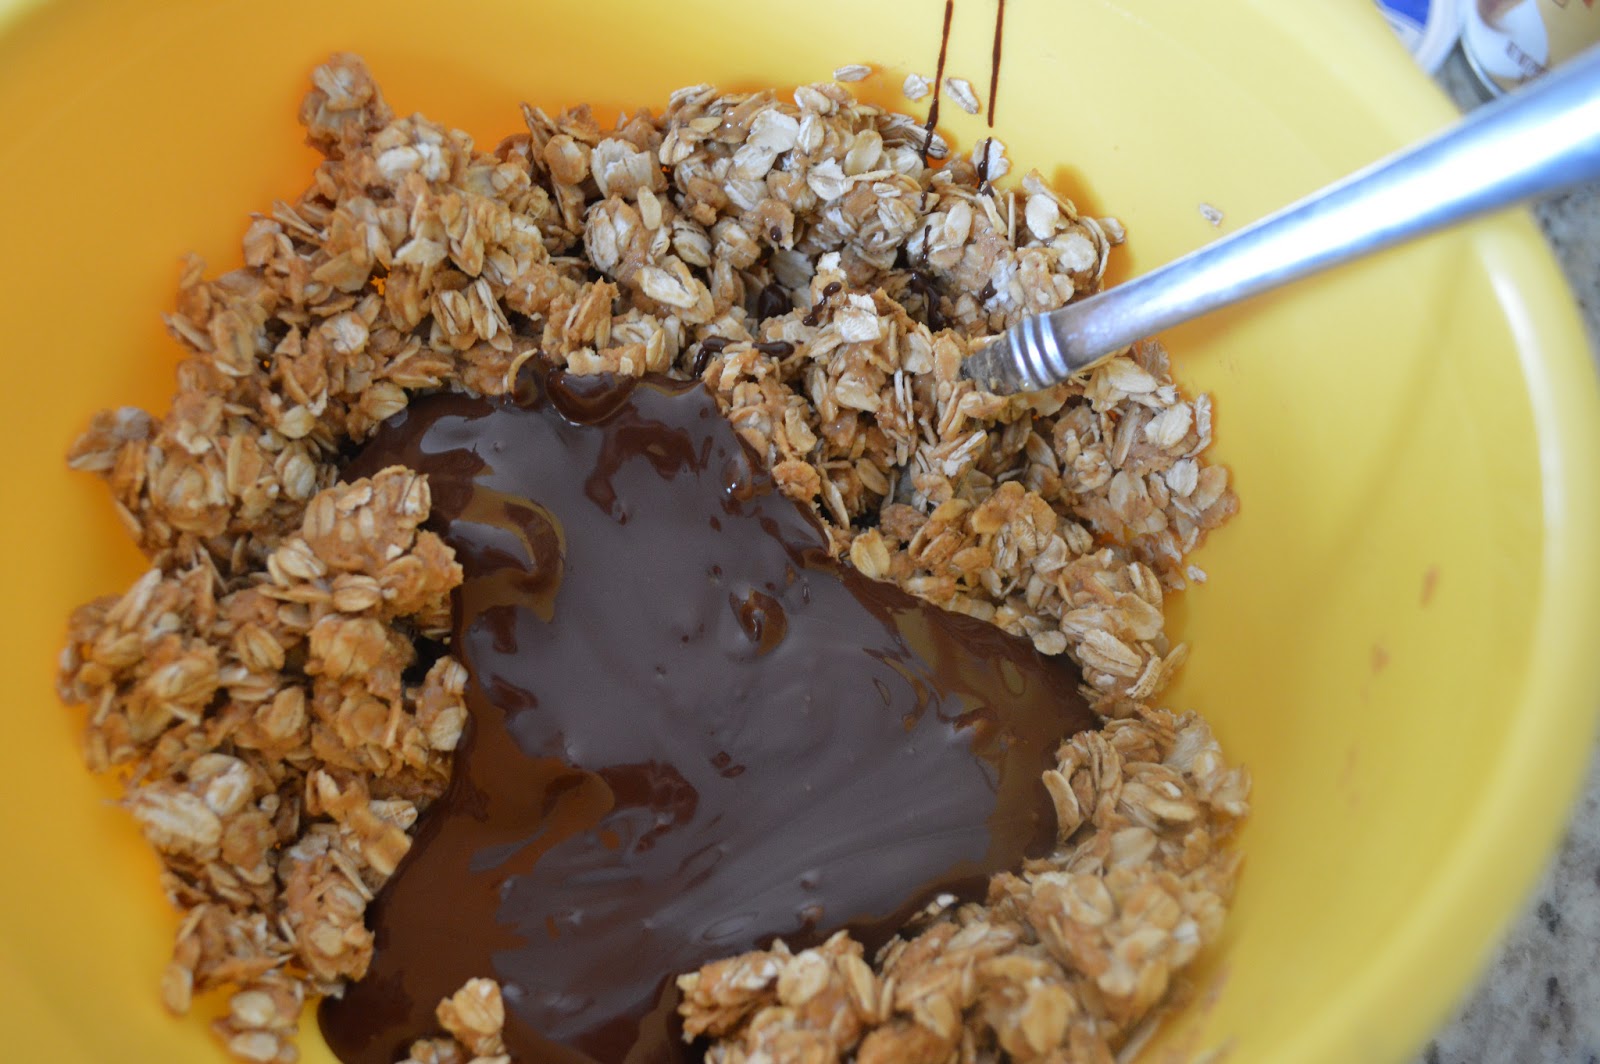
Mix together the wet ingredients and the dry just until combined. With a spoon, mix in walnuts and dark chocolate chips. Pour this mountain of gooey chocolate deliciousness into a prepared baking dish. Bake for 30 minutes.

I like to taste them warm out of the oven when the chocolate morsels are at their melty best, but if you want to let them cool first be my guest. That is, if you you can.


Heather

Leave a Comment

Beef Main Dishes Pasta

Easy Beef Stroganoff

The summer before I got married, my sister, Patty, was kind enough to let me live with her and her family until the big wedding day. (Now that I have a family and a husband of my own, I realize just how generous that was of her.) She is an excellent cook and used my time there to learn from her. I watched her in the kitchen and spent numerous hours, with cramped fingers, copying her favorite recipes. Many a wonderful evening was spent sitting around the kitchen table with her family enjoying her delectable fare. I still have all of those recipes and I still make them.

One of my favorites is her beef stroganoff. It’s creamy, delicious, and doesn’t require a whole lot of prep time. Which is really helpful when you have little ones running around your legs and you have to get food on the table. It’s also dressy enough for a delicious dinner for guests. (It happens to be one of my brother-in-law, Marty’s, favorite dishes.)

It’s one of those meals that conjures up special memories for me: time with my lovely sister Patty, and the numerous guest who have enjoyed this dish with me; when laughter, conversation and satisfaction filled the air around my dinner table. Just like the time I spent with Patty and her family. Food really does bring people together. It’s a big part of our communion with one another. And, not just because we need to eat, but because we relax and open up around a table filled with great food, gracious friends, and precious family.

I’ve updated and upgraded this recipe slightly over the years to make it more robust: Tri-tip steak instead of ground beef for a more intense beef flavor, baby portabellos instead of button mushrooms because they are meatier, and beef broth instead of bouillon cubes for more of that long-cooked savoriness without any extra cooking time (and extra salt). I feel these changes have just heightened the flavor profile to make it even tastier. I hope you enjoy it as much as we do.

Easy Beef Stroganoff

2 Tbs. butter
1 lb tri-tip steak, (feel free to use ground chuck if you prefer)
1 Tbs. minced onion
1 clove minced garlic
1/2 pound sliced baby portabello mushrooms
1/4 cup red wine
2 Tbs. lemon juice
2 cups beef broth
2 cups wide egg noodles
1 cup sour cream
salt and pepper to taste

Melt butter in a large pan, add beef, onion, garlic, and mushrooms. Saute until meat loses its red color. Add wine, broth, and lemon juice. Simmer, uncovered, for 15 minutes. Add noodles, cover and simmer for an additional 20 minutes or until the noodles are tender. (You may need to add more liquid as the noodles cook.) Stir in salt, pepper and sour cream. Heat gently until sour cream is warmed. I like to sprinkle with a little paprika for color. It’s now ready to serve.

Enjoy this meal with your friends and family. Let’s get those memory-making moments started.


Heather

Leave a Comment

Salads and Dressings Vegetarian

Warm Black Bean and Spinach Salad


Ok, I confess, I’m a hoarder. No, not like those people on TV; the ones who can’t even find their front door anymore because they’re shoulder-deep in “stuff”. (I’m glad they get professional help because if it was me, I would just knock them out, lock them in a hotel room, and empty their houses out. Right into the trash!)

No, I’m a recipe hoarder. I love clipping, copying, and collecting them. I have shelves of cookbooks,ripped out pages of magazine recipes, and notebooks filled with friends’ and familys’ recipes. I even have a few recipes without titles that I am still trying to figure out what they are and why I copied them! (And I will someday, too.)

It’s a great hobby but, I must admit, sometimes I forget where I got them or who I got them from. I only remember that I loved them enough to hoard them. This is one of those recipes. It’s not something I developed, but I have no idea who to give the credit to.

Truth be told, it was my husband who first discovered this recipe. (Yes, he cooks. And rather well, too.) He made it for a warm summer weekend dinner. We like to eat light on the weekends. Family time is so precious that we try to make the most of every minute. And, because of that, we choose to make lighter fare for dinners. Less time in the kitchen and more time together. Plus, in the summer you just crave less dense food.

This recipe is filled with flavor and it satisfies without weighing you down. The bean mixture is warm and savory, and the spinach is cool crispy and refreshing. The combination is a delight. And the best part: it takes so little time to make, you can wait until the last ray of the sunset is gone before even starting it.

Though there is no meat in this recipe, you will find that the black beans satisfy the desire for protein. The vinegars are tart, but toned down by the cooking time so as not to overpower the dish. I like to serve it with some warm crostini, lightly toasted with a drizzle of olive oil, and then rubbed with a fresh garlic clove.

Warm Black Bean and Spinach Salad

4 cups fresh spinach
1 Tbs. vegetable oil
1 cup chopped onion
1/4 cup sliced green onion
1 clove of garlic, minced
1/2 cup red pepper, diced
1-15 oz can black beans, drained and rinsed
2 Tbs. water
2 Tbs. white wine vinegar
2 Tbs. balsamic vinegar
1/8 tsp salt
1/8 tsp crushed red peppers
1/8 tsp black pepper
1/4 cup shaved parmesan

Tear spinach into bite sized pieces and place in large bowl. Set aside.

Heat oil in large skillet over medium heat. Add onion, green onion and garlic; sauté 4 minutes. Add bell pepper; sauté 2 minutes more.

Add beans and next six ingredients; cook and stir for 2 minutes, stirring frequently. Pour bean mixture over spinach, toss. Serve warm with shaved parmesan.

And there it is. A lovely warm summer salad for a relaxing Saturday evening. Now all we need is some warm weather to go with it!!!


Heather

Leave a Comment

Breakfast

Mother’s Day Brunch: Egg and Potato Cups

This week of posts was so fun for me. Acknowledging some of  the amazing “moms” in my life was cathartic and inspiring to me. I am so lucky to know all of these wonderful people. Becoming  a mom was one of the most surprising jobs I have ever taken on. It is the only job that you can feel completely exhausted and overwhelmed, but overcome with happiness and joy at the same time.  I love my kids and cannot think of anything I would rather be doing than being with them.

With all this crazy, sappy mom talk, what kind of daughter would I be if I didn’t recognize my own mom? The mom that inspires me to be a good mom. She is and was that kind of mom you wish you could be: creative, patient, kind, honest, and attentive. She had five children too…I could not even imagine. I am so lucky to have her as a mom, and as a friend. One of the things I really treasure from her helped me get where I am with this blog. She was the most wonderful cook! She made us meals every day of our lives and besides our favorites, we barely ever had the same recipe twice. She loved cookbooks almost as much as I do, and it made her happy to have people love what she cooked for us. I love that she gave me that gift of a love of food, cooking and entertaining. It definitely makes life happier!
If you have a brunch for Mother’s Day, you will definitely want to make these. They are the cutest idea ever! My kids loved eating them and they were actually easier to make than I thought. They are tasty too and really kid friendly. My kids kept calling them eggs in a nest and we went with that! These are great on a fancy serving tray for a delicious addition to your brunch, or just on their own with some toast for breakfast, lunch…or even dinner. You and your family are sure to love them!

It has been fun sharing some of my mom stories with you this week! Thanks for reading!

Egg and Potato Cups

4 whole potatoes
1 lb. of bacon, cooked and crumbled
12 eggs
salt and pepper
non stick cooking spray

Preheat oven to 350 degrees. Bake potatoes for 45 minutes, until tender, yet still a little undercooked. Let cool completely about an hour. This is a great step to do ahead of time. Preheat oven again to 425  degrees. Grate them and sprinkle them generously with salt and pepper.

Spray a muffin pan with nonstick cooking spray. Using a small handful of potatoes, form them into little cups in the each muffin pan cup. Do not pack them tightly, but just enough that they stick.

Place about a tablespoon of bacon crumbles in each potato cup.

Crack an egg in each cup and sprinkle it with salt and pepper.

Bake for about 15 minutes or until eggs are set. Let cool in pan for about 10 minutes and then carefully lift out . Enjoy!


*Adapted from The Pioneer Woman


Heather

Leave a Comment

Cakes and Cupcakes

Mother’s Day Brunch: Strawberry Lemon Cake with a Yogurt Glaze

Brunch is a tricky thing.
Do you have dessert? Do you just put all the sweets out at the time of breakfast, or do you serve the savory dishes and then put out the sweets after? Well whatever you decide, you must have sweets. Serve them before, during or after, but they must be there.
This particular cake was so different for me. The lemon flavor in this cake made it so fresh and light. I don’t really make a lot of stuff with lemon flavor, but after this, I think I am a changed woman. This cake is perfect for a mother’s day brunch, or even just sitting around and eating it by the spoonful with some really great mothers.
As far as that goes, I feel lucky that I can say I know a lot of them.
What would we do as moms without our mom friends?
I really would not survive.
No, seriously. It is not possible.

When I had my first baby, I remember my friends Tina and Melissa were like my saving grace. They had already had babies and I must have called them a million times a day to ask questions. Thinking back, they were probably the dumbest questions in the world, but at the time, they seemed uber important. Of course they were super patient with me, schooling me on bedtimes, bath rituals, nursing tips and how to stop that gosh darn crying baby when you feel as if you don’t have one more ounce of energy to do it. What awesome moms they are, and little did they know that I credit them for getting me through those first few months. I felt lucky then to have them in my life, and feel lucky still. They are my oldest friends–friends before we were moms–strong women and great mothers.

My friend Rita and I had babies around the same time. Not only did we serve as sounding boards for each other during pregnancy, we worked together once we had babies to solve the issues that seemed so big, but grew to be so small with time. The moments I remember sitting and nursing our babies together, make me think of such a simpler time. Not to mention a quieter time…when the children didn’t talk, and you actually could carry on a conversation! It really warms my heart to think of that time spent with such a dear friend of mine. It seems so long ago, but the memories are forever etched and treasured.

When I think of good moms, I also think of my good friend Jill. I talk to her often and feel lucky that she is someone who can find humor in everything. We laugh at jokes only she and I understand, and have tons of hilarious memories together that no one but us can treasure. I remember one time my husband and her husband challenged us to one of those board games that you have to give clues and your teammate has to guess what you are talking about. It was hilarious to watch our husbands’ egos drop to the floor when Jill could say, “The color sweatshirt that guy who lived on the 3rd floor of the dorm freshman year wore everyday” and I would shout out, “purple!” and win a round in 2.2 seconds. Sorry guys, but you didn’t stand a chance against us and our memories. Jill is the kind of friend you can call no matter what, and she will give it to your straight, but find humor in it all the same. She can make you laugh and feel better at the same time.
 
I think of my friend Tara-one of the first “mom” friends I had in my community. When I met her, we each only had one baby and little did we know, number two for both of us would soon be on the way. We bonded over our daughters’ complete and utter love for each other. They are still delighted to see each other seven years later and I think Tara and I might be the same way. We always joke that we have to talk so fast when we see each other so we can get all that we want to say to each other out as quickly as possible before our time together ends. The problem? We could talk forever so we never really get it all out. That is what happens when you have dear friends…you could be with them for long periods of time and never get tired of it.

I am so blessed to know so many amazing women. If I went through them all, this post would be way too long…but don’t worry. I love to talk about my friends so they will pop up in another post…I assure you! The best part about these women is not only what great friends they are, but it is also what amazing moms they are. Their kids are so lucky to have them and I feel blessed to know them all.

Happy Mother’s Day to all the amazing “mom friends” I have in my life!

I wish I could make this cake for each and every one of you. 🙂

Strawberry Yogurt Cake

2 sticks of butter, softened
1 1/2 cups sugar
3 eggs
3 tblsp lemon juice
zest of 1 lemon
2 1/2 cups all purpose flour
1/2 tsp baking soda
8 oz. vanilla yogurt
2 cups fresh strawberries, diced

Glaze:
1/2 cup vanilla yogurt
2 tblsp powdered sugar
2 tsp lemon juice

Preheat the oven to 375 degrees and grease and flour a bundt pan. Flour well…this cake will stick if pan is not prepared correctly! In a large bowl, cream together butter and sugar. Add eggs one at a time and lemon juice and mix well. In a medium bowl, mix 2 1/4 cups flour, baking soda and lemon zest.  Add dry ingredients to butter mixture slowly and mix well. Add yogurt and combine. Toss strawberries with remaining 1/4 cup flour and fold into batter.

Pour into bundt pan and bake for 1 hour or until a toothpick inserted into the cake comes out clean. Let cool in the pan for 30 minutes. Carefully turn out cake onto a plate. Let cool for 1 hour. In a small bowl, whisk yogurt, powdered sugar, and lemon juice together and drizzle over cake. Serve and store leftovers in the refrigerator. When serving again, let it come to room temperature before serving because it gets very dense in the refrigerator.
*I made double the batch of glaze because it is so good! 

Heather

Leave a Comment

Breakfast

Mother’s Day Brunch: Italian Egg Casserole

So the other day, when I was trying this recipe out, my friend Vickie came to the door to drop my daughter off, and she wanted to know…what was cooking?
She came in to check it out, and of course, before we really talked about her original question, we had about a million more topics to cover.
That’s what kind of friend Vickie is. The kind that comes in, and an hour later, you are trying to remember what started the conversation in the first place.
I met Vickie shortly after we moved here many years ago. She was organizing a dinner for ladies in the neighborhood and we got to talking via email, and realized we had a lot in common. Fast forward eight years and I feel like I gained another member of my family.
The craziest part? Our friendship not only survived one of the hardest things she ever had to go through… it got stronger.
Let’s talk about great moms for a minute…one in particular…I mean, this is a Mother’s Day post, right?
About three and half years ago, Vickie’s son was diagnosed with leukemia. It was a shocking moment for every one that knew her. We just couldn’t believe that it was happening to someone we knew. It is the sort of thing that you just want avoid and to curl up and sleep until it is over. Unfortunately when you are a mom, that type of avoidance is just not possible. Although they had a rocky start, Vickie swung into momma overdrive. Not only was she the best mom that her son could have had through it all, she even took it one step further. She became an advocate for kids with cancer and spoke at various events and fundraisers. She and her son became the face of fighting cancer and her son was stronger because of the support he received.
Being a mom is hard. It is so hard some days that you are not sure if you will make it through the day. Vickie lived the extreme of hard days as a mom. She lived it for three and a half years and more than succeeded.
She should be honored as a mother, and as a friend. She is an amazing person and you are lucky if you know her. On this Mother’s Day, I like to recognize those moms that really work hard for their title.
Vickie is one of them.
There are many more out there too.
Nowwwwww, back to that question…
What was it again?
Oh yeah…
“What’s cooking?”
Well, it is this delicious new recipe that I made that is perfect for a brunch! It is an egg casserole, but with a few healthy twists, and tons of great flavor. I substittuted skim milk for the usual whole milk you find in egg casseroles. I used lean turkey sausage and part skim mozzarellla cheese too, upping the flavor factor, but not adding a ton of fat and calories. I loved this recipe because it was so good and a little different from the usual egg casseroles I make.
Make it for someone special!

Italian Egg Casserole

5 cups whole wheat bread, cubed
2 tsp olive oil
1/2 cup sweet onion, diced
2 garlic cloves, minced
4 turkey Italian sausage links, sliced
6 eggs
2 egg whites
1 1/2 cups skim milk
1/2 cup romano cheese, divided
1 tsp Italian seasoning
1 tsp salt
1/2 tsp pepper
1 cup cherry tomatoes, quartered
1/4 cup part skim mozzarella cheese

Preheat the oven to 350 degrees. Spray a 13×9 inch pan with cooking spray. Layer the bread cubes on the bottom. Set aside.In a saute pan, heat olive oil and cook Italian sausage, onion and garlic until sausage is fully cooked through and onion and garlic is golden. In a large bowl, whisk together eggs, egg whites, milk, 1/4 cup Romano cheese, Italian seasoning, salt and pepper. Layer sausage, onion and garlic mixure over the bread cubes in pan. Pour egg mixture on top. Layer tomatoes, mozzarella cheese and the rest of the romano on the top.

Bake for 40 minutes until fully cooked through, and the cheese is lightly browned and bubbly. Let stand for 10 minutes before serving. Slice and serve.

Heather

1 Comment

Breakfast

Mother’s Day Brunch: Honey Butter

Ok. Bottom line.
This stuff is awesome.
Unfortunately, I add something a little bad to it.
Really, I am a real food person. What I mean by that is I like to cook with real ingredients and not a lot of processed stuff. That is why I mostly cook at home, and we really barely eat out. It has everything nothing to do with the fact that sometimes it is crazy to go out to eat with three children. I just really like to eat real food.
Well….in saying that, there is always room to cheat. I mean, this honey butter recipe was really not even my fault.
Who to blame? It all boils down to this…
My good friend Abby.
Yep. All her fault. It all started one summer day….
She invited me over for lunch while our kids played together. She made this awesome white chicken chili and served this amazing cornbread to go with it. It was the first time she cooked for me, and I knew we were destined to be friends. She is an amazing cook. She is also one of those people that you just sit in amazement of how she can actually do all that she does. Really-this girl is AMAZING! She takes care of her three YOUNG children, is super involved in her church, cooks awesome food and still has time to make these cute little crafty things that she says are easy which if it came out of most everyone else’s mouth would be code for “I am good at crafty things so it is easy. For you…this might not be so easy.” But out of Abby’s mouth it is, “I am sure you could do this crafty thing because you are wonderful. And if you can’t, call me, and I will help you all along the way!”
Oh? Did I not mention that? She is one of the sweetest people to ever set foot on this planet.
Oh, and she actually manages to look cute everyday.
Yes, people. It is true.
She actually does not wear yoga pants everyday . She wears jeans… and cute tops. She even does her hair. Did you hear that? SHE DOES HER HAIR! On top of all that other stuff. I mean, really. I am not sure I have done my hair on a day that wasn’t a weekend day since….2004. Seriously. I am not proud.
Despite all her non-faults (as in…I have not found one single one yet! I know…just disgusting!) she is awesome-and her white chicken chili and cornbread are awesome too. 
(Hold on..I am really getting to the point of the post here…stay with me!)
She served the cornbread with this delicious, creamy butter that we were slathering on the cornbread as if it wasn’t…um…butter with a million calories. It was so good, I begged for the recipe and of course she gave it to us… because she is sweet and generous as well.
It’s true.
Well, the honey butter contained one very sneaky, secret ingredient. I couldn’t believe it, but I speak the truth. Check out the recipe and you will have to try it to believe it. It is so good.
This Mother’s Day Recipe goes out to Abby-one of the best moms I know, and a very dear friend of mine.
Hugs Abby!

Abby’s Honey Butter

1 stick of salted butter, softened
2 tbslp of honey
1 tblsp of marshmallow fluff ( I know! It is BAD!)
Honey for drizzling
Stir altogether until creamy and smooth. Drizzle honey on top before serving. Serve at room temperature on hot rolls or muffins. Enjoy every last delicious bite!


Heather

Leave a Comment

Breakfast Muffins & Scones

Mother’s Day Brunch: Blueberry Corn Muffins

I love brunch.
Usually when you are cooking for friends or family, you are making dinner or lunch. There is something fun about making breakfast foods for a crowd. I love finding new recipes and experimenting in the kitchen to create delicious brunch recipes that I know my guests will enjoy.
Before I had kids, I used to throw a Mother’s Day Brunch every year and invited our families. It was such a fun time, and I loved trying new recipes each year.
Enter in…my own children.
All of the sudden-I was a mom too!
We still continued the brunch, but it became a lot harder to keep it up!
I was cooking, cleaning and then cleaning some more, but by the time everyone was gone, I was so tired, I wanted to crawl back into bed.
Now, we have a new tradition. The women in the family leave their husbands and kids at home, and we GO OUT for brunch. No cooking, no cleaning…just conversation and good food that someone else cooked for us.
Let me tell you…I highly recommend it!
So, why do you need these recipes, you may ask? Well, maybe you are not a mom yet and can make these for your own mom. Maybe you are stronger and less of a baby on Mother’s Day than me, and even if you are a mother, you can still throw a perfectly lovely brunch and not feel the need to scream, “Hey! I am a mother too!”
Or, maybe you just want to make all this delicious food on a separate day, and then follow my plan (see above) for your actual mother’s day!Or..maybe you are a man…who cooks! (LOVE) Go ahead and make someone’s day with these recipes!
Whatever it may be…check out my delicious brunch recipes this week! We are starting today with a muffin (of course). I love this muffin because it is not overly sweet, but still has that hearty corn muffin texture, with the delicious burst of blueberries in every bite. A perfect start to your Mother’s Day Brunch, or any occasion!

Blueberry Corn Muffins

1 cup yellow corn meal
1/2 cup flour
1 tblsp baking powder
1/4 cup sugar
1/2 tsp baking soda
1 1/2 cups buttermilk
1 egg
1/4 cup butter, melted
1 tsp vanilla
2 tbslp flour
1 cup fresh blueberries
Butter (optional)
Sugar (optional)

Lightly spray a 12 cup muffin pan with cooking spray. Preheat oven to 350 degrees. In a large bowl, combine the corn meal, flour, baking powder, sugar and baking soda. In a medium bowl whisk together buttermilk and egg. Pour into the dry ingredients and with a handheld mixer, beat on low. Slowly drizzle in melted butter and continue mixing. Add vanilla and mix for 20 seconds. In a small bowl, toss blueberries with 2  tblsp flour.

Fold into muffin batter. Evenly distribute batter amonst the muffin cups. Bake at 350 for 15-18 minutes, or until a toothpick inserted into the muffin comes out clean. Let cool in pan for 5 minutes. While they are cooling, butter the tops and lightly sprinkle with a dusting of sugar.

Carefully remove and let cool on a cooling rack. Serve with butter.

*recipe inspired by Pioneer Woman


Heather

Leave a Comment

Cookies & Bars Desserts

Chocolate Peanut Butter Oat Clusters {No Bake!}

I am always craving chocolate. I just love it. My dad doesn’t like chocolate and that knowledge honestly confuses me. How could you NOT like chocolate? I mean, it is seriously the best thing in the world. Well…the best tasting thing.
I guess it is really not the best thing in the world that I could easily eat chocolate all day.
I mean, I guess I could come up with, say, some healthier best things in the world to call my own.
But, why bother when you have these pretty healthy, no bake CHOCOLATE peanut butter oat clusters to make?
I mean, talk about easy. You don’t have to bake them, and they take about ten minutes total to put together and ten minutes to set.
Easy.
Perfect for the chocolate lover, and pretty healthy as far as chocolate treats go.
Did I mention that the combination of peanut butter and chocolate is also high on my best things list?

Yep. I need to make more of these!

Chocolate Peanut Butter Oat Clusters

Makes 24 oat clusters

2 1/4 cups oats
1 cup unsweetened natural peanut butter
1 cup dark chocolate chips

Pour oats into a mixing bowl. Scoop peanut butter into a microwave safe bowl. Microwave for 30 seconds -1 minute until peanut butter becomes very soft and more liquidy. Pour into bowl of oats. Stir with a wooden spoon until the oats are well mixed into the peanut butter. In another microwave safe bowl, heat chocolate chips for one minute. Stir. If they are not melted, continue to heat in microwave for 15 second intervals until smooth and creamy. Do not over cook. Pour melted chocolate into oat mixture.

Stir well. Scoop tablespoon clusters onto a baking sheet lined with parchment paper. Let set in the fridge or freezer for ten minutes or until slightly hard. Store in the refrigerator.

Heather

Leave a Comment

Main Dishes Salads and Dressings Vegetarian

Eggplant Caprese

This is a recipe that was suggested by my brother-in-law, Vince. He ordered it at one of his favorite Chicago eateries, Rosebud, and asked if I could recreate it. Sharing food is one of life’s true pleasures, so I was happy to accommodate. It didn’t hurt that I love eggplant, too. It took me a couple of tries to get it where Vinnie thought it was just right–matching the Rosebud version–but it was worth the effort.

It’s a really simple recipe but, it looks super elegant and the flavor profile is amazing. Eggplant Caprese is comfort food at it’s best. I love the fact that by adding the eggplant to a traditional caprese you are elevating this recipe from simple appetizer into the realm of a nice lunch with the girls or an exquisite first course at a dinner party.  It meets all the requirements of indulgence food: It has crisp, light eggplant; creamy, decadent cheese; fresh, seasonal tomatoes; and a refreshing salad as its base.

The only real “work” of this recipe is preparing the eggplant and the balsamic vinegar reduction. The remainder of the recipe is simply assembling the ingredients for a salad, which makes this dish the perfect meal for guests, because you’ll spend so little time away from them to pull it together. But, please feel free to pretend it took a lot longer. It certainly looks like it did.

Eggplant Caprese

1/2 cup bread crumbs
1 egg, beaten with 1 tbs. water
1/2 cup flour with salt and pepper mixed in
1 medium eggplant, peeled and sliced 1/8-inch thick
1 lb fresh mozzarella, sliced 1/4-inch thick
1 beef steak tomato, sliced into 1/4-inch slices
1 1/2 cup mixed salad greens
1/4 cup balsamic vinegar
1 tbs. brown sugar
1 tbs. vinegar
1 tbs. good quality olive oil
salt and pepper to taste

Start by placing your sliced eggplant on paper towel in a single layer on a plate, salt, cover with more paper towel, add another layer of eggplant, salt and cover with paper towel. Repeat until all the eggplant has been salted. Place a heavy can or bowl of water on top and allow to sit for about an hour to eliminate the eggplant’s bitterness.

In a small pan, bring the balsamic vinegar to a boil. Add in brown sugar and reduce heat to simmer. Let simmer until reduced by half. The balsamic reduction will be thick, syrupy and delicious.

Set up your breading station. One plate of flour, one bowl of the egg mixture, and one plate of bread crumbs. First, dip the eggplant in the flour, then eggs, and finally the bread crumbs. Set on plate. When all the slices of eggplant are ready, heat a pan with 1/2 inch  vegetable oil. When you place the eggplant into the oil it should bubble all around the edges of the eggplant. If it isn’t bubbling your oil is not hot enough and the eggplant will absorb all that oil. YUCK! Make sure not to crowd your pan, and cook until crispy on both sides. Place cooked eggplant on cookie cooling rack. I place mine over a baking sheet covered with paper towel.

To assemble, add oil, vinegar, salt and pepper on mixed greens, mix well. Place a small amount on each of four plates. Place one eggplant on each of the salads, then place one slice of mozzarella on each, then another slice of eggplant, then the tomato slice, salt and pepper the tomato slice and top with one more slice of crispy eggplant. Drizzle top with the balsamic vinegar reduction and serve. YUM! I couldn’t wait to dig in when these were completed. Adding another recipe to feed my eggplant addiction is always welcome. Thanks, Vince!

I also made a version with out breading the eggplant and using the salad greens as a layer instead of the cheese to make a Gluten free version for those of you who can’t, or don’t want to, eat gluten. It was still really delicious.

Heather

Leave a Comment

  • « Previous Page
  • 1
  • …
  • 21
  • 22
  • 23
  • 24
  • 25
  • …
  • 38
  • Next Page »

Heather

I am a midwestern girl who grew up in the big city, but now enjoys her days as a stay at home mom in the suburbs. Who says spending time in the kitchen has to be boring? I hope to inspire your family kitchen with some new ideas, fun recipes and great tips.

Stay Up to Date

Get all the latest tasty goodness straight to your inbox!

Girl and her Kitchen

Join us!

Hey! I am the GIRL in the kitchen and I am so glad you decided to visit. Love to cook and eat? You will find some great recipes on this site, whether you are looking to eat healthy, splurge on a dessert, make dinner or host a party-I have it all! Sometimes I’ll give you a story along with my recipe, other times, I want to take you straight to the food!  Whatever the reason that you decided to visit, I am so glad you joined me in the kitchen! Feel free to take a look around the site, and please…stay awhile!

Archives

Popular Categories

  • Appetizers
  • Breakfast
  • Crafts
  • Salads and Dressings
  • Side Dishes
  • Vegetables and Fruit

Most Popular Posts

Corner Bakery Cafe Giveaway!

Corner Bakery Cafe Giveaway!

Filed Under: Reviews

Bacon Cheddar Skillet Cornbread

Bacon Cheddar Skillet Cornbread

Filed Under: Breads, Quick Breads and Rolls, Side Dishes

Puffy Pancakes {Perfect for Valentine’s Day!}

Puffy Pancakes {Perfect for Valentine’s Day!}

Filed Under: Breakfast, Valentine's Day

100 Days of Real Food Cookbook Review {and Giveaway!}

100 Days of Real Food Cookbook Review {and Giveaway!}

Filed Under: Vegetarian

Copyright © 2026 · Divine theme by Restored 316