• Email
    • Facebook
    • Instagram
    • Pinterest
    • Twitter

Girl and Her Kitchen

Plan. Make. Eat. Design. Craft. Create. Celebrate. Life.

  • Home
  • About the Girl
  • Recipe Index
  • We LOVE
  • Weekly Menu

Appetizers

Smoky Bean Dip

dsc_0393.jpg

A few years ago, a good friend of mine and I decided to surprise our husbands with a grilling cooking class at this culinary shop in the city to celebrate their birthdays. It seemed like such a fun gift…some education on how to grill (yes, it would benefit me as well, but it would be the gift that would keep on giving…), a good time with each other, some great food and an enjoyable time overall.
Enter in a surprise.
A German Beer Festival was taking place in the exact place that our quaint little cooking class was happening.
Right there.
Like, stepping over drunk people to get in the door to buy some cute cooking tools vicinity.
My friend Jill and I didn’t let it damper our day. We oohed and ahhed when we were led out onto their adorable little patio where the class was to be held. We smiled as we learned how to baste ribs. We nodded our heads in surprise at the delicious taste of the cole slaw. We swooned over the delicious grilled shrimp. We were having a great time.
Our husbands tried. They tried really hard.
Unfortunately, the beer festival going on outside the gates of the patio was the ultimate distraction for the men. They swapped stories about beer, wondered what they would find outside the gates, and eagerly anticipated the tastes they would soon experience.
The cooking class left behind us, let’s just say Jill and I ended up eating some ice cream at Cold Stone while our husbands got the birthday they really wanted sampling (A LOT) of beer at a beer festival instead of learning how to grill (for their wives).
Well we tried Jill, we tried.
Besides getting to spend some hilarious time with one of my best friends while our husbands whooped it up, the other amazing thing that came out of this afternoon was the bean dip.
Yes, you heard me right.
The. Bean. Dip.
Heavenly.
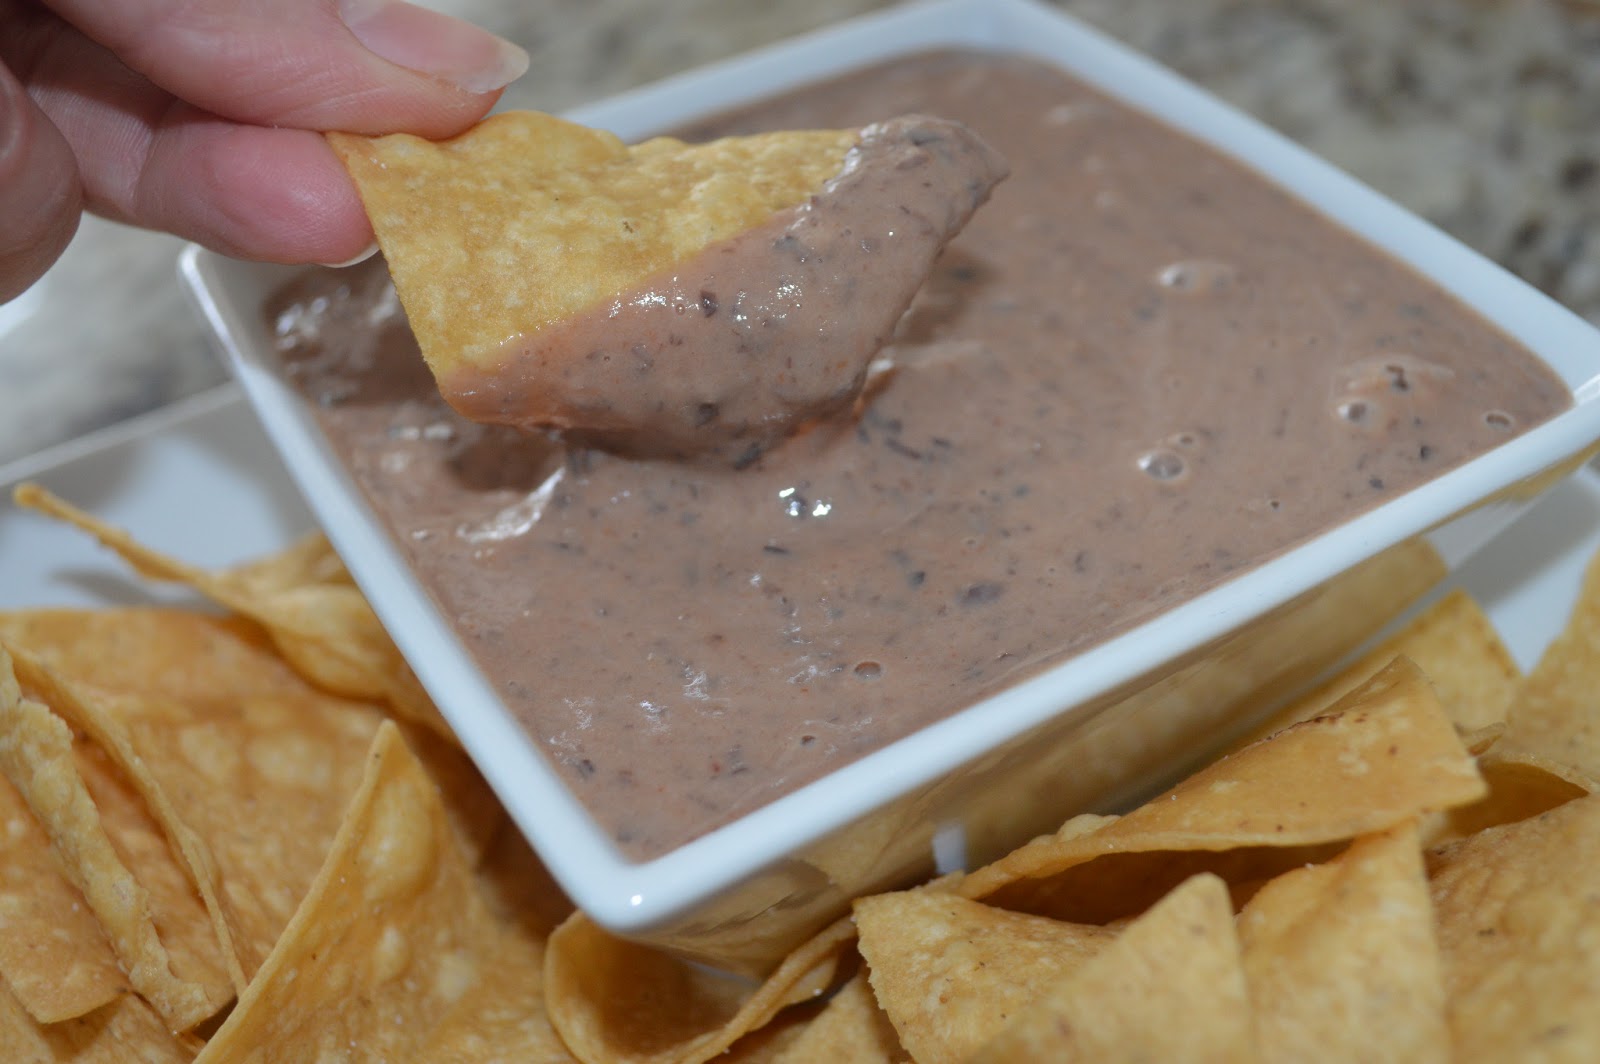
I really never thought I would use that word to describe anything that had the word “bean” in it. I mean it is just a bean dip, but I can assure you…it is not just any bean dip! It is the best bean dip you will ever have.I played around with the recipe a bit, and it actually became even better. I didn’t think it was possible, but it happened.
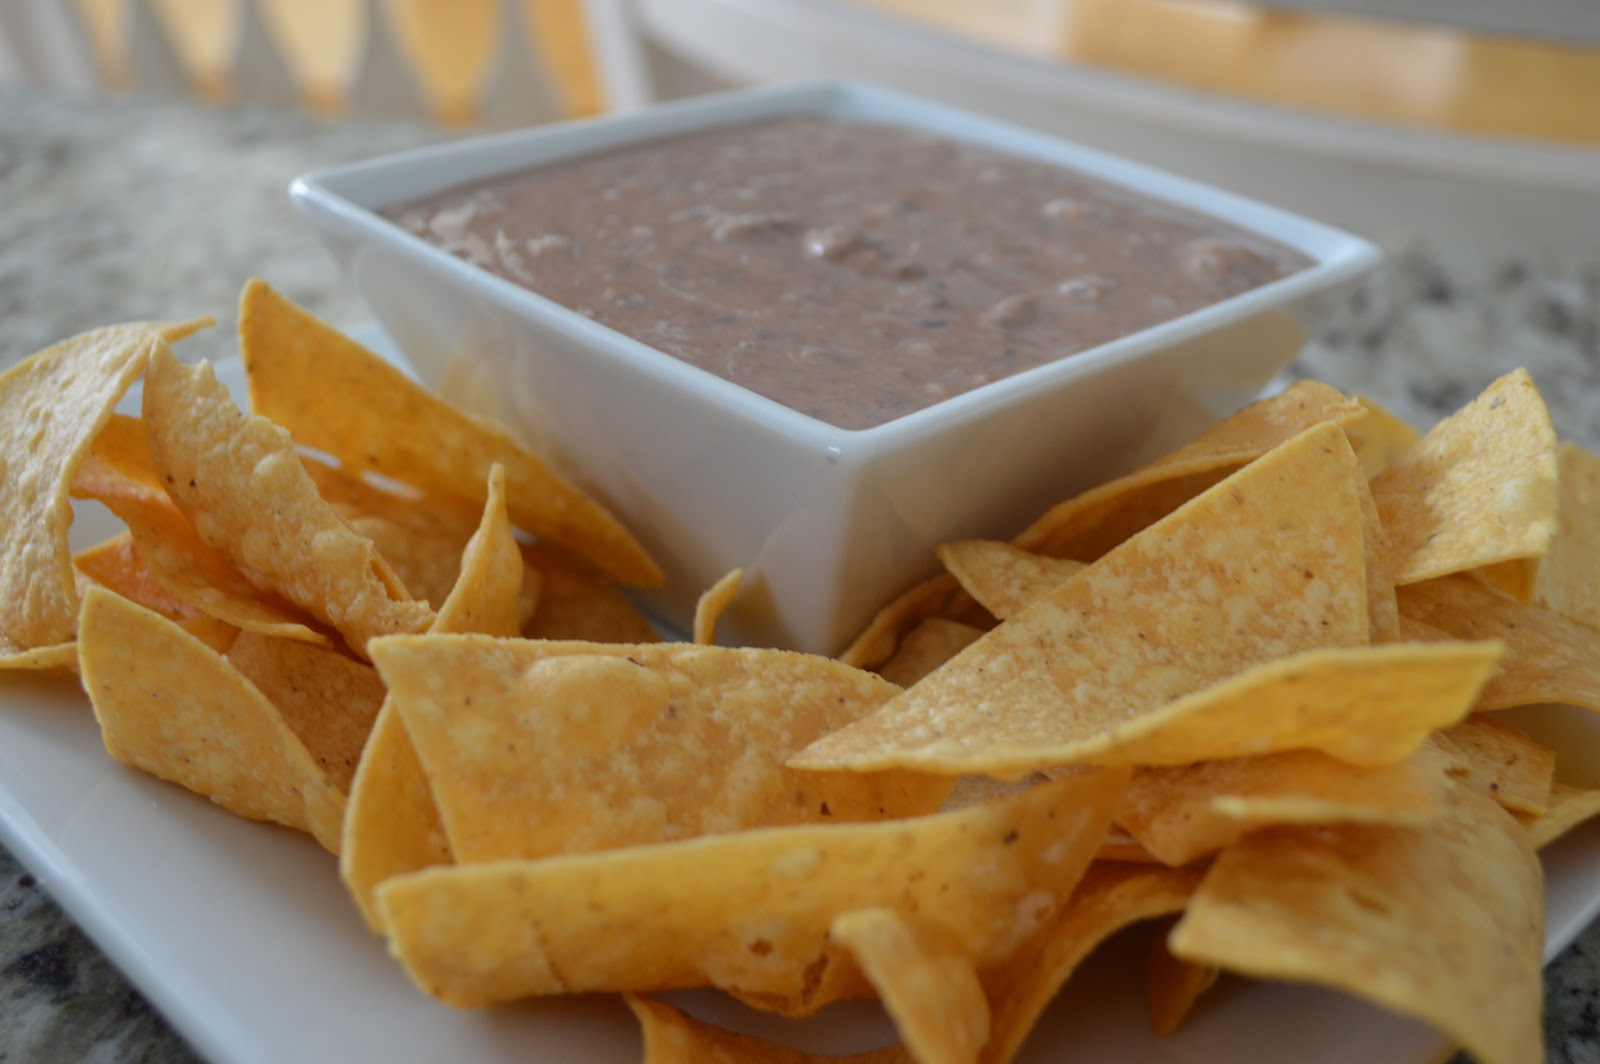
The smoky flavor, the creamy texture and the heartiness of the dip, make the perfect summer appetizer with some crunchy chips.
Even without a beer festival.

Smoky Bean Dip

1 can of black beans, drained and rinsed
1/4 cup sour cream
2 tsp dried minced onion
1/4 cup of your favorite barbecue sauce
1/2 tsp seasoned salt
1/4 tsp smoked paprika
Tortilla chips or fresh cut veggies for serving

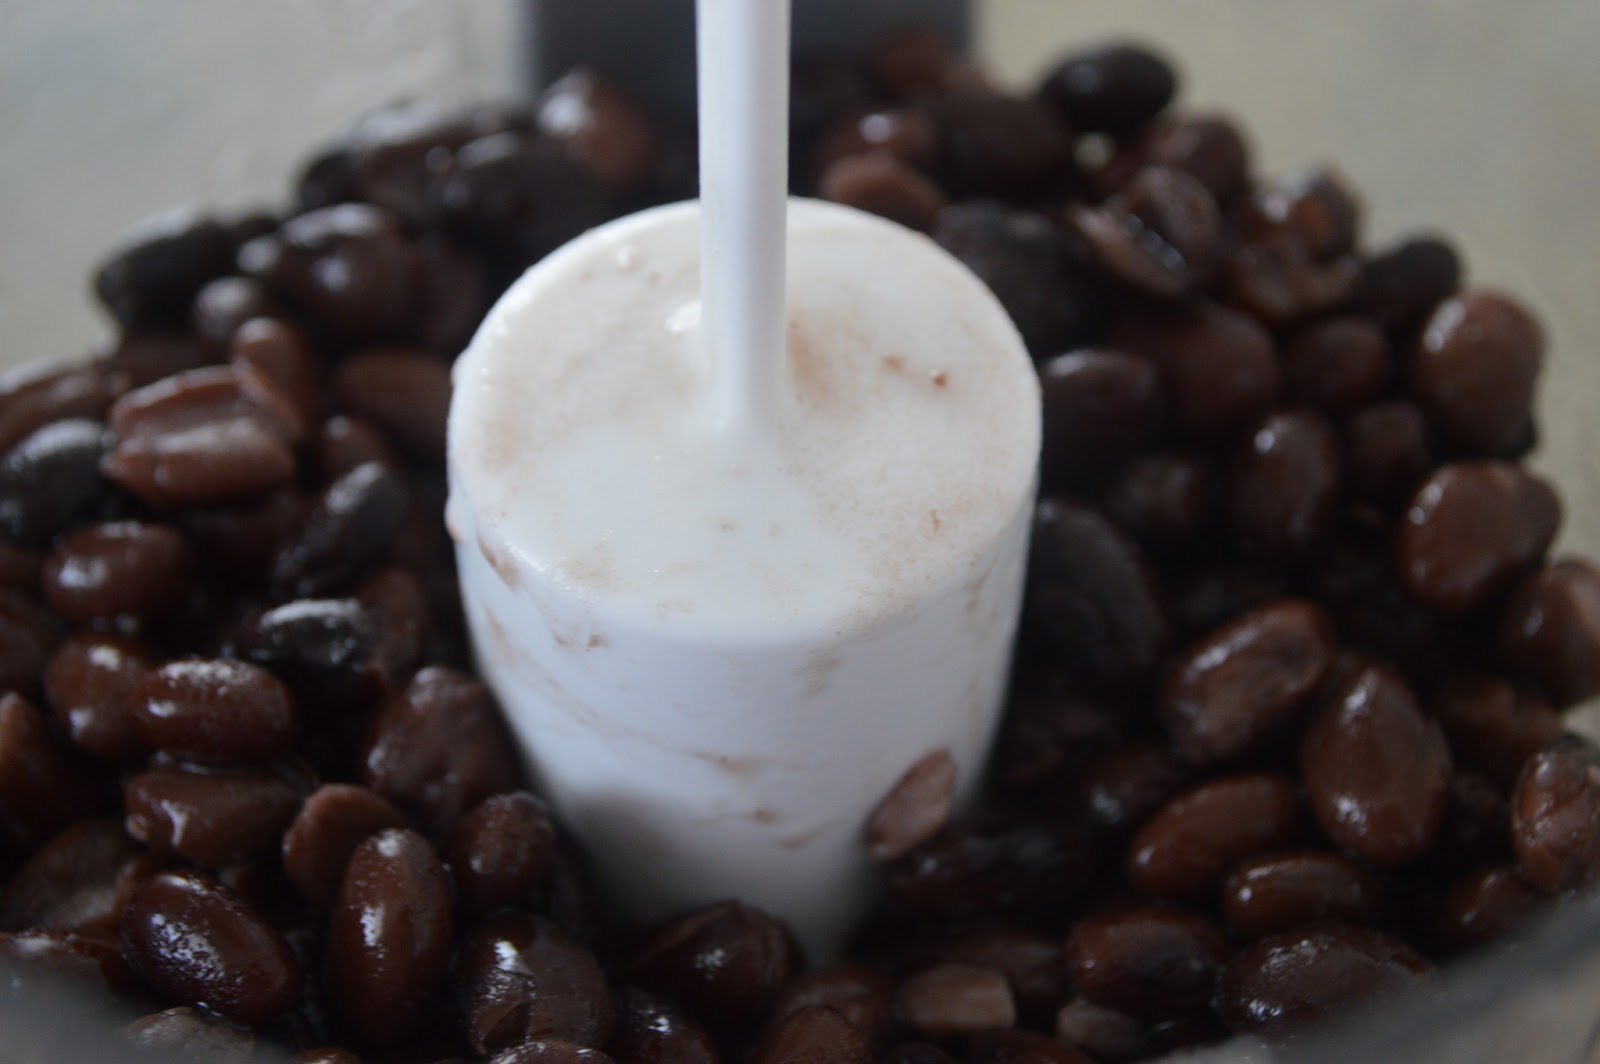
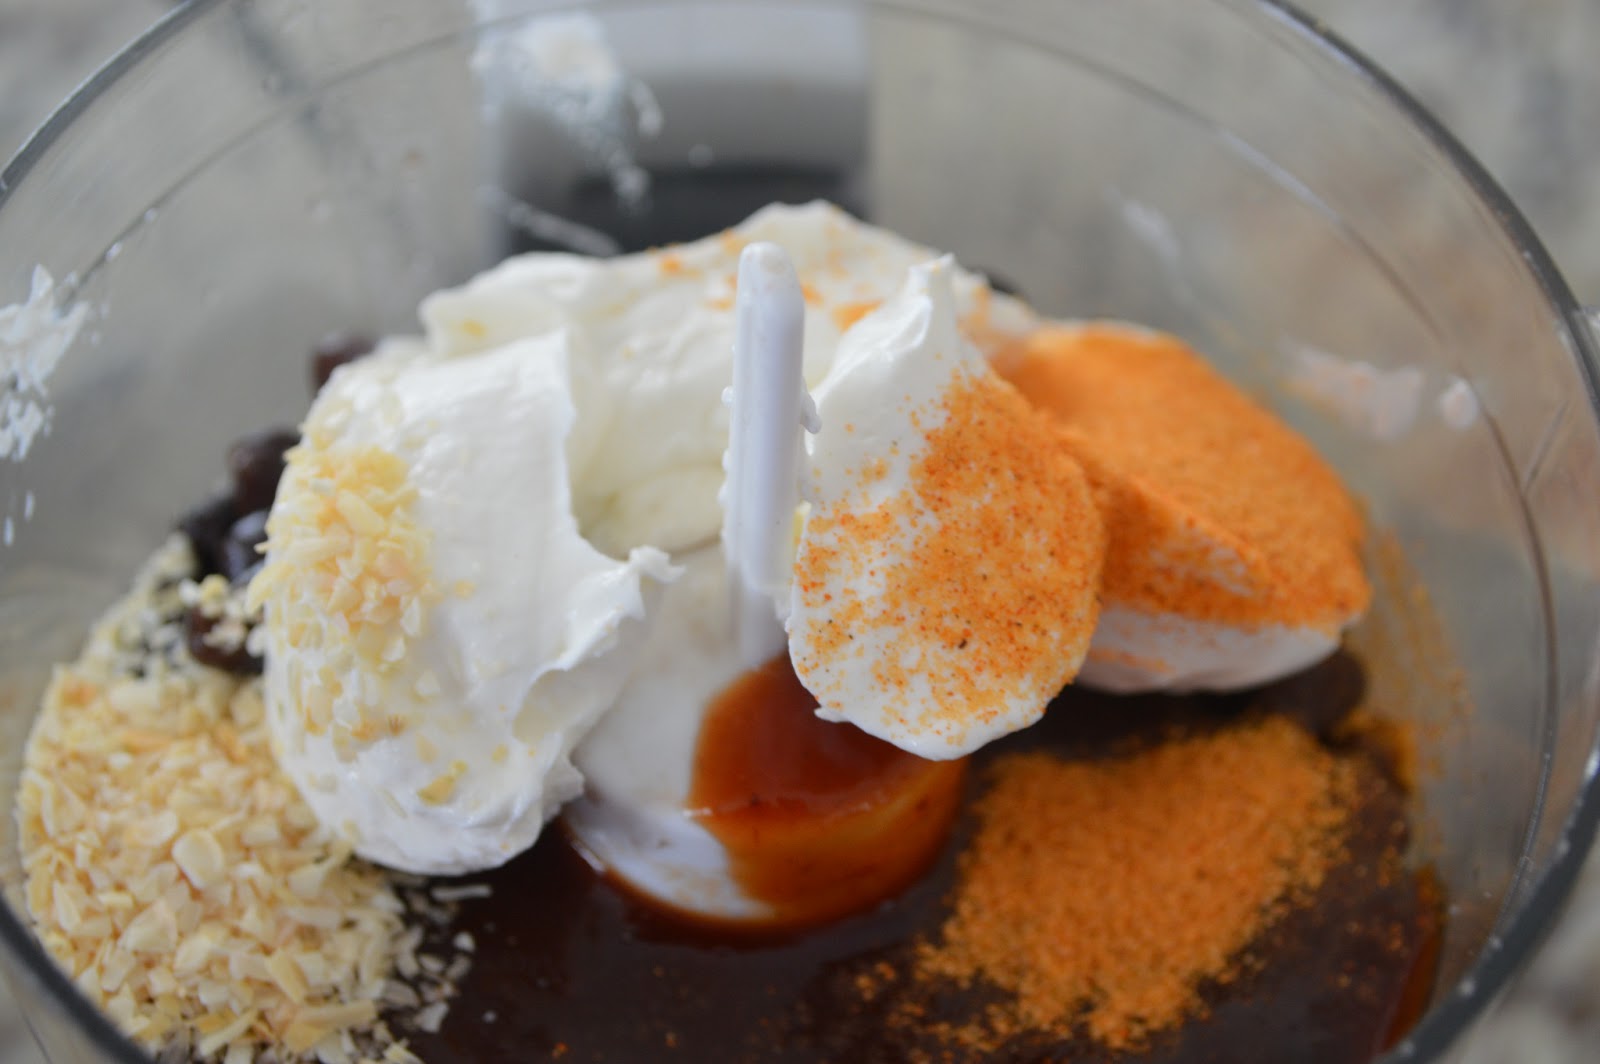
In a food processor, combine beans, sour cream, garlic clove, barbecue sauce, salt and paprika. Blend until smooth and creamy. Taste and adjust seasonings if necessary.

Chill for one hour. Serve with chips and veggies.

Heather

Leave a Comment

Cakes and Cupcakes

Coca Cola Cake

Okay, raise your hand if you love Pinterest. I know! I love it, too. I may even be a little bit addicted to it. I love to browse the site for “a few minutes” almost every night. Several hours later, I’ve pinned an abundance of great decorating, clothing and, of course, recipe ideas. This is one of those recipes I pinned that I just knew I would have to try.

The Coca Cola cake is a deliciously rich and chocolate-y treat. It’s is one of those amazing recipes created in the south where opulent and decadent desserts reign supreme. lt’s a sweet-dreamer’s delight. It’s super moist and covered in a smooth cocoa-rich frosting that you add when the cake is still hot. What could be easier for the busy summer schedule?

When you take your first bite, you’ll be in chocolate heaven. It fills your mouth with saturated chocolate deliciousness; your every chocolate fantasy will be fulfilled. I don’t know about you, but I’ve made scratch cakes before with varying results: Dry, drier, and driest being the usual varieties! Not this cake. It’s amazingly luscious and rich. It’s a good dish to bring to summer parties, too, because its richness and chocolate-y-ness make a little slice go a long way. One cake can feeds an army of hungry picnicers! I can’t wait for you to try it.

Preheat oven to 350 degrees. Spray a 9 x1 3 pan with nonstick cooking spray.

2 cups flour
2 cups sugar
1/ 2 tsp salt
1 tsp baking soda
1 tsp cinnamon

1 cup butter
1/ 4 cup unsweetened dark cocoa powder
1 cup Coca Cola
1/ 2 cup buttermilk

2 eggs
1 tsp vanilla extract

1/ 2 cup butter
1/ 4 cup unsweetened dark cocoa powder
1/ 2 cup Coca Cola

Mix together flour, sugar, salt, baking soda and cinnamon. Set aside.

In a sauce pan, over medium high heat, stir butter, cocoa, Coca Cola, and buttermilk until it boils. Take off heat and add to the dry ingredients and whisk until combined.

Then add eggs and vanilla and mix well. Pour into baking pan and bake for 30 minutes. Don’t over bake it . You want it soft and light.

When cake is nearly done, make the glaze. Mix together 1/2 cup butter, unsweetened dark cocoa, and 1/2 cup Coca Cola in a sauce pan. Bring it to a boil, remove from heat, and  stir in 4 cups of confectioners’ sugar until smooth.

When the cake is done (do the toothpick test; it should come out clean) and still warm, pour the glaze right over the top.

If you love chocolate, you will love this cake. If you love cake, you will love this cake. If you don’t think you like desserts, this cake will prove that you do. It’s that good.

Heather

Leave a Comment

Appetizers Breakfast Snacks

Pig Candy

Ok, I told you he can cook. Here is a special guest blog from  my husband, Michael. I hope you enjoy it.


Candied bacon. Let me say that again more slowly. Candied. Bacon.

How can you go wrong? The first time I had the pleasure, the honor, and the general bliss of tasting candied bacon was at an annual work function called “Grazing Day.” On Grazing Day, each department within the company would pick a theme and then decorate, dress in appropriate costumes, and cook themed goodies. Then the staff would wander the halls and generally feed our faces all day.

One year, my department went full-out pork. Each dish was a creation made from the versatile and succulent miracle meat. My associate, Nick, brought in what he called pig candy and once I had my first bite…well, let’s just say I pigged out.

Since that day, I’ve been trying to perfect my own recipe for candied bacon. While I’ve discovered various techniques, marinade ingredients, cooking times, and oven temperatures, I believe I’ve finally stumbled on the ideal combination. Sweet and savory. Crispy and tender. Yin and Yang.  As my nephew, Adam, said after his first taste of the piggy nirvana: “Good bacon-y God!”

Pig candy is a great snack while watching your favorite sport (golf is sport, right?) and is ideally paired with a frosty glass of your favorite brewski.

Ingredients

Be creative here and mix and match your own ingredients until you arrive at the flavor combination that works for you.

1/2 cup of brown sugar

1/4 cup maple syrup (or my preference, maple sugar)

1/4 cup agave nectar

2 Tbs. molasses

2 Tbs. honey

4 Tbs. apple cider vinegar

A few liberal squirts (1 or 2 Tbs.) of Sriracha chili sauce (or substitute your favorite form of heat)

Salt and pepper to taste

I lb. of thick cut bacon

The Technique

Preheat oven to 400 degrees.

Mix all the marinade ingredients together in a rectangular casserole dish or something large enough to accommodate your pound of bacon. Once mixed well, add the bacon and coat both sides with the syrupy marinade. Let sit.

Line a cooking sheet with aluminum foil. Use a cooking grate, or better yet, a cross-wire cooking rack (often used to cool cookies) and coat with nonstick cooking spray. Place the cooking rack on your lined pan, and using tongs, begin placing the marinated bacon on the rack.

Pop it into the preheated oven for about 15 or 20 minutes. Remove the pan and add the reserve marinade to the bacon strips. Return to the oven. Continue this process every 5 or 10 minutes until the bacon is done or you’ve run out of the syrupy candy coating.

TIP: When the sugary marinade drips onto the bottom of your cooking sheet, it WILL burn. That’s why I line my cooking sheet with aluminum foil. About halfway through the cooking process or when the drippings begin to smoke, carefully remove the cooking rack with the dripping bacon and re-line the sheet with a fresh piece of foil.

Total cooking time will vary based on the thickness of the bacon and how often you marinate it. I’ve discovered—through trial and error—that you need to leave it in the oven long enough to ensure the bacon is thoroughly cooked and is beginning to firm up, but not so long that all the sweet stuff you’ve been liberally coating it with gets burned. About 45 minutes seems about right.

Remove from the oven and let sit for about five minutes before carefully removing the bacon from the cooking rack. Don’t wait too long, or it will stick to the rack. Allow the candied bacon to cool further as the strips stiffen into mahogany-glazed planks of deliciousness.

When the bacon has cooled completely—if you can wait that long—serve and enjoy.

Why yes. I am on a cholesterol-lowering medication. Thank you for asking!

Mike DiFrisco

Heather

Leave a Comment

Salads and Dressings

Cider Vinaigrette


My absolute favorite dressing! I love this on anything! Keep this in your recipe box and save forever. You will get a lot of use out of it. 🙂

Cider Vinaigrette

1 tblsp finely chopped shallot
2 tsp apple cider vinegar
2 tsp dijon mustard
2 tsp maple syrup
3 tblsp extra virgin olive oil
sea salt
fresh ground black pepper

Combine all ingredients in a salad dressing cruet or jar. Shake well. Add your desired amount of dressing to the salad and toss. A little of this dressing goes a long way! 


Heather

1 Comment

Appetizers Beverages Snacks

Spa Waters

A few years ago, my husband treated my daughters and me to a Spa weekend. It was AMAZING! We strolled through the whole spa menu while we were there: manicures, pedicures, facials…this spa had it all. One of our favorite indulgences was the spa water. Every day, there was a different version of the most refreshing and delightful water we ever tasted. Needless to say, this is not a trip we can make every year. It’s a little pricey and we each have life’s little obligations that keep us from getting together as often as we would like. But we can spoil ourselves and have spa days–or even weekends–at home almost any time we like.

One way to enjoy the relaxing spa sensation is to create your own spa waters. I started doing this at home and the whole family relishes the delights of this flavorful and healthy way to quench their thirst. My daughter takes a full bottle to work with her every day. It’s the perfect supplement for the hot summer weather. But it’s not just the great taste that keeps us going back for more. It’s the advantages that drinking spa water affords that fills our glasses to the brim time after time.

We all know we’re supposed to drink water to stay healthy. A lot of water, too. What better way than with water that’s full of flavor and good for you. Depending on what you put in your spa water, you will reap a multitude of great healthy benefits.

* Berries are a wonderful addition with their antioxidant power and abilities to help your body ward off things like heart disease and cancer while adding a wonderful natural sweetness to your drink.

*Apples have been found in a new study to help keep Alzheimer’s away and fight the effects of aging on the brain. Flavonol-rich apples could even help reduce your risk of developing pancreatic cancer by up to 23 percent. They add a light apple juice crispness and freshness to your waters.

*Oranges, lemons, limes, grapefruit, and pineapple add an immune system boost of vitamin C and have cancer-fighting limonoids as well. It adds a lovely citrus note to your waters that makes you feel refreshed and rejuvenated.

*Cucumber has loads of potassium and also vitamin K which helps build bones. It has a mild melon sort of flavor when added to water.

*Watermelon has tons of vitamin c and beta carotene. It’s heart healthy and filled with nutrients. It adds a light, sweet, delectable flavor to any water you add it to.

*Mint is not only a perfect summer cooler for your water, it has been used for years to aid in digestive ailments.

*Ginger has been said to have the ability to aid in digestion, reduce arthritis pain and protect against cancer. It adds a lovely back note of heat to your waters.

I could go on and on because not only is the list of fruits, vegetables and herbs abundant–and their combinations almost limitless–so are the benefits each one provides. Here are just a few of my daughters’ and my favorite recipes.

Cucumber Mint and Watermelon Water

1/2 cucumber, sliced
1 cup watermelon, cubed
1 handful of fresh mint leaves
1 teaspoon agave nectar, optional

Combine all ingredients in a large pitcher or beverage server. Add water and one cup of ice. Chill for 2 hours. Serve with a garnish of mint leaves in each glass.

Pomegranate, Raspberry and Strawberry Iced Tea

1 pint of raspberries, washed
1 pint of strawberries, washed
4 Stash Pomegranate Raspberry Green tea bags
2 cups boiling water
1 pomegranate, seeds only

Steep the tea bags in the boiling water for 3-4 minutes. Remove tea bags and allow water to cool. Add strawberries, raspberries, and tea to large pitcher or beverage server. Top off with cold water and 1 cup of ice cubes. Refrigerate for 2 hours. Serve in a glass with a tsp of pomegranate seeds at the bottom.

Cranberry Orange Ginger Water

1 small bag frozen cranberries
3 oranges, sliced
1 inch of fresh ginger, sliced

Place fruit in a large pitcher or beverage server. Top off with water and one cup of ice. Refrigerate for 2 hours and serve in a glass with and orange slice in it.

Although you refrigerate these waters for two hours, they are actually best served at room temperature. At room temperature the fruits will release their luscious flavors and the water will be filled with all the healthy nutrients you could desire. So once you have chilled them take them out and leave them where you can see them and keep refilling your glass.

These recipes will last for two days at room temperature. After a few hours you will notice a beautiful hue to your water and a change in the taste as the dominant fruits recede and the milder flavors come forward. After the second day, dispose of the water, if there is any left, and start over with a fresh batch.

Don’t be limited by the recipes I’ve included. Be brave, try your own favorite fruit, vegetable, and herb combinations. Indulge in your favorite flavors and make some healthy, refreshing spa water for yourself.


Heather

Leave a Comment

Breakfast Snacks

Trail Mix Granola


I love granola. It is the perfect go to snack-crunchy, sweet and-my favorite-it is always different. Every time I make granola, I change it up. I am that person that has a hard time eating the same thing twice, so this is a huge benefit to me. My kids love eating this as a snack, for breakfast, or even as a topping over their yogurt as an after dinner treat. They love helping me make it too, which is always fun. I think it is the notion that we can just throw in whatever we decide and then call it a recipe works for them. Hey-it works for me too! Check out our latest creation…it was a success! 🙂

Trail Mix Granola

2 1/2 cups of oats
1 cup cooked quinoa
1 tsp cinnamon
4 tblsp butter, browned
1 cup of honey
2 tsp vanilla extract
3/4 cup walnut pieces
1/2 cup dried cherries
1/2 cup dark chocolate chips
1/2 cup coconut flakes or pieces (sweetened or unsweetened-your preference)

Preheat oven to 325 degrees. In a large bowl, toss together the oats, cooked quinoa and cinnamon. Set aside. In a small saucepan, melt butter until slightly browned and nutty–do not burn! Remove from heat and whisk in honey and vanilla.

 Pour over oat mixture and stir until coated and sticky. Do not over mix. You just want it coated, stirring it too much can cause it to break apart.

I had to add this pic of my little guy “helping”. Believe it or not, this is his good picture taking smile (his opinion).

Spread out evenly on a cookie sheet in a single layer. Bake for 10 minutes. Take out and toss gently. Add walnuts to mixture and toss again. Place back into the oven and back for another 10 minutes. Stir again. Reduce oven temp to 300 degrees and bake for another 10 minutes. Granola should be lightly brown and toasty. Let cool on cookie sheet for 30 minutes. Pour into a bowl and add cherries, chocolate and coconut. Toss well. Serve with yogurt, mik, or eat by the handful. Store in sealed container at room temperature for up to a week.

Heather

Leave a Comment

Salads and Dressings Vegetarian

Farfalle and Avocado Salad

It’s time for summer, beaches, water parks, family reunions and–by extension–delicious lighter, faster, more travel-friendly foods. And what’s more travel harmonious than the salad? It is perfect for those snap-lidded, travel-ready Tupperware bowls. It can all be done ahead so it’s a breeze to make and store. And it’s ready to hit the road whenever you are.

I don’t know about you, but I like to have a lot of summer salad recipes on hand so I have something new and different to bring to each food centric event. After a while, the same oil and vinegar recipes get, well, a little soggy in attribute and popularity. It seems to be the salad of choice for so many that I try to avoid it, if possible, to afford the edibles table a little variety.

Here’s a recipe that fits the bill perfectly: It’s creamy and fresh and it offers something new and different. Plus it’s a vegetarian dish for all those looking at the grilled meat selections with tears in their eyes. This dish will show your meat-opposed friends you thought enough of them to make something especially for their palate, and yet, it will satisfy all of your diners.

This recipe also includes tons of health benefits as well:

 ·         Jicama, which is filled with fiber, magnesium, potassium, vitamin C, vitamin A and beta-carotene. And, it’s low in fat and calories.

 ·         Avocado, which is filled with beneficial monosaturated fats which aid in reduction of cancer and diabetes. It’s also filled with natural antioxidants that help give you a healthier heart, stronger eyes, and beautiful skin.

 ·         Garlic, which lowers cholesterol and helps to prevent blood clots. It also has anticancer properties and helps with weight control according to recent studies.

More good reasons to add it to your summer salad quiver.

Farfalle and Avocado Salad

4 Tbs. olive oil
1 large onion, chopped
2 cloves garlic, chopped
2 Tbs. dry white wine
1/2 pound Farfalle (bow tie) noodles, cooked according to directions
1 ripe avocado
1/2 fresh lemon
1 cup sour cream or plain yogurt
salt and pepper to taste
1 red chili pepper, seeds removed and diced finely
1 small Jicama, julienne (cut into small matchsticks)
2 Tbs. salt cured capers, (found in the pickles aisle)
1 Tbs. fresh parsley, finely chopped

Heat 2 Tbs. of the oil in a pan. Add the onions, garlic and half of the diced red chili pepper and sauté for 3-4 minutes. (if you don’t like your food spicy you can skip the red chilies in the sauté) Add the wine and simmer until mostly evaporated. Set aside.

Peel and dice the avocado and squeeze lemon over the diced pieces to keep them fresh and green. Whisk the sour cream (or plain yogurt) with the remaining 2 Tbs. of oil, salt, pepper, jicama, capers, and remaining chili pepper.

In a bowl stir together pasta and sour cream mixture. Add in avocado, mixing gently. Sprinkle with parsley and serve.

It’s delicious cold too. The avocado gets a little homely after an overnight in the fridge, but the taste is still delicious. I hope this brings some new life to your picnic season. Ah, summer; I love it.

Heather

Leave a Comment

Salads and Dressings Side Dishes

Shaved Brussel Sprout Salad with Beets

Um….
Have I introduced you to my new favorite salad?
Okay, I know if you were under the age of say…fourteen, you probably clicked away from this post already. But as an adult, you should be okay with eating some foods you maybe avoided when you were a kid.
Brussel sprouts? Beets? If you would have asked me say…many years ago to try these, I would have given you a resounding NO!
But, I am an adult now. Putting them together in this salad with the addition of creamy feta, crunchy pine nuts and a delicious cider vinaigrette is nothing but pure genius! Delicious taste, hearty crunch and the sweet taste from the beets makes this salad my new favorite! Not to mention it is incredibly filling and good for you. It is honestly the best salad I have had in a long time! 🙂

Shaved Brussel Sprout Salad with Beets

Serves 2 generously, Serves 4 as a side dish

2 cups of mixed green
6 raw brussel sprouts, shaved with a grater or chopped
4 beets, diced
1/4 cup pine nuts, toasted
1/2 cup feta, crumbled
1 batch of Cider Vinaigrette

Place brussel sprouts in a bowl, and toss with desired amount of vinaigrette. Top with beets, cheese, pine nuts and more dressing if desired. Serve immediately.

Heather

Leave a Comment

Side Dishes

Spanish Rice

I rediscovered this recipe in one of my files the other day as I was trolling through to make sure I wasn’t saving anything I no longer wanted. I do a clean-out on a regular basis because if I didn’t, there wouldn’t be room for any new recipes in my files. (That’s the problem with being a recipe hoarder; you run out of spaces for all your cookbooks and recipe files.)

I originally discovered this recipe several years ago at my sister-in-law Clare’s house. We were invited to dinner and she served Spanish Rice (arroz) as a side dish. I loved it! She was kind enough to give me the recipe and I enjoyed it on a pretty regular basis until it was lost it in my files.

I’m so glad I found it again. The smell of it simmering on the stove immediately reminded me of all the reasons I kept the recipe in the first place. It’s filled with comforting flavors and has a lovely, savory sauciness in every bite. It has all the qualities of a red sauce, but with the Worcestershire and brown sugar, you get layers of flavor instead of one note throughout. And, of course, with the bacon permeating the dish you get a porky robustness that only bacon provides.

I often make this as a side dish but, I’m not adverse to making it as a meal unto itself for lunch (or even dinner if it’s a lazy Saturday with just me and my husband). It’s the perfect side dish for grilling season instead of the usual chips or beans. Just throw some steak or chicken on the grill and add the Spanish rice and your have a complete meal in less than 45 minutes.

Spanish Rice

6 slices bacon
1 sm. green pepper, diced
1 medium onion, diced
1-14 oz can chopped tomatoes
1 cup water
3/4 cup long grain rice
1 Tbs. brown sugar
1 Tbs. worcestershire sauce
1 tsp salt
1 tsp chili powder
1/2 tsp pepper
1 cup shredded cheddar

In a large skillet, cook bacon until crisp; crumble and set aside. Drain all but 2 Tbs. bacon fat from the pan. In drippings, cook onions and peppers until tender. Stir in un-drained tomatoes, water, rice, brown sugar, Worcestershire, salt, chili powder, and pepper. Cover and simmer for about 30 minutes or until rice is tender. Top with shredded cheese and crumbled bacon. Serve.

Try it for yourself and I’m sure you will love it and add it to your recipe file as well. Just don’t lose it like I did!

Heather

Leave a Comment

Breads, Quick Breads and Rolls Side Dishes

Whole Wheat Garlic Cheddar Biscuits

Wow. I can honestly say these were a HUGE hit at my table the other night! I whipped up a double batch of these tonight to go with this pasta and vegetable dish I made. I had a fruit salad ready as well, but I felt that we needed something else too.
I am so glad I tried these. The kids gobbled them up! The double batch made A LOT of biscuits, so I was still able to freeze a good portion of them for a meal later in the week, but I could not believe how much my kids loved these.
The best part?
I didn’t have to feel one bit guilty about them asking for seconds and thirds of these biscuits either.
I cleaned up the traditional garlic cheddar biscuit recipe by subbing in whole wheat flour, low fat buttermilk and lowfat cheddar cheese. The double batch made about thirty biscuits so I didn’t even feel bad about the addition of the butter either. I cut them into fun flower shapes, but feel free to use a circle cookie cutter or your own special design too. They will freeze well and can be kept in the freezer to be reheated for a great addition to another meal too.
Best of all, they really are easy to make, which if you have been reading my blog for awhile now, you know that is a big draw for me. I like to take time in the kitchen and I love to cook, but when you have three really hungry kids waiting for some food to be put on the table, you don’t really have a lot of quick options! These are great because they are quick and easy, but give off that “I just make homemade bread” smell and taste.
Your family is sure to love them too!

Whole Wheat Cheddar Garlic Biscuits

2 cups whole wheat pastry flour
4 tsp baking powder
1tsp salt
1 tsp garlic powder
1/4 cup cold butter
1 cup cheddar cheese, grated
1 cup buttermilk

Preheat oven to 350 degrees.  In a medium bowl, combine flour, baking powder, salt and garlic powder.  Cut butter into small pieces and mix into flour mixture with a fork, pressing butter together with the flour until dough begins to be a lumpy mixture. Sprinkle in the grated cheese and mix lightly. Pour buttermilk in, and mix until well combined. Add a little more flour if dough is too sticky, then take out and knead with your hands 10-12 times. Roll out on a floured surface and cut with a cookie or biscuit cutter.

Place on a cookie sheet 2 inches apart and bake on the middle rack in the oven for 8-11 minutes.

Biscuits should be lightly browned and baked through. Serve warm. Biscuits may be cooled and then frozen to be served another time.

Heather

Leave a Comment

  • « Previous Page
  • 1
  • …
  • 20
  • 21
  • 22
  • 23
  • 24
  • …
  • 38
  • Next Page »

Heather

I am a midwestern girl who grew up in the big city, but now enjoys her days as a stay at home mom in the suburbs. Who says spending time in the kitchen has to be boring? I hope to inspire your family kitchen with some new ideas, fun recipes and great tips.

Stay Up to Date

Get all the latest tasty goodness straight to your inbox!

Girl and her Kitchen

Join us!

Hey! I am the GIRL in the kitchen and I am so glad you decided to visit. Love to cook and eat? You will find some great recipes on this site, whether you are looking to eat healthy, splurge on a dessert, make dinner or host a party-I have it all! Sometimes I’ll give you a story along with my recipe, other times, I want to take you straight to the food!  Whatever the reason that you decided to visit, I am so glad you joined me in the kitchen! Feel free to take a look around the site, and please…stay awhile!

Archives

Popular Categories

  • Appetizers
  • Breakfast
  • Crafts
  • Salads and Dressings
  • Side Dishes
  • Vegetables and Fruit

Most Popular Posts

Corner Bakery Cafe Giveaway!

Corner Bakery Cafe Giveaway!

Filed Under: Reviews

Bacon Cheddar Skillet Cornbread

Bacon Cheddar Skillet Cornbread

Filed Under: Breads, Quick Breads and Rolls, Side Dishes

Puffy Pancakes {Perfect for Valentine’s Day!}

Puffy Pancakes {Perfect for Valentine’s Day!}

Filed Under: Breakfast, Valentine's Day

100 Days of Real Food Cookbook Review {and Giveaway!}

100 Days of Real Food Cookbook Review {and Giveaway!}

Filed Under: Vegetarian

Copyright © 2026 · Divine theme by Restored 316