• Email
    • Facebook
    • Instagram
    • Pinterest
    • Twitter

Girl and Her Kitchen

Plan. Make. Eat. Design. Craft. Create. Celebrate. Life.

  • Home
  • About the Girl
  • Recipe Index
  • We LOVE
  • Weekly Menu

Christmas Cookies & Bars

Christmas Cookies ~ Walnut Crescents

walnut cresecnt top

Every year, my husband would come home with this delicious tray of cookies from work. A male co-worker of his loved baking cookies, and would pass out plates piled high with cookies right before the holiday break. The first year, I picked cautiously at these cookies, not sure what tastes and ingredients I would find. Would they be dry? Would they be worth the calories?!

Well, I quickly found out that they were worth every calorie. All of them. Which is really dangerous. I mean, I wanted to eat this ENTIRE plate of cookies! I reigned myself in, and chose a few that I really, really loved. This peanut butter buckeye, which I never make, but absolutely love. A chocolate one, that was dreamy and delicious, and my absolute favorite, a crescent shaped cookie that surprised me every year with its unique flavor.

I begged my husband to get the recipe, but every year, he “forgot”, and I would be shamelessly searching the internet for something, anything, that could give me a hint at how to recreate delicious cookie. I mean, I didn’t even know what it was called. One year ago, I came across it.

A recipe.

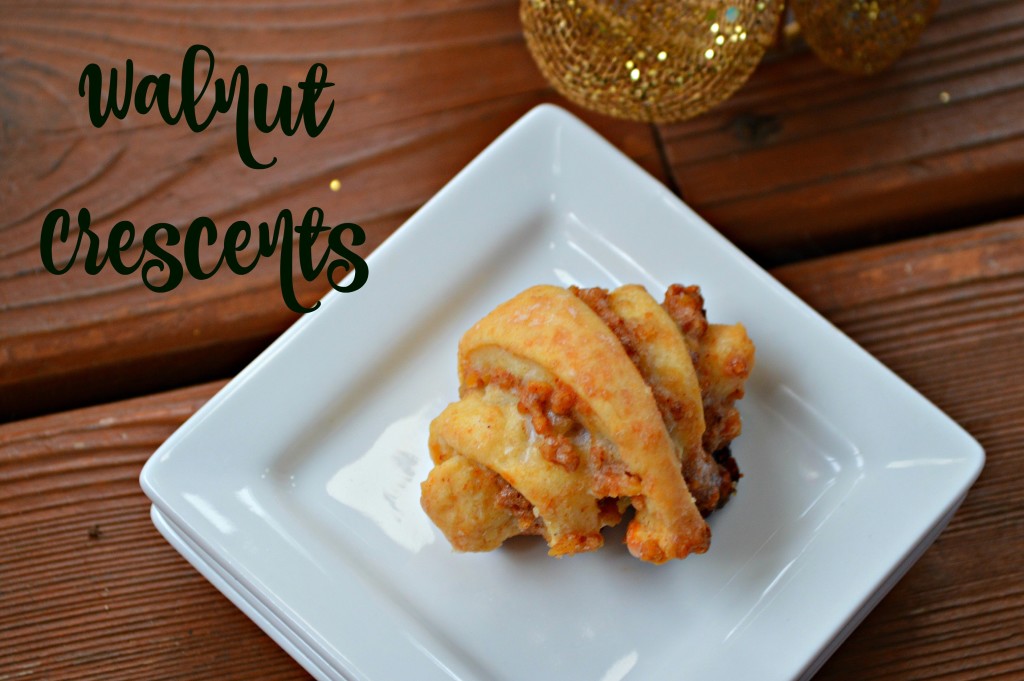
They were called walnut crescents. I gave the recipe a tentative try. They were close, but not exactly what I tasted. I made a few tweaks and changes, and in no time, I was sinking my teeth into the most delicious cookie! I have no idea if this is even close to the recipe that my husband’s co-worker uses, but let me tell you, it doesn’t matter. This is a really, really good cookie.

Crescent 2

Have I told you that I love cookie baking? I am the type that bakes 45,993,939 different types of cookies and then a few days before Christmas starts, I begin second guessing myself that I might not have enough and I bake up a few more. I am addicted. I have a problem. Instead of asking me to get help, just come over to eat some cookies.

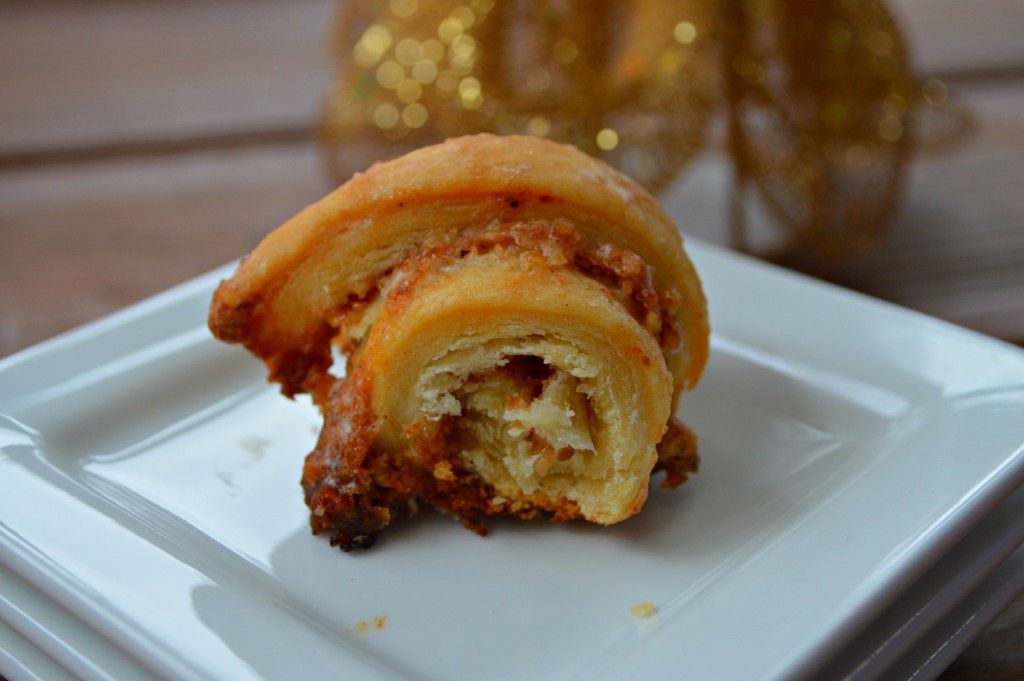
Despite my cookie baking problem, if I had to choose one, it would be this one. Flaky layers of dough, sweet hearty filling, and the delicate tangy glaze all come together to make the best cookie.

I would definitely choose this one.

But please. Please never, ever make me choose one.

Save Print
Christmas Cookies ~ Walnut Crescents
Author: Heather
Recipe type: Walnut Crescents
Cuisine: Cookies, Dessert, Christmas, Holidays
Prep time:  4 hours 30 mins
Total time:  4 hours 30 mins
Serves: 36 crescents
 
PLEASE NOTE: This dough needs to chill so prep accordingly
Ingredients
  • DOUGH:
  • 2 sticks cold, salted butter
  • 2 cups flour
  • 1 egg yolk (save the egg white)
  • ¾ sour cream
  • FILLING:
  • ½ cup sugar
  • ¼ brown sugar
  • ¾ cup finely ground walnuts
  • 1½ tsp cinnamon
  • GLAZE:
  • 2 tbsp lemon juice
  • 2 tbsp water
  • 2 cups powdered sugar
Instructions
  1. To assemble the dough, use a food processor or pastry cutter to combine cold butter and flour
  2. Add in sour cream and egg yolk
  3. Pulse until a soft dough forms
  4. Squeeze together and form into a ball
  5. Cover with plastic wrap and chill for at least 3 hours and up to 24 hours.
  6. To assemble the filling, combine sugars, walnuts and cinnamon in a bowl
  7. Set aside
  8. When dough is done being chilled, preheat oven to 350 degrees
  9. Line a baking sheet with parchment paper
  10. Remove dough from the fridge
  11. Divide into three equal parts
  12. Sprinkle your work surface with flour
  13. Roll out each section of dough into a 14 inch circle
  14. With a pastry brush, brush each circle with lightly beaten egg white
  15. Evenly sprinkle filling on each circle
  16. With a pizza cutter, cut into 12 wedges
  17. Starting at the thick end, carefully roll each wedge into a crescent shape
  18. Place on baking sheet, making sure to space apart
  19. Bake until golden brown, 23-28 minutes
  20. While baking, whisk together lemon juice, water and powdered sugar for glaze
  21. Remove cookies from oven and let cool on sheet for five minutes
  22. Transfer them to a cooling rack with parchment paper underneath.
  23. Brush them with glaze
  24. Let cool completely
3.5.3208

crescent 1

What is your favorite holiday cookie? 

Heather

Leave a Comment

Breakfast

Blueberry French Toast Bake {Make ahead! Perfect for the Holidays!}

H. Williams | 2015

I absolutely love make ahead breakfast ideas. I entertain a lot during the holidays, and whether I am hosting a brunch, or wanting to make a special breakfast for my own family, make ahead options are my favorite thing.

DSC_0632

I usually opt for an egg casserole, but this past weekend, my daughter voted for something sweet. This heavenly blueberry french toast bake was born. It is a hearty breakfast, bursting with bright blueberries and tons of flavor.

Check out this recipe, as well as my recipe for Easy Egg Cups, by heading over to Little Lake County to read my Kids in the Kitchen feature. Looking for more delicious breakfast or brunch options? Check out my recipe index and you will find a lot more!


DSC_0637


What is your favorite make ahead breakfast recipe for the holidays? Share in the comments below!

Heather

Leave a Comment

Christmas Cookies & Bars Uncategorized

Caramel Chocolate Pecan Pie Bars

12239364_875828905798303_8312382293630313069_o

Looking for a delicious recipe to wow everyone with your holiday baking? Well, I might be able to help you with that!

I posted a picture of the finished product on Instagram last week and received a lot of positive feedback. The least I can do for my loyal readers is deliver!

Funny story about this recipe. When I was first concocting it based off of several recipes for a “pecan pie bar” that I had found, I decided to use unsweetened chocolate in the filling because surely the caramel and the little bit of sugar I had used would sweeten it up.

WRONG.

OMG. Have you ever eaten unsweetened chocolate? Have you ever eaten it when you expected sweet chocolate? It is just terrible. I know that I am committing a no no by just saying terrible and chocolate in the same sentence, but it is true. So…take two on the recipe now using bittersweet chocolate. Just enough sweetness to take the edge off!

This is an easy dessert to make for a party or to throw into your regular Holiday cookie rotation. Pecan pie, chocolate and caramel? What could go wrong?

{Insert story about using unsweetened chocolate HERE! Otherwise, NOTHING!}

Enjoy!

*Check out our new PRINTABLE feature! Just click and print all of your favorite recipes! 🙂

Save Print
Caramel Chocolate Pecan Pie Bars
Author: Heather
Recipe type: Cookies/Bars
Cuisine: Dessert
Prep time:  2 hours
Cook time:  90 mins
Total time:  3 hours 30 mins
Serves: approx 24 bars
 
This will become a family favorite around the holidays...or anytime!
Ingredients
  • 1 cup unsalted butter
  • ½ cup brown sugar
  • 2½ cups all purpose flour
  • 1 tsp salt
  • 3 large eggs, lightly beaten
  • ¾ cup honey
  • ½ cup brown sugar
  • 1 tsp vanilla extract
  • 10 ounces bittersweet chocolate, finely chopped
  • 2 cups unsalted pecans, coarsely chopped
  • 1 stick of salted butter
  • ¾ cup brown sugar
  • 4 tbsp heavy cream
Instructions
  1. To make the Crust:
  2. Preheat oven to 350 degrees
  3. Line a 13x9 pan with parchment paper and lightly spray with cooking spray
  4. In a medium bowl, beat butter, brown sugar, flour and salt together
  5. Press into a 13x9 pan and bake for 30 minutes
  6. Allow to cool slightly
  7. To make the filling:
  8. In a large bowl, beat eggs, honey, brown sugar and vanilla
  9. Fold in chocolate and pecans
  10. Pour over crust
  11. Bake for 35-45 minutes or until set
  12. Allow to cool slightly
  13. While cooling, make the caramel
  14. To make the caramel:
  15. Place butter in a saucepan and begin heating
  16. Whisk in brown sugar
  17. Continue whisking until smooth and creamy
  18. Heat for 60 seconds without whisking, allowing it to bubble up
  19. Add in cream, whisking quickly
  20. When fully emulsified, turn off heat
  21. Allow to cool slightly
  22. To finish:
  23. Poke holes in the top of the slightly cooled bars
  24. Drizzle hot caramel all over, letting it seep into the bars.
  25. Cool completely before slicing.
  26. Serve and store leftovers in the refrigerator
3.5.3208


Heather

Leave a Comment

Thanksgiving

Thanksgiving Leftovers

DSC_0469

Ahhh….Thanksgiving Dinner.

Has there ever been a more awaited meal than Thanksgiving Dinner? I really don’t think so.

As we all prepare to stuff our faces with ungodly amounts of food that we would never eat on a regular basis, followed by dessert of course, we all must really get ready for the inevitable…

Leftovers.

Yep, most likely they will be there after the eating has ceased. Even more likely is the fact that you will look forward to them with great anticipation the next day. Most likely? After that you won’t ever want to see them again.

I have the solution for you!

Check out my post on Little Lake County to see what you can do to transform those Thanksgiving leftovers into something that you will look forward to eating. Creative recipes for all sorts of leftovers that will leave you wanting to make a turkey dinner all over again, just to get the leftovers.

Check it out here, and most importantly…Have a Happy Thanksgiving!


Thanksgiving

Heather

Leave a Comment

Thanksgiving

Thanksgiving Tree Centerpiece – Pottery Barn Kids Hack for under $10


Last week I was checking my email and came across some adorable Thanksgiving decorations on Pottery Barn  Kids. I fell in love with the Thanksgiving Tree Centerpiece for $59 and Leaf Ornaments for $22 as shown below.

Photo Property of Pottery Barn Kids

So cute, right?

Well, at least everything is cute…besides the price.

Of course, the crafter in me said “MAKE IT!!!” and I happily gave in.

Honestly the project cost me less than $5 because I already had a pot lying around, along with some burlap, and random buttons for the leaf ornaments. I put under $10 in the subject because that is the most you would spend putting this cute little tree together.

I texted my Pottery Barn Hack partner ie: my sister-in-law Kiersten, the picture of the tree and wrote “we should make this” her immediate reply was “Tuesday?” So we got to work Tuesday and busted our trees out in about 2 hrs while juggling 4 children. I’d say that’s a pretty great craft.

What you’ll need:

-Tree Branch: I picked mine up next to the river while I was on a walk with my toddler, from a tree that had been cut down.

-Flower Pot: I had one lying around in the shed, but I saw some at Hobby Lobby for $1.37

-Foam/filler: You’ll need foam or some sort of stabilizer for your tree to stick into. My husband filled my pot with insulation foam spray he had in the garage and I let it dry overnight. You could use some floral arrangement foam or even dirt if you want!

-Floral Stem Wrapping similar to this I found at Hobby Lobby. The wrapping we used wasn’t dark brown like from this link, but I couldn’t find it online to show you. We found ours in the bridal section. It was white with gold glitter on it. $2.99

–Heat n Bond which can also be found at Hobby Lobby. $2.99

-Burlap: for the base you’ll need about 1/2 yard depending on the size of pot you are covering. I had a scrap piece that I used. You most likely wont use the whole 1/2 yard, but you need enough to make a square that you will then wrap around the pot base.

-Burlap: for the leaves we purchased 1/8yrd of each color. We bought brown, orange/rust, sage/green, and a white with gold glitter. which came out to about $2.50

-Hot glue and glue gun

-Scissors

-Buttons, felt, twine, and whatever else you choose to decorate with.

Step 1: Trim your branch. Snip off any unwanted limbs from your branch. Make sure to break off all those little stubs you don’t want to wrap floral wrap around. You can stick the branch in your foam filled pot now to look at the symmetry and shape of the branch.

Step 2: Wrap your branch, starting at the base with the with floral wrapping. I found it easier to take the branch out of the foam at this point so I could turn it while I wrapped. The floral wrapping is not sticky like tape but has kind of a waxy texture to help it stick to the branches. Your fingertips will feel waxy afterward. Make sure and go all the way to the tips of your branches. Sorry I have no picture of  the wrapping, we were wrangling kids and trying to be quick!

Step 3: Place your branch back in the pot and wrap your large square of burlap (cut from your 1/2yard) around the pot. It was nice to have an extra set of hands for this part. We tied ours off with twine and then later I went back with a white piece of burlap and tied a large knot.

Step 4: Make your leaves. Start by ironing your burlap for the leaves. Cut a piece of Heat n Bond that is half the size of your burlap and iron it on. The plastic/glue side should be touching the fabric and the paper side should be up.

Once you have ironed the paper side thoroughly and it has cooled, peel off the paper and you will have a plastic/glue film left on your burlap. Now, fold the burlap section without the Heat n Bond on top of the portion with Heat n Bond and iron them together (sandwiching the glue between the pieces). You are bonding your burlap together so that it is stiffer and won’t fray when you cut out your leaves. Repeat this process with all of the burlap designated for the ornament leaves.

Once the burlap has cooled down from being ironed, start cutting out leaves for each of your branch tips. we used the same color burlap for the base as we did the branch tip leaves. I just kept cutting until I had one for each tip. I did not use a template for the branch tip leaves, but did for the ornament leaves. Here is a close up of the branch tip leaves. You could add twine to each of them with some glue to make leaf veins if you want.

I found this template on this website on Pinterest. I printed it out and used it for the ornament leaves.

Use for the Thankful Tree: printable leaf patterns Each child could get one sheet's worth of leaves for their branch!:

I cut out the ornament leaves on the white, orange, green, and brown colors of burlap and then laid them  onto another color and cut around it to make a border. Glue those pieces together and then add some embellishments. We used buttons and felt. Cut out some twine to glue to the back of the ornaments so they can hang on the branches. You could also use embroidery floss here and put some family names on the leaves. Here are some close ups of a few I made. See how the edges aren’t frayed? That’s the Heat n Bond at work.


Step 5: Glue your branch tip leaves onto your tree branches. I placed a little hot glue on the tip of each branch and then stuck my leaves on to them. Be careful here, your fingers will thank you.

Step 6: Hang your ornaments and enjoy your handy work! Here is Kiersten’s tree at her house. Don’t you just love it!

Here is another shot of mine. If I could only decide which table I want it on!


Another thing Kiersten and I wanted to add to the tree was to make them “Thankful Trees”, and have our children write down what they are thankful for. We would then attach those notes to the tree. It would be a wonderful family tradition. Kiersten thought mini clothespins would do the trick, and would look great with the burlap as well.

Let us know how you made your Thanksgiving Tree Centerpiece into a Thankful Tree. Here are some things I’m thankful for: My husband, my boys, and all our family. I’m grateful for my church and the gospel of Jesus Christ and for my Savior. I’m grateful for sunshine and the beauty this earth has to offer.

Take sometime to think about what you are truly thankful for!

Blessings to you all!


Heather

Leave a Comment

Soups & Stews Vegetables and Fruit

Creamy Butternut Squash Soup {with Browned Butter Cinnamon Sugar Croutons!}

If you are looking for all the scents and flavors of fall to be in one pot, this is definitely the soup for you. As in, go to the store now, get all of the ingredients and make this soup. Your house will smell wonderful and your fall cravings will be completely satisfied.

I first was introduced to Butternut Squash soup at Panera. I love Panera and when I stopped in for a quick lunch, I was intrigued by this soup that I had never tried before. Thick, creamy and delicious-it was perfect in every way except one. It was a bit too sweet for me. I craved the creamy, flavorful soup, but wanted to recreate it with just a little less of the sweet flavor in the soup.

Simmering the fresh vegetables infused with spices like turmeric, curry and cinnamon on the stove today, I knew this soup would be a huge hit. The vegetable stock and hearty vegetables give it depth, while the pumpkin and the half and half contribute to its creaminess factor. It tastes very sophisticated, while the prep for it is anything but.

That business about browned butter cinnamon sugar croutons? I mean, come on, do we actually NEED a reason to eat what basically boils down to cinnamon sugar toast for lunch?

I didn’t think so!

Add this to your Thanksgiving menu, or enjoy as a simple lunch or dinner with a green salad.

Creamy Butternut Squash Soup

Soup:
2 tbsp buttter
1 small sweet onion, diced
3 carrots, peeled and sliced thin
3 stalks of celery, sliced thin
1 Granny Smith apple, peeled and diced
1/2 tsp turmeric
1/2 tsp cinnamon
1 1/2 tsp salt
1/4 tsp pepper
1/2 tsp curry powder
1/4 tsp nutmeg
4 cups butternut squash, cubed
4 cups vegetable broth
1 1/2 cups canned pumpkin (fresh is fine too if it is roasted)
2 tbsp honey
1 1/2 cups half and half
Roasted pumpkin seeds, optional for garnish
Browned Butter Cinnamon Sugar Croutons, optional for garnish

Browned Butter Cinnamon Sugar Croutons:
1 whole grain baguette, cubed
8 tbsp butter
1/4 cup brown sugar
1 1/2 tsp cinnamon

Soup Directions:
Melt butter in a large stockpot.  Add onions, carrots, celery and apple. Toss until coated in melted butter. Lightly sauté about 7 minutes, stirring gently occasionally.  Add all of the spices and stir. Add the butternut squash. Pour 3 cups broth over vegetable mixture and stir once. Cover. Cook on medium heat for 10 minutes. Lift lid, stir once and add last cup of broth. Stir in pumpkin, honey and half and half. Using an immersion blender, or by placing batches of the soup in your blender, blend until smooth and creamy. Put lid back on and simmer for about 5 more minutes or until warmed through. Top with pumpkin seeds and croutons if desired.

Crouton Directions:
Brown butter in a small saucepan over low heat until lightly golden and aromatic. Be careful not to burn. Place bread cubes in a large bowl. Pour butter over the bread and toss to coat. In a small bowl, combine sugar and cinnamon. Sprinkle over buttered bread and toss to coat again. Spread on a baking sheet covered with parchment paper. Bake for 10 minutes. Turn off the oven and leave in oven as it cools down for 10 more minutes.

Heather

Leave a Comment

Cakes and Cupcakes Fall

Pumpkin Chocolate Chip Streusel Cake


Fall has been here for awhile, although you wouldn’t really know it around here. We have had some unseasonably warm weather here in the Chicagoland area as of late, which has made some days still seem like summer. How is this a bad thing? Well it isn’t, but it makes life a little tricky when my son still won’t stop wearing shorts. 
 
Cooler weather is rolling in this week, but of course, just in time for Halloween. Why can’t this thing called weather EVER cooperate?
 
Despite the weather inconsistency, I am, and have been in full fall mode. The trees are beautiful, the air is (sometimes!) cool and crisp, and most importantly, I can get baking.  We all know what else fall means to many…..
 
Yep, you guessed it…pumpkin flavored EVERYTHING. Are you sipping your pumpkin latte right now while reading this? There is a good chance many of you are. While I am not a fan of everyone’s favorite pumpkin latte, I am a fan of  pumpkin desserts. Nothing says fall like pumpkin cake, bread, pancakes…you name it!   I was trying to make something that had my favorite fall ingredients, along with everyone’s favorite, chocolate.
 
 This pumpkin cake is beyond amazing. The cake is moist and delicious but nothing compares to the crumbly, buttery streusel topping that sprinkles over the batter right before baking. Can we just make a dessert with ONLY crumbly butter topping? Just topping more of this delicious topping? I mean, that is how good this is. 
 
Beware…these are addicting. 

Pumpkin Chocolate Chip Streusel Cake
1 cup sugar
1/2 cup oil
2 eggs
1 cup canned pumpkin
1 tsp. vanilla extract
1 1/2 cups sifted all purpose flour (I used whole wheat pastry flour)

1/4 tsp. salt
1/4 tsp baking powder
1/2 tsp. baking soda 
3/4 tsp. cinnamon
1/4 tsp. ground nutmeg

Streusel Topping
1/2 cup brown sugar
1/3 cup flour 
1/4 cup butter, room temperature

1/4 cup mini chocolate chips


Preheat oven to 325 degrees.  Grease and flour 8×8 -inch square pan.  Beat sugar with oil until blended.  Add eggs, one at a time, beating well. Continue beating until light and fluffy.  Mix in pumpkin on low speed and add the vanilla.  Sprinkle in dry ingredients on low speed and mix just until combined. Pour into prepared pan.  

Streusel Topping:
In a small bowl, mix brown sugar and flour. Add butter cubes and work with a pastry cutter or your fingers until mixture resembles small pebbles and is crumbly. Add in chocolate chips.  Sprinkle topping over entire loaf.  Bake 60 minutes, or until toothpick comes out clean. Enjoy!


Heather

Leave a Comment

Crafts Halloween

Spooky Spider Handprints

Today my best gal came over and we did some crafting with the kiddos. I wanted to do something fun for Halloween and I had seen different craft ideas on Pinterest I wanted to try out. This hand print craft looked perfect. I had everything on hand, so it really didn’t cost me anything.

What you’ll need:

paper plates
paint
paint brushes/sponges
hole punch
yarn/twine
tape
googly eyes
glue 

Honestly this was a super fun, super easy craft for Halloween that the kids loved. We gave each kiddo a plate that they then painted the color of their choice. (We stripped the boys of their t-shirts because we were using acrylic paint, and put an old sheet on the table to protect it). We painted on the backside of the plates.

Once the paint had dried we let them each paint a  large circle using a round sponge brush and either black or white paint. My friend’s daughter wanted a white spider so we let her go with that.:) This became the body of the spider. We did this instead of painting the kid’s entire hand, but you don’t have to do it this way. You can skip this step and just use the palm of the child’s hand for the body of the spider. After that, using a paint brush, we painted the inside of our kiddo’s fingers and stamped them on either side of the circle for the legs. Again, here you can choose to use their whole hand, minus their thumb, making the print of the palm the body of the spider. Once all the paint was dry, we punched holes along the edges, and allowed them to lace the yarn/twine around the plate to make the web. We secured the yarn with some tape on the back of the plate. Once they were done lacing they each glued on their googly eyes. We also taped a separate piece of yarn on the back of each so the kids could hang them up. Super easy, super quick, and they all LOVED it!!! My oldest son named his spider “Spooky Spider” and named his younger brother’s spider “Spookylicious Spider”.

Have a great time with your kids this fall season and make some Spooky Spiders of your own! We sure enjoyed it!

Heather

Leave a Comment

Chicken & Turkey Sauces and Condiments

Garlic Lemon Marinade


I love any excuse to grill, anytime of year.  Just because fall has rolled in, does not mean that you should put away that grill! For some reason the thought of grilling always makes me really excited to cook.  This is my “go-to” marinade. It makes the most delicious chicken.

After you take a bite you will be hooked.

My friend Jenny gave me this recipe and it became my favorite as soon as I took that first bite. Using this marinade, you will be constantly making amazing chicken.  I like to cook up extra to use in salads and other meals I make throughout the week.  Make sure and peek at our great grilling tips post  and you will be ready to go.

Garlic Lemon Marinade

1/4 cup fresh lemon juice
2 Tbsp olive oil
4 cloves garlic, minced
1 tsp salt
1/4 tsp oregano
1/4 tsp pepper

Mix ingredients together and pour over chicken and refrigerate for at least 30 minutes. Grill according to the type of chicken you are using.

*** I really like to grill with chicken tenderloins.  I know they are smaller than chicken breasts but they are more forgiving with grilling and stay “tender” even if you overcook a little.***

 Happy Grilling


Heather

Leave a Comment

Salads and Dressings

Easy Creamy Caesar Salad Dressing

Summer is the perfect time for a salad! As summer winds down, I always try to get all of my favorite recipes packed in before I start my fall cooking. Salad is the perfect warm weather dinner and Girl and Her Kitchen loves our salads! Chrissy’s Shrimp salad sort of puts me over the delicious edge and this Tex Mex Salad is so colorful, you hate to ruin the rainbow and eat it! I could eat a salad every day in the summer if my kids would go for it. They are particular about the salads they like though. This one just happens to be one of their favorites!

You really don’t even need anything to go with this-it has everything.

Well, bread…but that is another story. I mean…everything goes better with bread. Lucky for you, this salad comes covered in croutons! I have a recipe for my homemade croutons coming, but in the meantime, your favorite store bought ones will do!

I can’t take the credit for this dressing either. The brains behind it is my friend Jill. I had dinner there once and could not get enough of her insanely delicious caesar salad. We are friends that share recipes, so I had it in my possession soon enough, and could make it whenever I wanted. Score!

It pays to have friends that are fabulous cooks!

This salad dressing is creamy and flavorful, but is seriously so easy to make you will never buy a bottled dressing again!

Best yet, this can all be thrown together in your food processor and whizzed together so it is even easier!

Some crisp greens, crunchy croutons and shaved parmesan cheese are all it takes to make this the perfect salad.

Easy summer dinner, easy summer clean up=more time for summer fun!

Easy Creamy Caesar Salad Dressing

2 garlic cloves
1 tsp anchovy paste (optional-I LOVE this addition, but I leave it out when making it for kids)
2 tbsp fresh squeezed lemon juice
1 tsp dijon mustard
2 tsp Worcestershire Sauce
1 cup mayo
1/2 cup Parmigiano reggiano cheese
1/2 tsp salt
1/2 tsp freshly ground black pepper

In a food processor, chop garlic cloves. Add all other ingredients and pulse until smooth and creamy. Chill for at least 30 minutes. Serve over crisp greens, top with croutons and shredded parmesan cheese. This also works great for a tasty dip!

Heather

Leave a Comment

  • « Previous Page
  • 1
  • …
  • 7
  • 8
  • 9
  • 10
  • 11
  • …
  • 38
  • Next Page »

Heather

I am a midwestern girl who grew up in the big city, but now enjoys her days as a stay at home mom in the suburbs. Who says spending time in the kitchen has to be boring? I hope to inspire your family kitchen with some new ideas, fun recipes and great tips.

Stay Up to Date

Get all the latest tasty goodness straight to your inbox!

Girl and her Kitchen

Join us!

Hey! I am the GIRL in the kitchen and I am so glad you decided to visit. Love to cook and eat? You will find some great recipes on this site, whether you are looking to eat healthy, splurge on a dessert, make dinner or host a party-I have it all! Sometimes I’ll give you a story along with my recipe, other times, I want to take you straight to the food!  Whatever the reason that you decided to visit, I am so glad you joined me in the kitchen! Feel free to take a look around the site, and please…stay awhile!

Archives

Popular Categories

  • Appetizers
  • Breakfast
  • Crafts
  • Salads and Dressings
  • Side Dishes
  • Vegetables and Fruit

Most Popular Posts

Corner Bakery Cafe Giveaway!

Corner Bakery Cafe Giveaway!

Filed Under: Reviews

Bacon Cheddar Skillet Cornbread

Bacon Cheddar Skillet Cornbread

Filed Under: Breads, Quick Breads and Rolls, Side Dishes

Puffy Pancakes {Perfect for Valentine’s Day!}

Puffy Pancakes {Perfect for Valentine’s Day!}

Filed Under: Breakfast, Valentine's Day

100 Days of Real Food Cookbook Review {and Giveaway!}

100 Days of Real Food Cookbook Review {and Giveaway!}

Filed Under: Vegetarian

Copyright © 2026 · Divine theme by Restored 316