• Email
    • Facebook
    • Instagram
    • Pinterest
    • Twitter

Girl and Her Kitchen

Plan. Make. Eat. Design. Craft. Create. Celebrate. Life.

  • Home
  • About the Girl
  • Recipe Index
  • We LOVE
  • Weekly Menu

Chicken & Turkey

Perfectly Grilled Barbecue Chicken

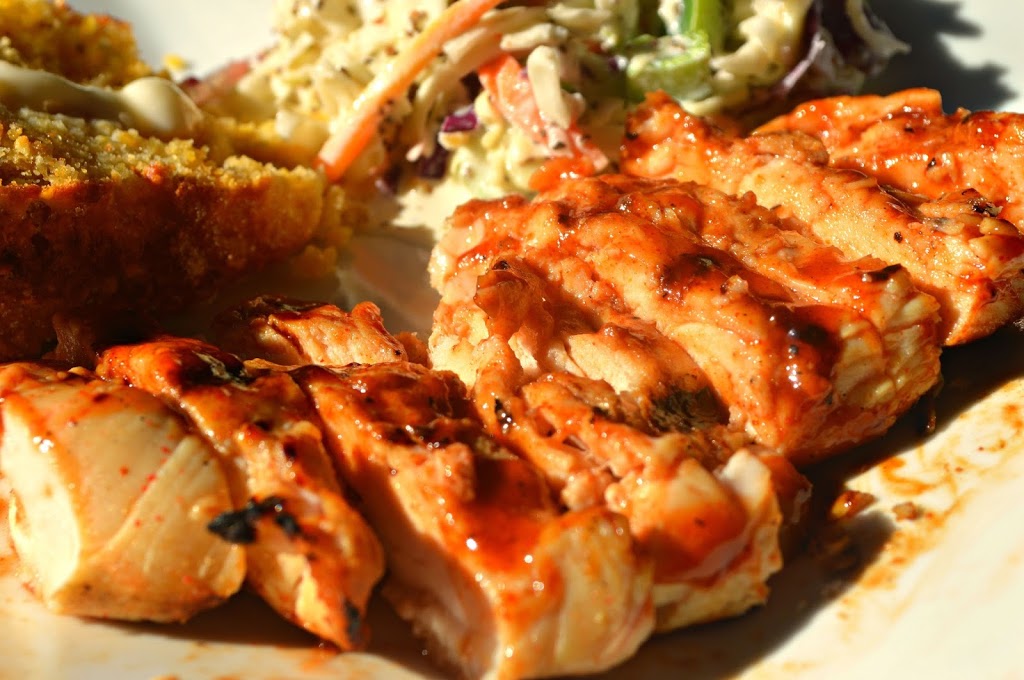
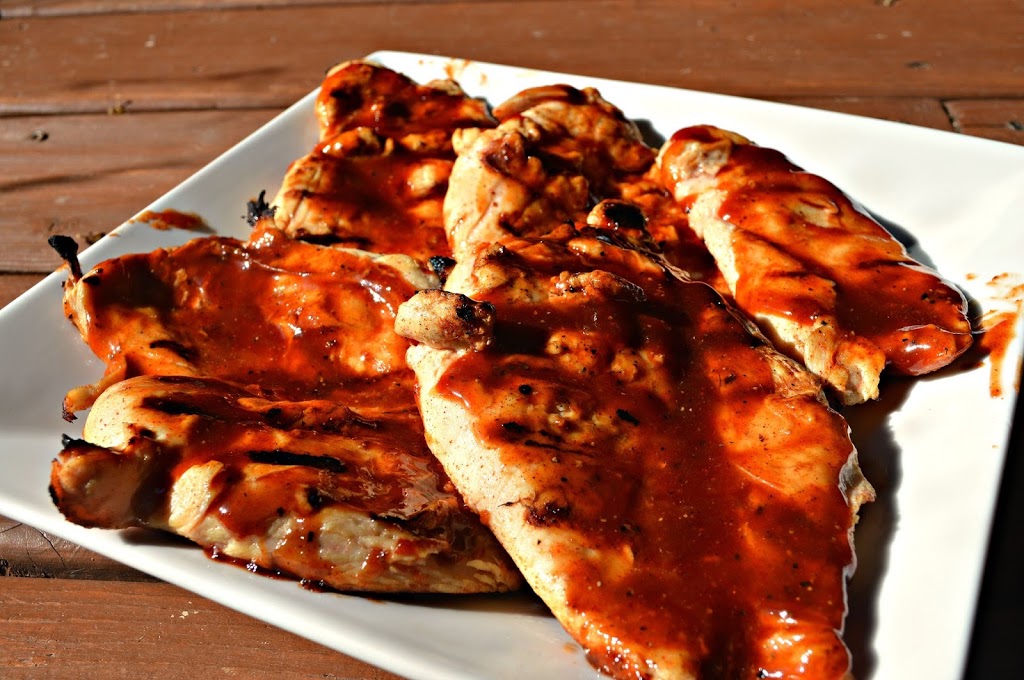
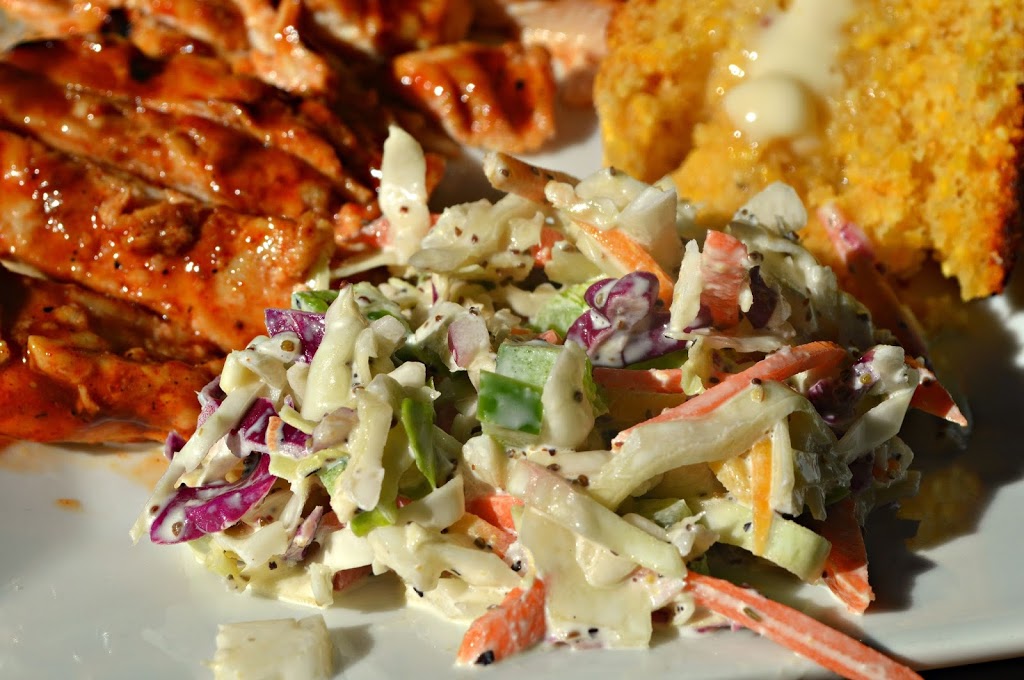
As Labor Day weekend rolls in and signifies the “end” of summer, many of you are firing up that grill at least one more time. If you are looking for the juiciest, most delicious chicken recipe to serve your guests or grill up for just your family, this is the one. It is that perfect mix of juicy chicken, sweet and smoky barbecue sauce and fresh grilled flavor.

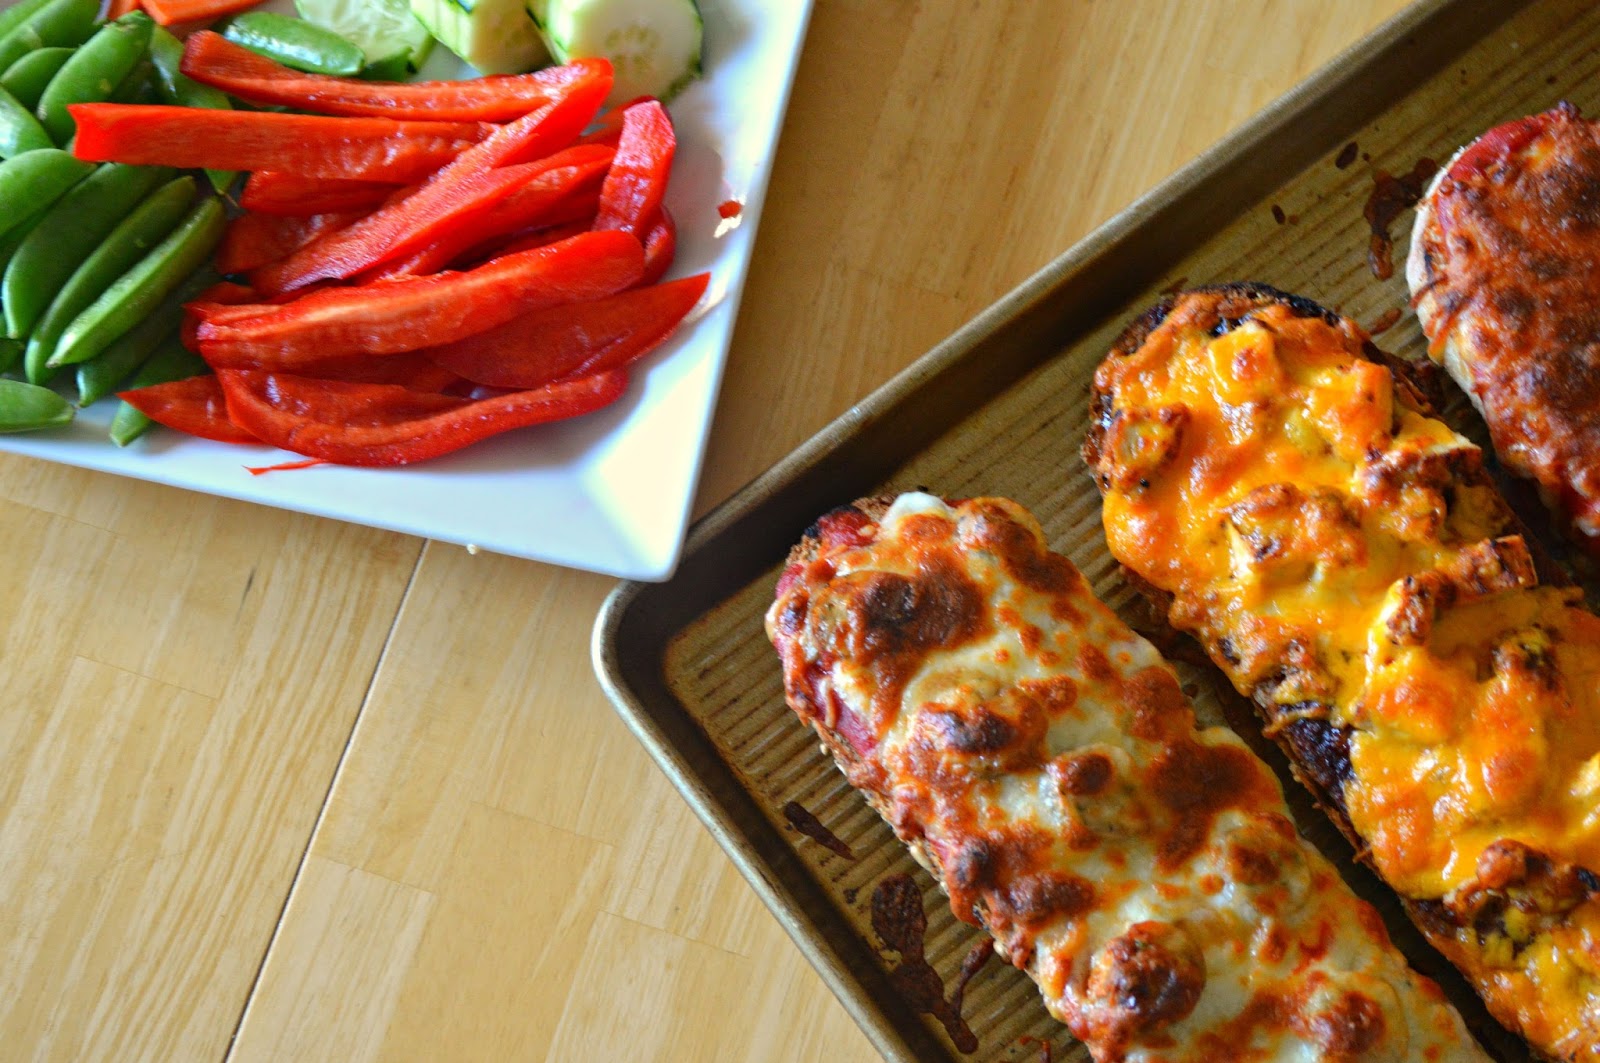
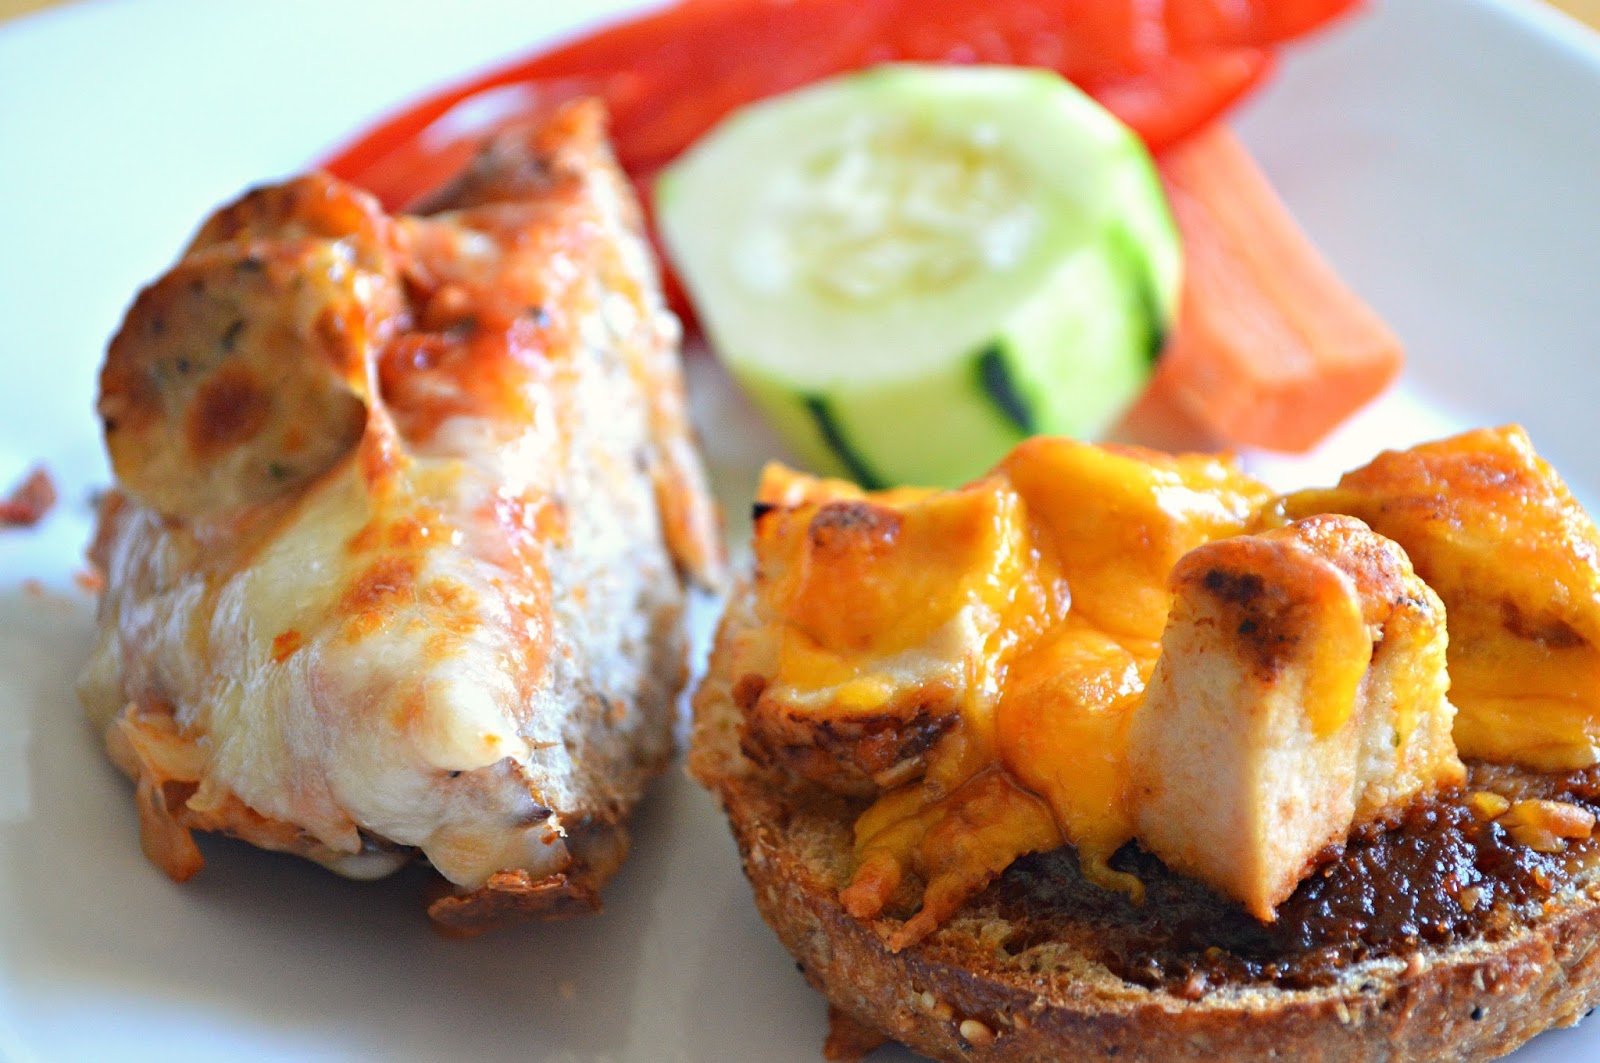
The recipe takes some prep ahead of time, but it is all worth it in the end. For this recipe, and so many more great features, check out my Kids in the Kitchen With Girl and Her Kitchen post on Little Lake County. 

Happy End of Summer!

Heather

Leave a Comment

Appetizers Pizza

French Bread Pizzas { Super Easy Summer Dinner! }


During the summer months, dare I say, I don’t enjoy cooking as much. It is not that I don’t like making food and eating it, it is that I just don’t want to have to spend so much time on it. I want to be doing other things…playing with the kids, going to the pool, enjoying the beautiful weather.

Easy, throw together dinner like this are what I strive for! I am sharing this with you because I want you to have the same! Go out, enjoy the weather! Come in, throw this together-then bring it outside and eat. No slaving away in a hot kitchen forever.

Can I even call this a recipe though? I may be cheating just a bit by pawning this off to you as a recipe. That is how easy it is! I CANNOT even call it a recipe people!

I love my classic pizza recipe, but who in the world has time to make a dough, let it rise and make pizza like this in the summer? Not me.

A few ingredients, a little creativity, and a tiny bit of your time.

Done.

French Bread Pizzas

Makes 4 Pizzas

2 loaves of fresh bread, halved lengthwise

Toppings:

Cheese Pizza : Favorite marinara sauce, mozzarella cheese

BBQ Chicken Pizza: Leftover Barbecue Chicken, Barbecue Sauce, Cheddar cheese

Italian Sausage Pizza: Favorite marinara sauce, mozzarella cheese, sliced, fully cooked Italian sausage

Margherita Pizza: Fresh mozzarella, basil, Sliced tomatoes

Or…get creative! Make your own combination!

Top your bread, throw it in the oven on a large cookie sheet for about 15 minutes and then broil the top until browned and bubbly for about 3-5 minutes. Let cool for a few minutes and slice. Serve with a green salad or some cut up raw veggies and dip. Easy as can be!

Heather

Leave a Comment

Side Dishes Vegetables and Fruit

Southern Style Cole Slaw

Cole slaw is that sort of … overlooked recipe.

It really shouldn’t be, but it is. Stay with me here. I mean, have you ever heard anyone talking about a cole slaw recipe that blew their mind?

 It just doesn’t happen.

The thing is, it deserves some credit. It is filled with vegetables. It’s good for you! It is tossed in what could be (if done right) a delicious dressing and it is chilled to let all those flavors soak in.

Really, it could be very good. If, IF, it is done right.

I think the time has come.

I have a recipe that will bring cole slaw to center stage. Really, I know, stop laughing at boring old cole slaw…this recipe will really change its reputation!

Along with cabbage, I combine green pepper, carrots and sweet onion to really up the crunch factor. The dressing, arguably the most important part, is the perfect mix of salty and sweet with a unique ingredient that really takes the flavor to the next level.

Did you see that? I used the phrase “next level” to describe cole slaw. You must be curious about this recipe now.

Oh, one more thing. A disclaimer. I am not southern. I just combined about a million cole slaw recipes to make my favorite and I thought since one of them was called southern cole slaw, it might have a touch of the south intertwined between the cabbage and carrots.

Ok y’all?

Southern Cole Slaw

2 1/2 cups shredded green cabbage
2 1/2 cups shredded purple cabbage
1 cup shredded carrots
2 tblsp sweet onion, finely grated
1 green pepper, finely diced
1 cup mayo
2 tbsp dijon mustard
2 tbsp apple cider vinegar
2 tbsp honey
1 tsp salt
1/2 tsp pepper
2 1/2 tsp celery seed

Combine all the veggies together in a large bowl. In a small bowl, whisk together mayo, mustard, vinegar, honey, salt, pepper and celery seed. Drizzle over veggies and toss lightly to combine. Chill for an hour before serving.

Hint: Leave out about a cup of the mixed veggies and toss in right before serving. This will add a little extra crunch.

Heather

Leave a Comment

Breads, Quick Breads and Rolls Side Dishes

Bacon Cheddar Skillet Cornbread

My kids go crazy for cornbread. I have to admit, I love it too, but sometimes I crave a more grown up version.

If grown up means lots of smoky bacon and tons of cheddar cheese, I have definitely got you covered with this recipe.

Should I also tell you I am obsessed with this cast iron skillet my husband bought me for Christmas? I cannot get enough of it. I have been using it for everything and find myself craving recipes to just have the chance to use it. It is my new favorite thing in the kitchen.

Of course cornbread is the perfect excuse to use it. Especially a cornbread that has loads of bacon and cheese in it! Shall we put some jalapeños on top?

Yes we should!

(Okay, I only did half since my kids would not touch a jalapeño. I am not as much of a cornbread rebel as I was claiming to be I suppose!)

This cornbread is the perfect combination of salty and sweet and has a texture that is moist, yet crumbly. If your mouth is watering, you have a good reason to!

I am serving this with some of my favorite coleslaw and a delicious barbecue chicken recipe coming soon! The perfect summer … or anytime dinner!

Bacon Cheddar Skillet Cornbread
2 cups stone ground corn meal
2 cups whole wheat pastry flour
2 tsp salt
1/3 cup sugar
2 tbsp baking powder
2 cups buttermilk
2 eggs
1 1/2 cups butter, melted and slightly cooled
6 slices of bacon, cooked and crumbled
1 1/2 cups freshly grated cheddar cheese
jalapeños, optional
extra sugar for sprinkling, optional
honey butter, optional

Preheat oven to 425 degrees. In a large bowl, mix together corn meal, flour, salt, sugar, and baking powder. In a small bowl, whisk together eggs and buttermilk. Add the melted butter and whisk together. Add the wet ingredients to the dry and stir JUST until combined. DO NOT over mix. Fold in the bacon and the cheese and pour the very thick mixture into a 12 inch cast iron skillet. Top with jalapeños if desired. Bake at 425 degrees for 30 minutes. Check to make sure it is baked through. Take out to cool. Sprinkle sugar on top or slather with honey butter. Best if served warm, but delicious any way!

Heather

5 Comments

Appetizers Candy Desserts

Chocolate Covered Frozen Banana “Lollipops”

banana lollipop1

After a summer that has felt more like fall, this week is supposed to be a hot one! All of the complaining on social media about how cold and rainy this summer has been will now cease…and make way for the complaining about how hot it will be.

It all evens out in the end.

During this week, you might need a snack to cool off, and this one is a delicious way to beat the heat. It is a frozen treat that is not only delicious, but is a way to get some fruit in too!

Interested? Check out the FULL RECIPE on Little Lake County! Make up a batch of these, stay cool and enjoy!

Heather

Leave a Comment

Appetizers Candy Snacks

Easy Party Popcorn

party popcornIMG_0280
Who doesn’t love a good party?!

The bigger question is…who doesn’t love a good party treat?

This is my go to party snack (of course it involves popcorn), especially if I need something quick.  I love that you can just change out the colors to fit any holiday or party theme. It’s easy to make as little or as much as you want and it is a great gift.  Just put some in a cute bag with a fun ribbon and tag, and you are set. This could not be any easier! Perfect for a snack before your party gets started, or as part of your dessert bar!

Let’s just hope there is some leftover for you to snack on after the party ends!

Easy Party Popcorn
Popcorn
M&Ms
Rice chex cereal
pretzels
sprinkles
candy melts (I like to use Wiltons)

Mix popcorn, chex mix,  and pretzels in a large mixing bowl. Heat up candy melts in the microwave, start with a minute, and then do 15-30 seconds after, while stirring in between each time until melts are completely smooth and creamy.  Pour over mixture making sure everything gets coated. Spread mixture out on baking sheets lined with parchment or wax paper Sprinkle the M&Ms and sprinkles over mixture while it is still wet, gently pressing the candy into the soft candy melts, and then let it sit until completely set. Break up party mix, stick it in a bowl or party bags and serve.

What would you add to this mix to make it perfect for your party? Comment below! 

Heather

1 Comment

Salads and Dressings

Shrimp Salad with Tequila Honey Lime Dressing

I love summer, and one of my favorite summer things to do are parties and barbecues. I love being outside with family and friends, sharing great food, and wonderful company. I am usually asked to make potato salad, or my mom’s famous crab salad (recipe will post soon-you will not want to miss that one!).  However, not everyone likes rich, creamy salads, and would much rather have something light.
The good news? 
I have a great recipe that solves this problem.
If you are in the mood for something fresh and summery, this shrimp salad is my favorite. It can be served as a side dish, or a main dish. 
Looking for something to make for the fourth? Well, this is your recipe! 
Whenever I make this salad, everyone seems to ask for the recipe, so now I am sharing it with the world (or the people who read this blog-thank you!). 
The dressing calls for tequila…..yes, tequila. Need I say more? 
It is optional if you need to make it more kid friendly,  but it makes the dressing so delicious. Just call it an adult salad. Tell the kids there is spinach in it or something. They won’t want to come near it and then, there is more for you! 
The recipe calls for cooked shrimp. I roasted mine in the oven at 450 for about 10 minutes. You also could grill the shrimp (yum!), or buy cooked shrimp. The corn should be fresh off the cob and does not need to be cooked. Raw corn is so delicious, especially this time of year. 
Shrimp Salad with Tequila Honey & Lime Dressing
serves 4
1 bunch of asparagus, trimmed and cut into 2 inch pieces 
1 pound of shrimp(cooked) and cooled
1 pint of grape tomatoes halved
4 large scallions, chopped
3/4- 1 cup of fresh corn
3 tablespoons of chopped cilantro
2 tablespoons of  fresh lime juice
2 tablespoons of extra-virgin olive oil
3 teaspoons of honey
1 tablespoons of tequila(optional)
1/4-1/2 teaspoon of salt
1/4 teaspoon of pepper
Cook the asparagus in a large pot of boiling water for about 5 minutes, Drain and rinse under cool water. You may also roast the asparagus with the shrimp 450 for 5-10 minutes until crisp tender (Just let it cool slightly before adding other ingredients) next combine all other ingredients. Then whisk together lime juice, oil, tequila (optional), salt and pepper. Toss with shrimp mixture. Serve immediately or chill. 
Enjoy!

Heather

Leave a Comment

Breakfast Cookies & Bars

Blueberry Muffin Breakfast Cookies

blueberry breakfast cookies

So…I am on a cookie kick lately I guess? Does anyone mind? Anyone? Well then…

Cookies for breakfast?

Sign me up!

Isn’t it funny how if you sell the food you are serving your family just right, they will have a completely different reaction?

Try it.

“Green smoothies for breakfast!”

Silence.

“Green Monster Milkshakes!”

Kids running to the table.

“Healthy oat muffins!”

Nothing.

“Blueberry Cookies for breakfast!”

Cannot make enough to satiate crazy hungry children grabbing for cookies.

It really works.

Not to mention, you will be grabbing for this cookies too. Delicious and good for you, you will have every reason NOT to resist them! I made a double batch and popped them in the freezer too. Perfect for breakfast on the go. Let them thaw out the night before or pop them in the microwave right before breakfast. They really taste like an oatmeal cookie, bursting with blueberries!

I mean, as parents, sometimes we have to get a little creative, right? The kids don’t have to know that these cookies are packed with whole wheat flour, blueberries and apple sauce, and chia seeds and toasted almonds. Let them eat their cookies in peace!

Blueberry Muffin Breakfast Cookies

2/3 cup coconut oil, melted
1 cup coconut sugar (or brown sugar if you do not keep coconut sugar in the house)
1/2 cup unsweetened apple sauce
2 eggs
2 tsp vanilla
1 1/2 cup whole wheat pastry flour
1 tsp baking soda
1 tsp baking powder
1 tsp cinnamon
1/2 tsp salt
2 tblsp chia seeds
3 cups rolled oats (not quick oats!)
1/2 cup sliced almonds, toasted
1 1/2 cup fresh blueberries

Preheat oven to 350 degrees and line a large cookie sheet with parchment paper. In a large bowl, add coconut oil and coconut sugar. Beat on low with a hand mixer until smooth and creamy. Add eggs, vanilla and apple sauce, blend on medium speed until combined. In a small bowl, whisk together flour, baking soda and powder, cinnamon and salt. Add to wet mixture and mix on low until dry ingredients are incorporated. Stir in chia seeds. Add oats. Mix until everything comes together. Fold in blueberries and toasted almonds*. Scoop with a cookie scoop or heaping tablespoon onto cookie sheet. Bake for 10 minutes or until fully baked and golden brown. Let cool on sheet for 2 minutes and then transfer to a wire rack to continue cooling. Serve immediately, or, store in a sealed container at room temperature for one day (cookies will be much softer when stored at room temperature). Store in refrigerator for 1 week, or freeze in an airtight container for 3 weeks.

blueberry breakfast2

Heather

Leave a Comment

Christmas Cookies & Bars

Browned Butter Peanut Butter Oatmeal Chocolate Chip Cookies

brown butter cookie

Wow! Can I trash up these cookies anymore?

I am pretty sure that I just combined about four different types of cookies and created one! These just might be the cookies of your dreams. Just sayin’.

The browned butter gives these cookies a warm, nutty flavor. The oatmeal makes it a hearty cookie and the chocolate and peanut butter just bring it over the top. There is the little extra step of browning the butter, but other than that, these are just as easy as any other cookie recipe you have ever made.

These excessive rainy days are giving me no choice but to bake cookies. If the weather would ever be nicer, maybe I would have a taste for asparagus or broccoli or something. Unfortunately, rain + thunder + kids home = COOKIES.

I can’t help it.

I know you appreciate me.

You’re welcome. 😉

brown butter 3

Browned Butter Peanut Butter Oatmeal Chocolate Chip Cookies

1 stick + 2 tblsp butter, browned*
1/3 cup creamy natural peanut butter
1 large egg + 1 large egg yolk (discard or save the white)
1 cup brown sugar, packed
2 tsp vanilla extract
1 cup rolled oats (not quick oats)
1 1/4 cup whole wheat pastry flour
1/2 tsp baking soda
1/4 tsp baking powder
1/2 tsp salt
1 cup bittersweet or semi-sweet chocolate chips

*In a medium saucepan, place stick and tablespoon of butter. Heat on low heat until butter is lightly golden and gives off a nutty aroma. Remove from heat immediately before it burns. Set aside to cool just slightly.

In large bowl, combine warm butter and peanut butter and mix with a hand mixer on low until smooth and creamy. Add sugars and continue mixing. Add eggs and vanilla and mix until combined. Stir in oats gently. In another bowl, whisk together flour, baking soda and powder and salt. Add this to the wet ingredients and mix on low until just combined. Do not over mix. Add chocolate chips and stir. Chill in refrigerator for 30 minutes. Line a baking sheet with parchment paper and preheat oven to 350 degrees. Scoop cookie dough out in heaping tablespoons or with a cookie scoop. Place on the cookie sheet making sure to evenly space then apart. Bake for 11 minutes. Cool on cookie sheet for 1 minute. Transfer to wire rack so they continue cooling.

It will be hard not to eat them all while warm!

brown butter2


Heather

Leave a Comment

Fourth of July

American Flag Pallet Art


The 4th of July is one of my favorite holidays. It also happens to be my birthday. When I was little I told my mom how nice it was of everyone to celebrate my birthday and to do fireworks. Apparently everything is about you when you’re five. Over the years, I learned it wasn’t all about me and it was about our beautiful country becoming independent! I am truly grateful to live in this country where freedoms exist to bless us and allow us to pursue our dreams for ourselves and our families.
In honor of the 4th coming up, I wanted to make a craft/piece of art that would display my patriotism and loyalty to our country. What better way than through a flag! I saw this flag created before, but had to try it out myself. It was fast and fun, and is now a beautiful addition to my front porch.

Materials:

-Pallet of wood (I used an older pallet with discoloration and knots. Since I have men working on our house I asked that they just leave it since they were going to throw it away. It worked great, but you could easily use a brand new one.)

-Paint/paint brushes (The exterior of my house just got painted a beautiful navy blue, so I had about 12 samples of blue to pick from and used a Sherwin Williams color called Naval and just some red and white acrylic craft paint I had already from previous crafting.)

-Painter’s tape

-Star stencil or dye cut out

-Gel stain (if antiquing)

-Sand paper (again, if antiquing) I used 100 grit because my wood was pretty hard and I wanted to really give it a distressed look.

Instructions:

Step 1: Clean your pallet if its old or dirty. I just hosed mine off and let it dry in the sun. I wanted to make sure my paint would stick without any dirt getting in the paint.

Step 2: Tape off the area you would like blue and paint it. If you’re going for an antiqued look like mine, don’t worry about painting it perfectly or too thick. A little wood grain is nice to see. The paint could even be watered down a little to give it more of a whitewash look.

Step 3: Let the blue dry then place a strip of paint over the blue edge and get to painting your white and red strips.

Step 4: Add your stars! I used my Cricut to cut out my stars using cardstock to make a stencil. You can buy a stencil or simply cut out stars from a clipart print out. There are hundreds of star images on clipart online.

When painting your starts try to have a pretty dry brush so that you don’t get huge blobs of paint seeping under your stencil. I did two light coats so that I could avoid the nasty blobs! You could also use a sponge brush here. whatever you have on hand.

Now that your stars are done, you can stop with your beautiful project right here or you can continue on by adding a favorite patriotic phrase along with some gel stain and sanding for an antiqued look.

Step 5: Add your favorite patriotic phrase.

So, I’m not going to lie, this was the most time consuming part of the project. Of course I had to choose the longest quote ever and of course I was stuck with an outdated version of Microsoft Word that was a beast to work with. The good news is, I prevailed and no computers were harmed in the process. I saw this adorable piece of art work on Pinterest, which can be found at kohls for $144.99 and immediately wanted to put the quote from the Declaration of Independence on my pallet (but seriously, who wants to spend $144.99  when they could spend nothing!?)

 I followed this tutorial for my letters. I’ll be honest….it was a little bit of a trial to figure out how wet you needed the paper to be in order for the transfer to occur. Once I got that down it was great. It worked wonderfully on the white paint, but not as great on the red. So after I was done rubbing and wetting the paper I made a watercolor/inkwash out of some black and cream acrylic paint but mixing them with some water and then painted this over where I felt I wanted the letters a little darker. This was not a big deal for me because I love to paint, but if you are using this technique and don’t like to paint either only do it on the white, do a smaller quote, or just be happy with the antiqued look you get with the faded letters. If you choose not to use this technique you can always freehand paint your quote on or use a stecil/dye cutting machine. Here are some pictures of me doing the process:

After I printed off my mirrored version of my quote which I ended up printing from Microsoft Publisher, I cut and taped them together to fit nicely on my pallet. I will say nothing helps a project like some good jams. I personally love a little Andrew Belle and Mat Kearney.

Here are my words laid out ready to be wet and rubbed off with a sharpie marker lid.

  
This picture shows the rubbing, but the actual paper was a little wet. I’m telling you, this is an awesome technique, it just takes some practice. It wouldn’t be a bad idea to do a trial run on a small piece of scrap wood just to get the feel of it. 
 
See the white? Doesn’t it look incredible?! Again, the issue I had here was I wanted it to look antiqued, but I also wanted everyone that walked up my front porch to see the words as well. I took black and cream paint at this point to give me a browner black color, and then mixed it gradually with water to thin the paint out like a watercolor making sure my brush was not too damp so that my letters didn’t get too dark or uneven. 
Remember, start with less and if you want to add more you can always do another little coat. After I got done with the letters I started to distress my pallet with some 100 grit sandpaper and gel stain that I found at Hobby Lobby. I really roughed it up with the sand paper. My wood was very hard so I had to use a less fine grit than I thought I would need.

Paint on the gel stain and then rub it into the wood taking the excess off. It leaves a brown antiqued look on the wood. Alternate doing this with and sanding to get the look you want. After you’re all done, if your pallet is going to be in the weather at all be sure and spray some poly acrylic on it. Say no to poly urethane! It will yellow the white. 🙁
Drum roll please…..

I was very pleased with the finished product and even more pleased with the price! Our painter came by today to touch up some things on the exterior of our house and said “Wow is that the crate I left you? That looks like something you would find at Pottery Barn.” That’s mission accomplished in my book.


I chose to use some inspiring words from the Declaration of Independence but you could paint on “God Bless America” or the Pledge of allegiance. You could just leave it at the flag without any words. The choice is yours. Let us know what you did with your American Flag Pallet Art project. You can also share why you’re grateful to live in this beautiful country.

Happy Crafting!

Heather

Leave a Comment

  • « Previous Page
  • 1
  • …
  • 8
  • 9
  • 10
  • 11
  • 12
  • …
  • 38
  • Next Page »

Heather

I am a midwestern girl who grew up in the big city, but now enjoys her days as a stay at home mom in the suburbs. Who says spending time in the kitchen has to be boring? I hope to inspire your family kitchen with some new ideas, fun recipes and great tips.

Stay Up to Date

Get all the latest tasty goodness straight to your inbox!

Girl and her Kitchen

Join us!

Hey! I am the GIRL in the kitchen and I am so glad you decided to visit. Love to cook and eat? You will find some great recipes on this site, whether you are looking to eat healthy, splurge on a dessert, make dinner or host a party-I have it all! Sometimes I’ll give you a story along with my recipe, other times, I want to take you straight to the food!  Whatever the reason that you decided to visit, I am so glad you joined me in the kitchen! Feel free to take a look around the site, and please…stay awhile!

Archives

Popular Categories

  • Appetizers
  • Breakfast
  • Crafts
  • Salads and Dressings
  • Side Dishes
  • Vegetables and Fruit

Most Popular Posts

Corner Bakery Cafe Giveaway!

Corner Bakery Cafe Giveaway!

Filed Under: Reviews

Bacon Cheddar Skillet Cornbread

Bacon Cheddar Skillet Cornbread

Filed Under: Breads, Quick Breads and Rolls, Side Dishes

Puffy Pancakes {Perfect for Valentine’s Day!}

Puffy Pancakes {Perfect for Valentine’s Day!}

Filed Under: Breakfast, Valentine's Day

100 Days of Real Food Cookbook Review {and Giveaway!}

100 Days of Real Food Cookbook Review {and Giveaway!}

Filed Under: Vegetarian

Copyright © 2026 · Divine theme by Restored 316