• Email
    • Facebook
    • Instagram
    • Pinterest
    • Twitter

Girl and Her Kitchen

Plan. Make. Eat. Design. Craft. Create. Celebrate. Life.

  • Home
  • About the Girl
  • Recipe Index
  • We LOVE
  • Weekly Menu

Uncategorized

Margarita Fruit Dip

I love entertaining and some of my favorite dinner menus includes anything Mexican. I entertained the other evening and I prepared these delicious Tomatillo Shrimp Enchiladas for our friends (tacos for the kids!). They were really good and I was even lucky enough to have my friend Jill bring dessert. Jill is always the friend that has the most creative recipes. Honestly, I have probably said this before, but if you go to eat at her house, you come out of there wanting the recipe for everything she made! She knew that I was making Mexican food so she decided to keep with the theme.
Do I have the greatest friends or what? They just know me so well! 🙂
She made this delicious banana cream cake and brought some fresh fruit. With the fruit, she made this wonderfully creamy, tangy dip called Margarita Dip. (See the theme here…:)
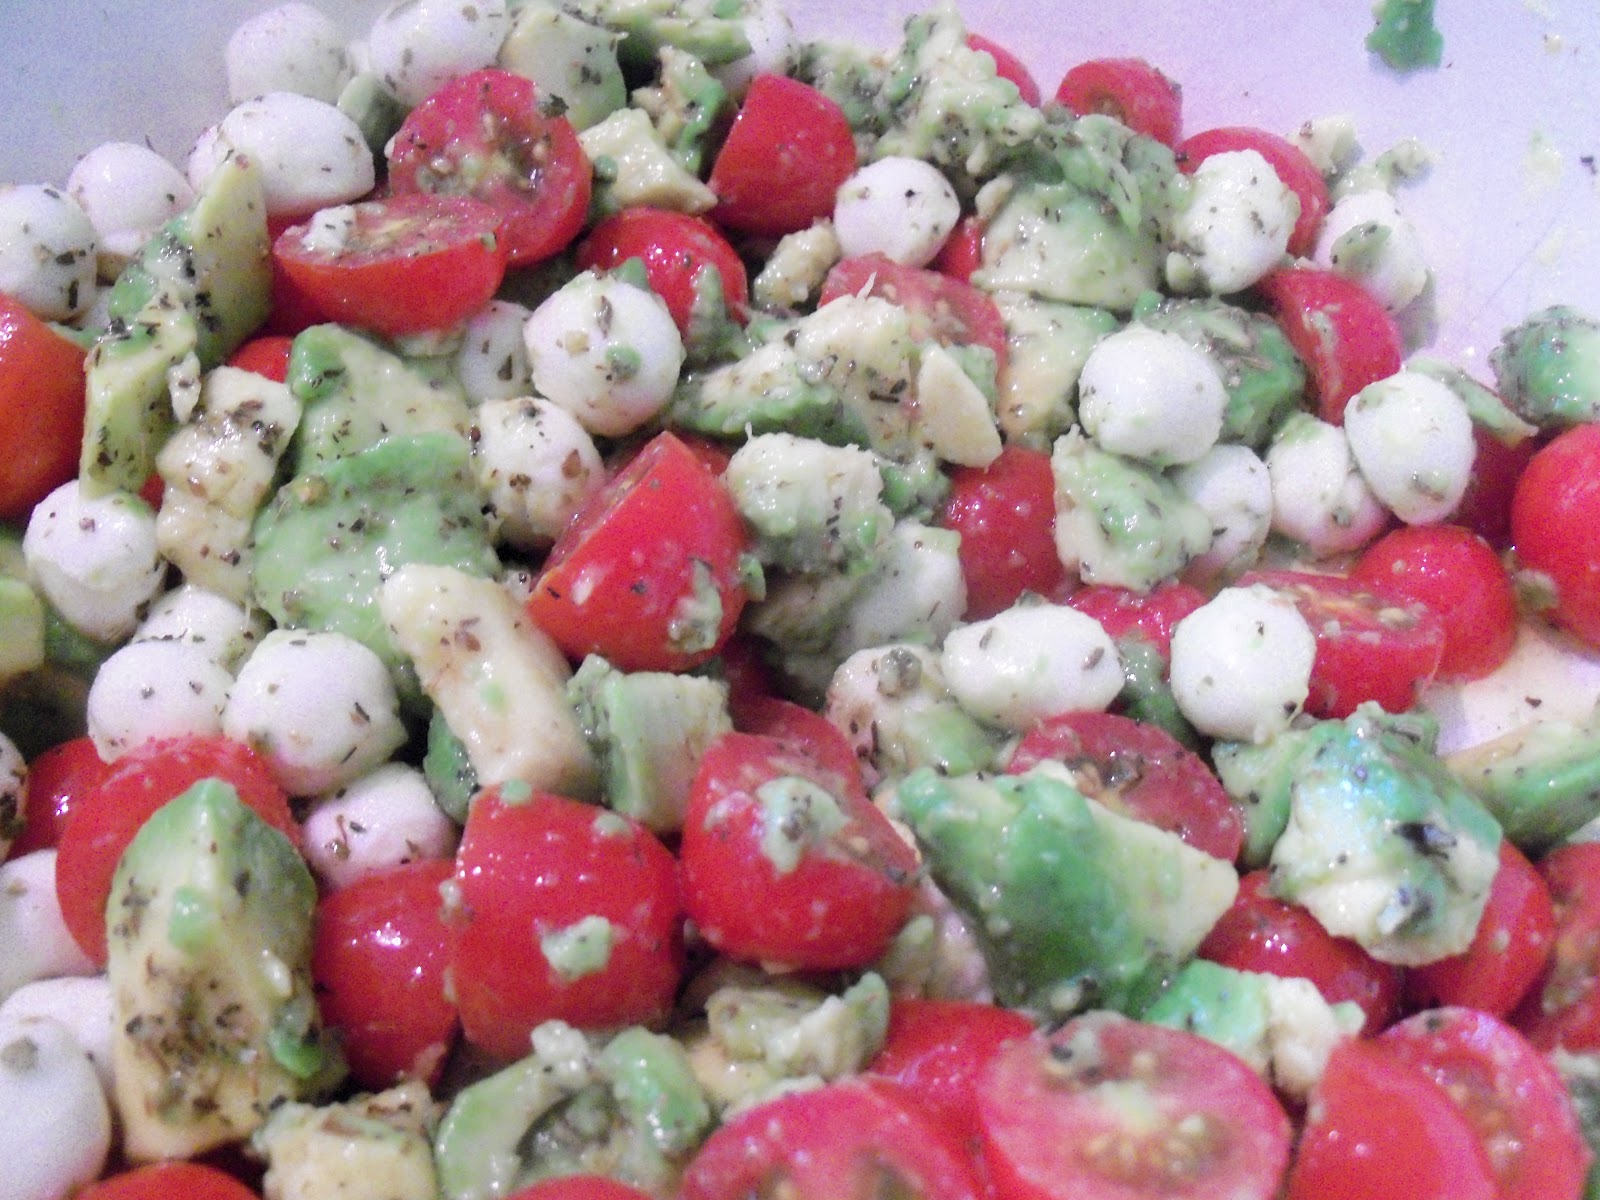
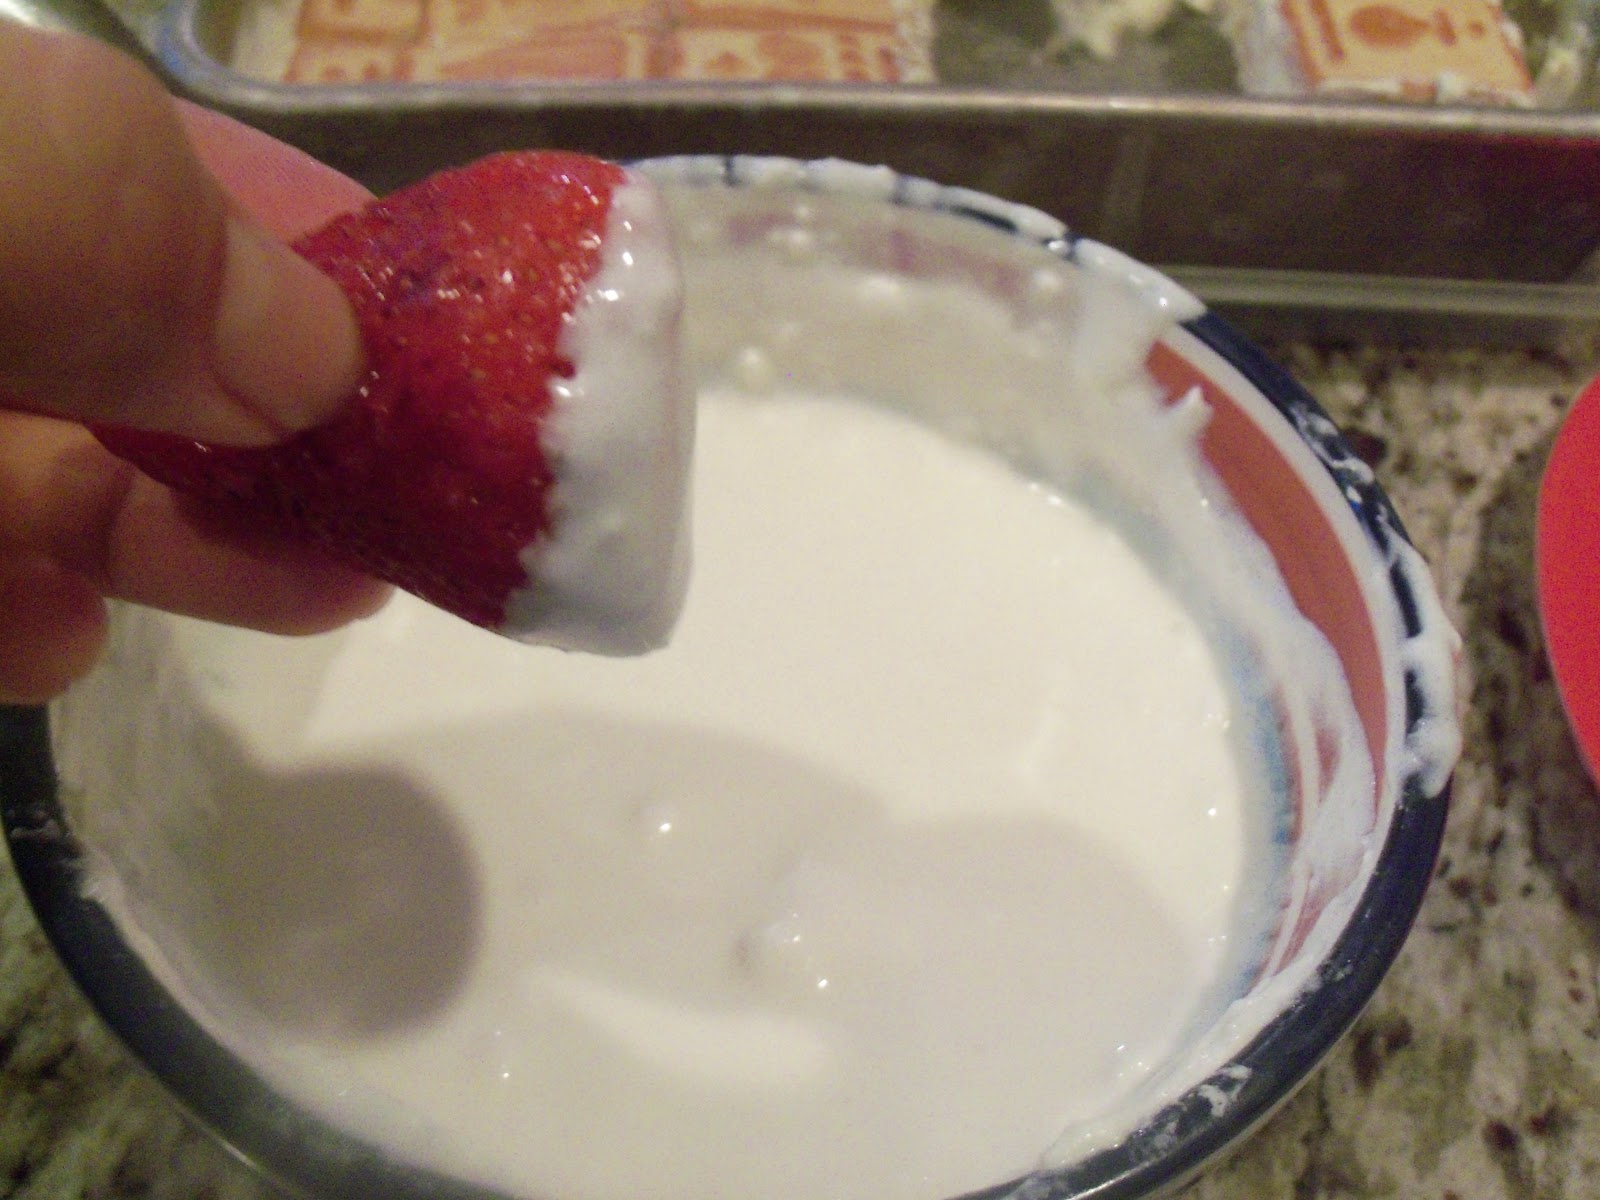
It really tasted like a margarita-how could you go wrong with that?-but it was family friendly, containing no alcohol at all. It was delicious and perfect for spring and summer entertaining. With the delicious array of fruit she brought, dipped in this dip, you just couldn’t get enough.
If you are looking for something fresh and different to entertain or just for a healthy snack or dessert on a hot summer day-this is the recipe for you! Thanks Jill-this one is a keeper!
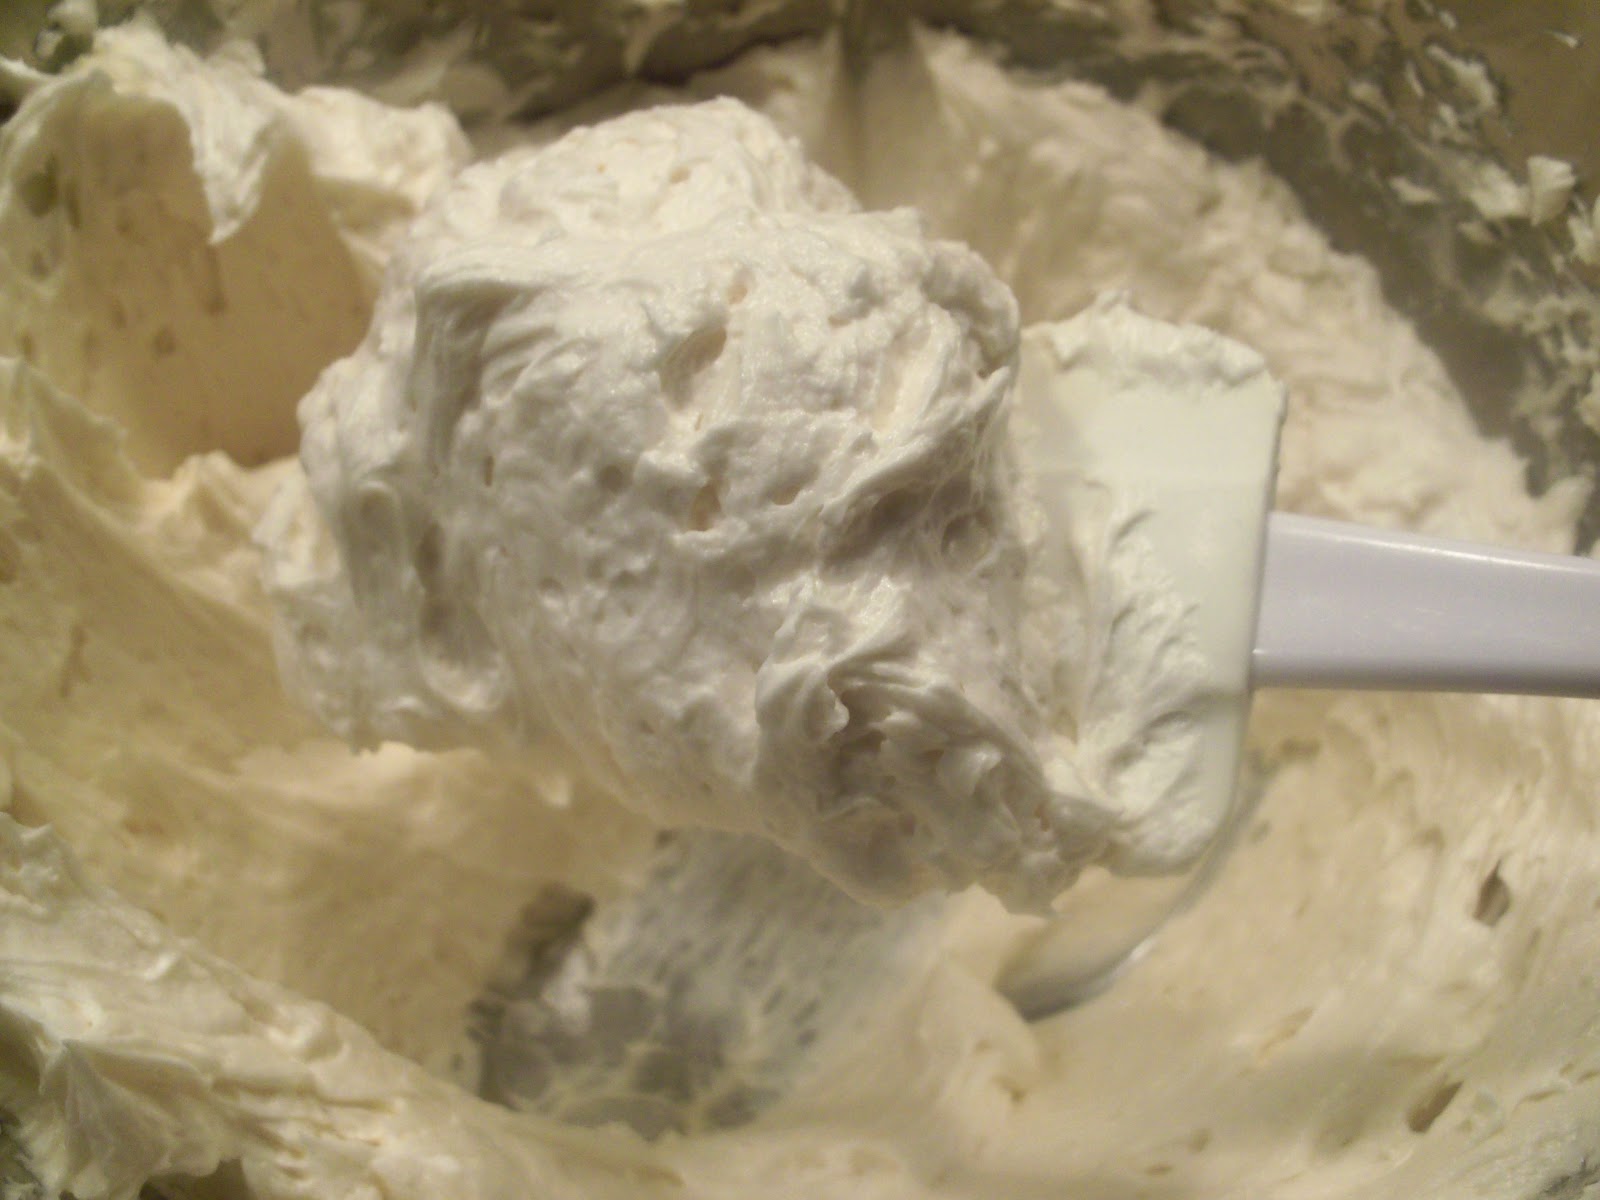
Margarita Fruit Dip

1 pkg. 8 oz cream cheese, softened
1/4 cup frozen limeade concentrate, partially thawed
2 tblsp orange juice
1/2 cup thawed cool whip

Beat cream cheese, limeade and orange juice in a medium bowl with an electric mixer on medium speed until well blended and smooth. Gently stir in cool whip. Cover and chill for at least an hour. Serve with fresh fruit. Fun tip: serve it in a margarita glass! 🙂

Heather

Leave a Comment

Casseroles Main Dishes Pasta

Stovetop Macaroni and Cheese

Oh wow. Something really disturbing happened today.
I found my first gray hair.
It is true.
This is bad. Really, really bad.
You know what this means?
I have to spend more money getting my hair highlighted more often….or some would say…I am getting old.

The weirdest thing about this gray hair thing is that it wasn’t just laying on my head, quietly announcing its arrival. It was sticking up in a sort of…strange…zig zag pattern. I mean, really? Is this how the gray hairs are going to enter into my existence? In a short time will I have a head full of gray zig zaggy hairs?
This thought was starting to really horrify me.
So, I thought of something to make me feel better.
Mac and cheese.
And, no, not the kids kind that comes in a blue box that always seems a little more orange than normal cheese should be, the kind that is creamy and melty and flavorful. In other words, grown up mac and cheese. But guess what? The kids still love it!
The perfect antidote for weird hair troubles that make you wonder….or just an easy and delicious dinner that goes perfect with some grilled Buttermilk Rosemary Chicken and steamed veggies.

Stovetop Macaroni and Cheese

4 tblsp butter
3 tblsp flour
1 1/2 cup skim milk
1 cup whole milk
1 tsp salt
1/2 tsp pepper
2 tsp dried thyme
2 cups shredded sharp cheddar (I used 2% milk light cheese)
4 1/2  cups cooked pasta (recommended shells, rotini or elbows)

In a large saucepan begin to melt butter at a medium heat. As it is melting, sprinkle in flour and whisk until a paste is formed. Slowly add in milk while whisking continuously until it is smooth and creamy. Turn up heat and cook until just before it starts to boil. Turn heat down to medium. Add salt, pepper and thyme. Add in cheese slowly, stirring until cheese is completely melted and sauce is thick, rich and smooth about 5 minutes. Add hot cooked pasta, stirring to coat pasta completely with cheese sauce. Continue cooking until heated through, 3-5 minutes.

*This recipe makes a lot but can be cut in half easily. I like making a big batch so the leftovers can be for my kids’ lunches for a few days! :)*

Heather

Leave a Comment

Uncategorized

Lunch with Friends-Worthy Chicken Salad

Okay, we all have time to lunch with friends all the time right?

Riiiight….
But, if you happen to be in the position where you can invite some girlfriends over for lunch, I have the perfect recipe for you.
Back when the kids were much younger and we weren’t running from place to place with activities, I would love going over to my friend Tina’s house for a playdate and lunch. She always had some delicious goodies for us to eat while the kids played, but one of my favorites was her chicken salad. I loved it!! I think what made it even better was the fact that she would serve it alongside croissants. I mean, what could be better than a creamy, chunky chicken salad on top of a bread that is made primarily out of butter? Not much I tell you, not much.
This chicken salad is the perfect mix of tender chicken, creamy mayo, a few sweet surprises and a little bit of crunch. I changed it a little through the years, adding this and adding that, but in essence, it is still the same chicken salad that I shared with one of my best friends. Enjoying lunch, enjoying conversation, and enjoying being with a great friend. Does it get any better?

Lunch with Friends-Worthy Chicken Salad

2 cups cooked, white meat chicken, cut into chunks (I use a rotisserie chicken)
1/2 cup red grapes, sliced
1/2 cup pecan halves, crumbled
1/4 cup dried cranberries
1/4-1/2 cup mayo (I use light mayo and only use 1/4 cup-try that first, adding a little more if needed)
2 tblsp sour cream
2 tsp dried minced onion
1/2 tsp Salt
1/4 tsp Pepper

Place chicken, grapes, pecans, and cranberries in medium bowl. In small bowl, mix mayo, sour cream, minced onion, salt and pepper. Pour mayo mixture over chicken mixture and stir. Add more mayo if necessary. Refrigerate 1 hour . Serve over salad greens, or with fresh bread.

Heather

Leave a Comment

Uncategorized

Thank you!

I just wanted to take the time to say thank you to all of you who have supported me on my blogging adventure these past few months. I am having so much fun and I cannot wait to continue sharing my recipes and stories with all of you. I really appreciate you checking out my site, taking time to comment and liking my facebook page. Please feel free to comment on my blog directly or on my facebook page at any time! I love hearing from you! Thank you again and I hope you continue to check Girl and her Kitchen for great recipes, fun ideas and some stories that hopefully make you smile!
See you Monday with a new recipe!

Heather

Leave a Comment

Uncategorized

Strawberry Rhubarb Crisp

Last year on Mother’s Day, my mom gave me the sweetest gift…literally.
I love love love getting new serving dishes and decorative platters for all the food I make.
I know, I am hopeless.
Anyways, my mom is really great at finding really cute stuff and last year she handed me this pretty white dish, with a strawberry rhubarb crisp baked inside. The dish she gave me was so nice, but the strawberry rhubarb crisp…even better!
I love rhubarb. My mom used to bake a rhubarb apple pie when we were kids that I LOVED. Maybe there were strawberries in there too? I don’t remember, but I do remember that was when my love affair with rhubarb begun. It is my favorite dessert ingredient.
Ok, I lie.
Chocolate is my favorite, but rhubarb is a very close second.
 As soon as it starts appearing on the store shelves, I am buying it.
This crisp was so good. Sweet, tart and crunchy. I topped it with vanilla frozen yogurt, but whipped cream or ice cream would be good too. It was almost gone after my family had dessert the night I made it, but I did store the leftover in the fridge and heated it up for my daughter two days later and it was still good….well she said it was (don’t tell her I took a bite!).

Strawberry Rhubarb Crisp

Topping:
2 cups old fashioned oats
1/2 cup brown sugar
1 tsp cinnamon
1 stick butter, melted

Filling:
4 cups rhubarb, diced
4 cups strawberries, hulled, and sliced
1/2 cup sugar
2 tblsp orange juice
1 tbsp corn starch

Preheat the oven to 350 degrees. In a bowl, mix together oats, brown sugar, and cinnamon. Drizzle melted butter over oat mixture and stir until well coated. Set aside.
In another bowl, mix rhubarb, strawberries and sugar. In a smaller bowl, combine juice and cornstarch until blended. Pour over strawberry mixture and toss well. Pour mixture into an 8×8 baking dish. Top evenly with oatmeal mixture.. Bake for 45 minutes until the fruit is bubbling and the topping is golden brown. Serve warm with ice cream or whipped cream.

Heather

Leave a Comment

Uncategorized

Green Chile Chicken Burgers

Ok, so the funniest thing about this recipe is that my kids, for a long period of time in the afternoon, thought we were having Green CHICKEN chile burgers. They swore that I said it. I denied it.
Truth?
I probably did.
It sounds exactly like what a sleep deprived (totally my own fault–cannot gain sympathy for it by saying “my kids were up all night” , etc, etc. Nope. I really stayed up until almost 1 am watching my DVR’d episodes of The Voice. Seriously pathetic right?), hungry, mother who was trying to get dinner on the table would say while jumbling over her words answering for the thousandth time the ever so fun question, “What are we having for dinner?”
Green CHICKEN Chile burgers, alright kids? How does that sound??
Well, needless to say, they were seriously acting really odd until I put the burger in front of them and my oldest actually breathed an immense sigh of relief.
“It’s normal!” she exclaimed with more delight that I would have expected for a burger that didn’t have her usual ketchup and mayo combo. “It’s not green!”
And that is when the misunderstanding came full circle and we had a laugh about it,  and I was left wondering what they were actually thinking I was going to serve them for dinner? Wow. They really don’t expect a lot from me if they quietly accepted that I was going to serve them green chicken for dinner.
Despite the misunderstanding with my children, these burgers deserve some mentioning.
Wow, is all I can say.
I was skeptical at first as well wondering what was in store for us.
They were soooo good!
Like really good.
As in, I want to eat two burgers but I really cannot do that, good.
Speaking of, why is it that guys get that metabolism that they can actually brag to their friends about how many burgers they can eat and everyone thinks it is awesome?
So not fair.
Anyways, this burger was so delicous and flavorful and the green chile sauce on the top really just put me over the moon. The kids LOVED the burgers. They wouldn’t try the green chile sauce (well my little guy did, and liked it, but the girls just turned up their noses)  but I think it was more because of the way it looked (green) more than because of the way it tasted. I piled it on high on my burger (don’t judge, it’s vegetables, right?) and it was sweet and tangy and a perfect complement to the juicy burger. I used whole wheat buns and toasted them, but any bun would do fine and toasting is optional of course. Guacomole is optional for these burgers and I am sure the burgers topped with this would have been really good too, but honestly, I didn’t even need it. They were so good with just the chile sauce, I didn’t want to take away from that.
 We served this burger with crunchy red, orange and yellow pepper strips and homemade tortilla chips and fresh salsa. It was a great dinner and my kids will vouch for that. I think that they would have eaten anything at that point though as long as it wasn’t green chicken.
Give these a try. You may start to forgo your usual cheeseburger in favor of this one! 🙂

Note: The recipe I adapted this from said it makes four burgers but I made six good sized ones out of this. I think if you are looking for a big burger, four would be accurate. Size them the way you want that fits your family and enjoy!

Green Chile Chicken Burgers

Burgers:
1 lb ground chicken breast
1 tblsp olive oil (if you are using regular ground chicken, you can omit this)
1/2 tsp salt
1/2 tsp pepper
1/2 tsp cumin
1/4 tsp onion powder
2 garlic cloves, minced
2 – 4 oz cans of diced green chiles ( I used mild, but choose whatever is right for your family and tastes)
3 oz of monterey jack cheese cut into very small cubes
Cooking spray for pan
1 tblsp honey
1/2 tblsp lime juice
Monterey Jack for topping burgers
6 buns, sliced, toasted
Avocado slices or guacomole (optional)

Combine chicken, olive oil, salt, pepper, cumin, onion powder, garlic and 1/2 can of green chiles. Add cheese cubes and mix. Form into six equal patties. Coat skillet or grill pan with cooking spray. Cook burgers on one side until lightly browned and cooked through, about 3-4 minutes. Flip over and top cooked side with extra monterey jack cheese so cheese can melt while cooking other side. Cook burgers on other side 3-4 minutes or until completely cooked through. While burgers are cooking, mix the rest of the chiles, honey and lime juice. Serve burgers on toasted buns and top with chile sauce and guacomole if desired.

Recipe adapted from How Sweet It is

Heather

Leave a Comment

Uncategorized

Orange Blueberry Scones {Plus Some Mother’s Day Brunch Ideas!}

A very special day is approaching.
Happy Mother’s Day to all you moms out there!
I am not only thinking of this day because I am a mom…. I am thinking of this day because I have a mom.

It’s funny when I write on this blog, I am always thinking of my mom. Why? Well, without her, there would be no blog. She is the one that inspired me to cook, to bake, to put homemade food on the table for my family, to bond over food and to make every occasion special, no matter what.
My mom and I love to plan holiday menus, talk about new recipes and then try them out. Of course tasting is always fun too! The thing is, without my mom, cooking might not be such a big part of my life.
Although, I have to say, that is one of the many things my mother taught me.
My mom taught me to be honest, no matter what. She taught me to make new friends, and value them like family. She encouraged me to stay home with my kids when my first child was born, and reassured me that it would get better when I couldn’t believe how lonely I felt with only a newborn baby for company.
She never judges me, even when I know she has a different idea of how she as a mother might handle a situation. She is always there to listen, to support and to encourage.
Ooops— how could I forget that she taught me to make a very organized shopping list, plan my weekly meals and grocery shop only once a week? Oh and I also cannot forget the incredible spaghetti sauce recipe she taught and passed down. Mmmmm…..
How did I get so lucky?
This mother’s day, make something special for mom. Sure, we could all go out and buy flowers or chocolates, but this year, do something for her. Invite her over for brunch or a home cooked meal. Cook together, try something new, and bond over sharing a meal together.
Of course, going out to eat and leaving the husbands and kids at home is always fun too.
And, there is always good food there too….and less cleanup……. 🙂
Ah…decisions, decisions….
Just make sure to tell mom you love her. She deserves it.
Check out these delicious scones if you are making a brunch or just a light snack before heading out to enjoy a meal cooked by someone else. 🙂
{Check out other delicious brunch/breakfast recipes at the end of this recipe!}

Blueberry Scones
2 cups all-purpose flour
1/2 cups sugar
1 tblsp baking powder
1 tsp salt
1 tblsp grated orange zest
1 stick cold unsalted butter, grated
1 large egg, beaten
1/2 cup heavy cream
1 cup fresh blueberries
Heavy Cream for brushing the top
Sugar for sprinkling
In a bowl, mix flour, sugar, baking powder, salt and orange zest. Using a mixer, lightly mix and add butter slowly. Add egg and heavy cream and mix on low until just blended. Dough will be lumpy. Stir in blueberries and mix until blueberries are embedded into the dough.
Take the dough out of the mixing bowl and place on a flat, well floured surface. Form into a large ball, then flatten out, shaping the dough into a square about 3/4 inch thick. Lightly sprinkle a pizza cutter with flour. Cut dough into fourths, and then into eighths, making triangles. Brush the tops with heavy cream and sprinkle with sugar. Place scones on a baking sheet lined with parchment paper. Bake at 400 degrees for 20-25 minutes. Let scones cool and serve with butter and jam. Spread some of  my Homemade Fresh Strawberry Jam on top. You will not be disappointed! 
Does this look good? I have more where that came from! Try out some other brunch/breakfast recipes too:
Overnight Cinnamon Rolls
Hunger Games Bread
Quinoa Muffins
Family Favorite Egg Casserole
Overnight Crockpot Oatmeal
Honey Lime Fruit Salad
Classic Banana Bread
Heirloom Tomato and Goat Cheese Tart 
Want some awesome craft ideas for Mother’s Day? Check out a fabulous site with so many great ideas for Mother’s Day, and so much more! I am sure you will love it!
www.thecraftingchicks.com

 HAPPY MOTHER’S DAY!!!
Here is hoping you are all treated like gold by your family and friends on this day…and every day…you deserve it!

Heather

Leave a Comment

Crockpot Uncategorized

Crockpot Honey Sesame Chicken over Rice

I probably say this every time I post a crockpot recipe, but I love the crockpot! Seriously…it is my best friend some days.I never really used as much as I do now that I have kids.
Like the other day, when my daughter came home not feeling good, but I had to shuttle kids to various activities after school, and then make a late doctor appointment and my husband was not going to be home until too late to help, and….
Well, I think you get the picture. After all that, we came home to dinner already made. It was amazing. The house smelled good, dinner was on the table in about fifteen minutes and I had happy kids.
This one is good too because it is really a different taste. Sweet and tangy chicken complemented by the slight crunch of  toasted sesame seeds sprinkled on the top. It was a hit with the family. I steamed some crisp snow peas to go along with that and…dinner was served.

Crockpot Honey Sesame Chicken Over Rice

4- 6 oz boneless, skinless chicken breasts
Salt and pepper
1/2 cup chopped onion
1 cup honey
1/2 cup soy sauce
1/4 cup ketchup
2 tablespoons canola oil
2 cloves garlic, minced
2 tblsp cornstarch dissolved in 1/3 cup water
2 tblsp toasted Sesame seeds
2 cups cooked brown rice

Salt and pepper chicken breasts on both sides and place in bottom of crockpot.Sprinkle onions on top of chicken. In a small bowl, combine honey, soy sauce, ketchup, oil, and garlic. Whisk until combined and pour over chicken and onions.
Cook 4 hours on high. Remove chicken from crockpot. Whisk together cornstarch and water. Pour into sauce, cover and cook for 10 minutes. (NOTE: This is when I start steaming my peapods, have my kids set the table, lightly toast the sesame seeds in the oven-350 degrees for 5 minutes- and put a package of Uncle Bens 90 second brown rice in the microwave!) Shred chicken. Return to crockpot and mix with sauce. Sprinkle in toasted sesame seeds. Serve over brown rice.

Heather

Leave a Comment

Uncategorized

Old Fashioned Frosting

Alright….disclaimer!!!
What you are about to see is NOT considered health food. It is a decadent, delicious treat, I can promise you that, but health food it is not.
I am laughing because I just heared about the lady that sued Nutella because she was giving the hazelnut chocolate spread to her kids and she thought -because of their advertising she claims-that it was a health food. Crazy town we live in these days I tell you! The weirdest part? She won millions from Nutella.
Crazy town.
So with that little current events news story I just provided you (see what you get from reading my blog? Recipes AND current events. Well, current evenT 🙂 I will get on with the recipe.
My recipe for one of the most delicious things I have made in recent weeks. This is seriously one of those recipes where I almost consider NOT giving it away.
Almost.
But I will, because I have to share this. It is really something that should be shared.
I am sure that I have said before that I am not really a frosting girl. I have a feeling you are going to stop believing me about that little fact each time I post a new frosting recipe. I think it was last time with my Perfectly Creamy Cream Cheese Frosting recipe that I gave this same song and dance about not liking frosting.
It really is true though. I usually take the frosting off my cake, but with this frosting, just like the cream cheese one, instead of scraping it away, you will be left wanting more..
Buttery and lightly sweet, this frosting is the best I have ever tasted. It is the way frosting used to be made before they started adding all that extra junk to it. NOT that I am saying that this one is a health food by any means (just reiterating my disclaimer from above!) but it does not have all the chemicals and additives you will get from the store bought kind. Just pure goodness. I do believe that is a direct quote from my husband’s mouth.A mouth that was surely filled with this delicious frosting.
I will let you be the judge.

Old Fashioned Frosting

1 1/2 cups sugar
1/4 cup all-purpose flour
3 tablespoons cornstarch
1/4 teaspoon salt
1 1/2 cups milk
2 teaspoons pure vanilla extract
3 sticks butter, cut into 24 pieces, softened to room temperature

NOTE: This frosting takes a bit of planning so read the entire recipe before starting so you leave yourself enough time to follow the directions as carefully as possible for best results.

In a bowl, combine the sugar, flour, cornstarch and salt. Slowly whisk in the milk until the mixture is smooth. Pour into a saucepan and cook over medium heat whisking the entire time until mixture becomes so thick that it is almost stiff and not able to be whisked. Turn off heat. This might take anywhere from 5-8 minutes so whisk constantly and watch it carefully.
Transfer the mixture to a bowl and let it cool completely. This is extremely important. The mixture must be completely cooled. Do not refrigerate it to cool because the butter will not beat into it properly. If you are in a hurry and must cool it in the fridge, take it out and let it get to room temperature again before adding butter.
Add the vanilla to the completely cooled mixture and beat on medium speed until completely combined. Add the butter, one piece at a time and beat well. Once all the butter is added, beat on low for five minutes until it is light and fluffy.
Spread on your favorite prepared cake or cupcake recipe. If you need to pipe it, refrigerate for 30 minutes so frosting becomes more stiff and easier to pipe.

Heather

Leave a Comment

Uncategorized

Avocado Salad

This is so one of those recipes that just screams summer.
You know what I am talking about.
Fresh vegetables, lots of flavor and goes almost perfectly with anything you pull off the grill. I made this tonight with lemon herb grilled chicken, but it would have gone nicely with a marinated flank steak or some honey mustard salmon pulled right off the grill as well.
Can you tell that I am ready for grilling season? I must reference it at least once in almost every post! Just wait until summer grilling starts….but then I guess you will start hearing about my desire for hearty stews and soups that fall brings. Ahh…the grass is always greener, right? 
Some nights I am just looking for something quick to make, but healthy as well. It always seems like all of the convenience foods, that are fast and easy to throw together for dinner, are so completely unhealthy. I learned to avoid all of those things so long ago. It is almost just as easy to throw together something healthy for the family with just a little planning. 
I love salads like this. Quick to make and something my whole family loved. I think my little guy honestly ate almost all of the avocado out of the bowl!
Remember though, this salad does need to be consumed at the meal you are making it for because the avocado will brown up and the salad will lose its freshness. My family is two adults and three little ones and it was more than enough for us. If you are feeding less, you may even want to cut the recipe in half. 
The creaminess of the avocado, the sweetness of the tomato, the crispness of the cucumber all complemented by fresh mozzarella really is the perfect salad for a summer, or in this case, spring day!

Avocado Salad

2 ripe avocados, cubed
1 pint fresh cherry tomatoes, halved and quartered
1 cucumber, peeled, sliced and quartered
1 8 oz container fresh mozzarella balls or 8 oz fresh mozzarella, cut into small pieces
1 1/2 tblsp extra virgin olive oil
2 tsp dried italian seasoning
1 tsp salt
1/4 tsp black pepper

Toss together avocado, tomatoes, cucumber and fresh mozzarella. In a small bowl, whisk olive oil, italian seasoning, salt and pepper. Pour over avocado mixture and toss gently. Taste and add more salt or seasonings if needed. Serve and consume immediately.

Heather

Leave a Comment

  • « Previous Page
  • 1
  • …
  • 30
  • 31
  • 32
  • 33
  • 34
  • …
  • 38
  • Next Page »

Heather

I am a midwestern girl who grew up in the big city, but now enjoys her days as a stay at home mom in the suburbs. Who says spending time in the kitchen has to be boring? I hope to inspire your family kitchen with some new ideas, fun recipes and great tips.

Stay Up to Date

Get all the latest tasty goodness straight to your inbox!

Girl and her Kitchen

Join us!

Hey! I am the GIRL in the kitchen and I am so glad you decided to visit. Love to cook and eat? You will find some great recipes on this site, whether you are looking to eat healthy, splurge on a dessert, make dinner or host a party-I have it all! Sometimes I’ll give you a story along with my recipe, other times, I want to take you straight to the food!  Whatever the reason that you decided to visit, I am so glad you joined me in the kitchen! Feel free to take a look around the site, and please…stay awhile!

Archives

Popular Categories

  • Appetizers
  • Breakfast
  • Crafts
  • Salads and Dressings
  • Side Dishes
  • Vegetables and Fruit

Most Popular Posts

Corner Bakery Cafe Giveaway!

Corner Bakery Cafe Giveaway!

Filed Under: Reviews

Bacon Cheddar Skillet Cornbread

Bacon Cheddar Skillet Cornbread

Filed Under: Breads, Quick Breads and Rolls, Side Dishes

Puffy Pancakes {Perfect for Valentine’s Day!}

Puffy Pancakes {Perfect for Valentine’s Day!}

Filed Under: Breakfast, Valentine's Day

100 Days of Real Food Cookbook Review {and Giveaway!}

100 Days of Real Food Cookbook Review {and Giveaway!}

Filed Under: Vegetarian

Copyright © 2026 · Divine theme by Restored 316