• Email
    • Facebook
    • Instagram
    • Pinterest
    • Twitter

Girl and Her Kitchen

Plan. Make. Eat. Design. Craft. Create. Celebrate. Life.

  • Home
  • About the Girl
  • Recipe Index
  • We LOVE
  • Weekly Menu

Appetizers

Enchilada Dip

So a few years back, on New Year’s Eve, I tasted a dip that was really amazing! My friend Jill hosts us almost every year for New Year’s Eve and every year, I sample some of the most delicious appetizers. This one stood out for me that year, and I proceeded to make it a few times. After that, I sort of forgot about it. Does that happen to you? Then, a few weeks ago, I rediscovered it and made it for some friends. Yum! I had forgotten how delicious it was! I love finding a new recipe again! It’s almost like finding $20 in your pocket that you forgot you had, but tastier. 🙂
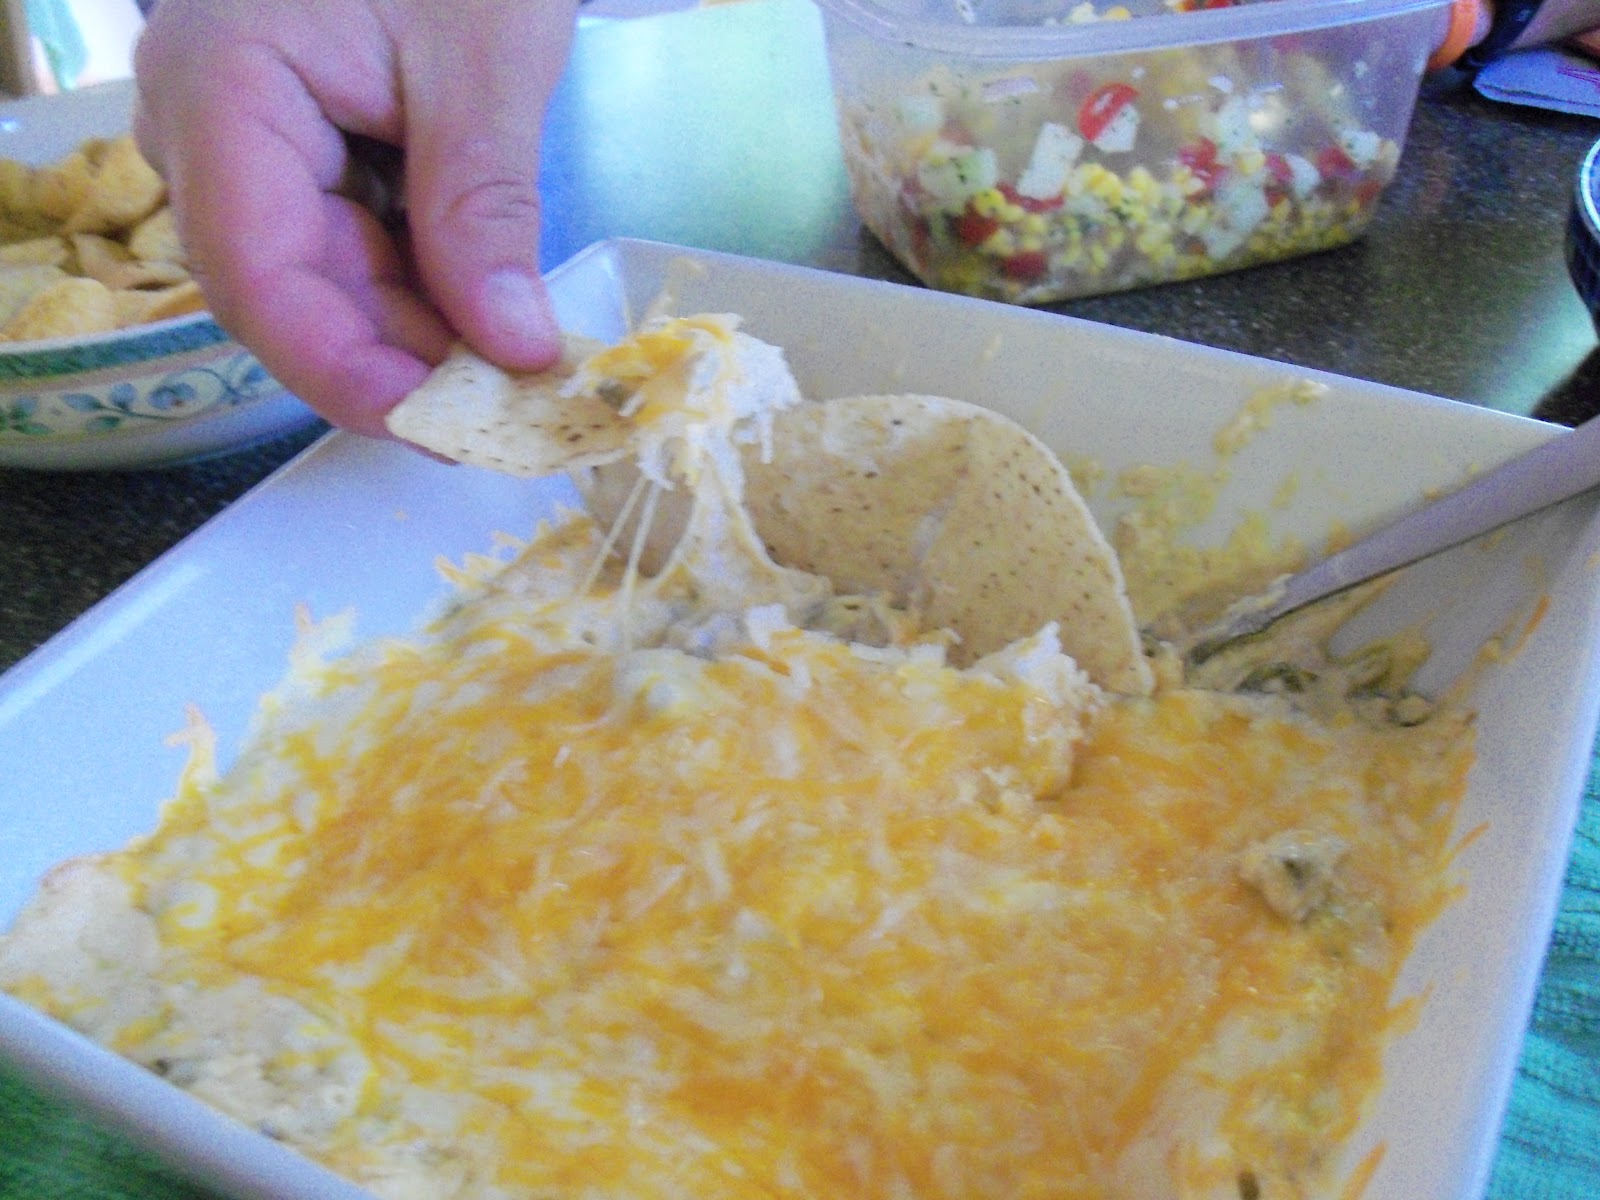
This dip really tastes like a chicken enchilada, and it is really easy to make! Fritos are a must when you serve it and try not to sit next to it the whole party-you will eat the entire bowl. I promise you that!

Enchilada Dip

1 pkg. 8oz. cream cheese, room temperature
1 1/2 cups mexican style shredded cheese blend, divided
1 can 7 oz. chopped mild green chiles, UNDRAINED
1 tsp garlic powder
1 tsp salt
1 tsp chili powder
2-4 oz chicken breasts, cooked, finely chopped or shredded

Beat cream cheese, 1 cup of cheese, chilies, salt and spices in a small bowl with electric mixer. Gently stir in chicken. Spread into a lightly sprayed 9 inch pie plate or shallow baking dish. Bake at 350 degrees for 25 minutes until dip is lightly browned and heated through. Remove from oven. Sprinkle with remaining cheese. Let stand until cheese is melted. Serve with fritos, tortilla chips or crackers.
Enjoy!

Heather

Leave a Comment

Candy

Salted Dark Chocolate Toffee Pretzel Bark

So, I made this thinking that it would be a great little snack for my husband and kids to nibble on here and there. Maybe I would have a taste…just one taste, but it would be no big deal.
Well, thirty tastes later, I have a love hate relationship with this toffee. I love it soosoooooooo much, but I hate that it is calling my name EVERY time I open the fridge. I mean, why can’t it be a little harder to eat, ya know? Like, if I had to take it out, cut a piece, do…ummm…something else to get it ready, it wouldn’t be so easy and tempting to eat.
You know, like all the fruit in my produce drawer. I mean, why isn’t that calling my name every time I open the fridge door? Well, because I have to wash it, cut it, and talk myself into eating it.
Unfortunately, I am not having that same problem with this toffee.
It is just sitting in my fridge, in perfectly portioned pieces (if you only ate one), forcing me to grab one every time I open the door.
Really, it’s not even my fault. I was going in the fridge to get an apple. I can’t help it that I had to take five one pieces of toffee when I went in. I had good intentions I tell you!
This toffee is perfect-salty pretzels covered in delicious, sweet, buttery toffee, smothered in dark chocolate and then sprinkled with sea salt bringing out the deep rich flavor of the chocolate.
Believe me, your produce drawer will remain full if you make this.
Is that good or bad?
I guess….both?

Oh! And remember the time I was telling you about my friends bringing me some of that delicious Trader Joe’s Pretzel bark? I made these Chocolate Peanut Butter Pretzel Truffles that were really delicious and made me think of the delicious treat? Well, I think I came really close this time! This tastes almost just like it.

So proud of myself. 🙂 It doesn’t take much these days…it doesn’t take much.

Salted Dark Chocolate Toffee Pretzel Bark

1-10 ounce bag of small, salted pretzel twists, broken into small pieces
2 sticks of butter
1 cup brown sugar, tightly packed
2 1/2 cups dark chocolate chips
Coarse sea salt

Line a baking sheet with parchment paper. Pour broken pretzels on sheet, making sure they are in one layer.

In a small saucepan, heat butter and brown sugar until slightly bubbling. Let cook without stirring for three minutes once it is bubbling. Pour evenly over pretzels, covering them in the toffee mixture. Bake at 375 degrees for 5 minutes and toffee will fuse together and harden. Take the pan out of the oven and sprinkle chocolate chips on the top, letting them melt from the heat of the toffee.

Once they are soft, use a rubber spatula to spread the chocolate until smooth. Sprinkle sea salt on the top of the chocolate. Place entire tray in the fridge for 30 minutes. Take out and break toffee into large pieces. Store in a tightly sealed container in the fridge.

Try to make it last more than one day.

Good luck.

*Recipe adapted from Mel’s Kitchen Cafe

Heather

Leave a Comment

Pasta

Mediterranean Pasta Toss

I love fresh and easy dinner ideas. This one was thrown together super quick and could be eaten hot or cold, which really benefits me since I never seem to eat hot food anymore.
Not by choice, I promise you.
The great thing about this dish too is that a lot of the ingredients may be found in your pantry. That is a really great thing for those nights that you seriously don’t have any idea what to make for dinner! This is what I tossed in mine, but feel free to experiment with other ingredients to find your perfect pasta toss!

Mediterranean Pasta Toss

3 cups cooked pasta
3/4 cup chopped canned artichoke hearts
1/2 cup sliced kalamata olives
1/2 cup sun dried tomatoes packed in oil, thinly sliced
1/2 cup sliced black olives
1/2 cup sliced jarred roasted red peppers
1 cup cherry tomatoes, halved
1/4 cup oil from sun dried tomatoes
salt
pepper
a few splashes of balsamic vinegar
3/4 cup feta cheese
chopped fresh basil for serving

Mix pasta with artichokes, olives, sun dried tomatoes, peppers and cherry tomatoes. Toss with oil, salt, pepper and vinegar. Sprinkle with feta cheese and serve warm, room temperature or cooled. Serve with chopped fresh basil.

Heather

1 Comment

Appetizers Snacks

Tomato Cheese Tarts with Carmelized Onions

So the really great thing about this appetizer is that it looks really fancy and elegant, but is really easy to make.
That is my kind of appetizer.
Of course, I will warn you, it does include my usual favorites of cheese and tomatoes. Although I will say, I took a break from my usual fave of mozzarella and tried out a delicious french gruyere. Yum! The carmelized onions on top are optional, but let me tell you-you don’t want to miss it! The sweetness of the onions is the perfect topper for this tart.
Delicious, easy, but looks like you spent all day in the kitchen making these?
How can you go wrong with this?

1 package of puff pastry dough, slightly thawed
1 1/2 cups grated gruyere cheese
2 small tomatoes, sliced into ten thin slices
salt
freshly ground pepper
olive oil for drizzling
1 recipe carmelized onions (recipe below)

Roll out slightly thawed puff pastry dough. Using a round 2″ cookie cutter, (I used a flower shaped one because I couldn’t find a round!)  cut dough into ten circles. Place on baking sheet lined with parchment paper. Sprinkle each tart with 1 tblsp gruyere cheese. Place one sliced tomato on top of cheese. Drizzle with a few drops of olive oil and sprinkle with salt and pepper. Bake at 350 degrees for 15 minutes until puff pastry is puffed up and golden brown. Let cool. Serve with carmelized onions for topping.

Carmelized Onions

1 sweet onion, chopped
1 red onion, chopped
2 tblsp butter
1 tblsp olive oil
2 tblsp brown sugar

Chop onions and set aside. Heat butter and olive oil in a medium saute pan. Add onions and turn heat to low. Cook onions for ten minutes on low heat. Sprinkle with brown sugar and continue cooking for 30 minutes on low, stirring occasionally. Let cool and serve on top of tomato tarts.

Heather

Leave a Comment

Appetizers

Bill’s Salsa

You will LOVE this salsa. It is cool, crisp and refreshing and the perfect summer snack. It is perfect when used as a dip with crunchy tortilla chips, as a topping on tacos, fajitas or a salad, or even just eaten straight from the bowl! Also, if you have a garden, you can grab the onions, tomatoes and cucumbers from there to really intensify the fresh flavor of this salsa.
Funny name though, right?
Wondering about it?
Well, my husband and I attended a superbowl party…many years ago….you know, those years where you can attend a superbowl party and actually hang out, talk and if you want (I don’t) watch the game?
Yes, those days BEFORE you had kids! 🙂
Well anyways, there was this guy named Bill there. He made this salsa. The salsa was excellent. I asked him what was in it. He told me. Never saw Bill again.
I sure love his salsa though.
Thanks Bill.

Bill’s Salsa

3 cucumbers, peeled, sliced and quartered
1 pint of cherry tomatoes, quartered
3 cups fresh or frozen (thawed) sweet corn
1/4 cup very thinly chopped red onion
1 packed hidden valley ranch dressing mix
2 tblsp rice wine vinegar
Tortilla Chips for serving

Mix all vegetables in a medium bowl. In a small bowl whisk dressing mix with rice wine vinegar. Pour over vegetables. Mix well. Chill for one hour and serve with chips.

Heather

Leave a Comment

Snacks

Whiskey Pretzels

Oh….these are good.
As in really, really good.
My husband actually told me that I had to have these on hand all the time in the house for him to snack on. Then I told him what actually goes into these and that it might not be good to always have them in the house.
I am still not sure if he agrees with me, but really, for someone who exercises as much as him, he could probably eat whiskey pretzels for breakfast, lunch and dinner and still look fit and healthy.
Ahh…to be a man……
I made these to take on a short weekend getaway with some friends and their kids and they were perfect to snack on. A little bit salty and a little bit sweet, they satisfy any snack craving. I am surely going to include these when I make snacks around the holidays. These might rank up there with my buffalo ranch chex mix as far as snacks we love. And yes, you will get that recipe one day.
It is really worth waiting for.
These were super easy and fun to make. The kids can help too-although you may want to pour the whiskey and not give the kids the bottle…..:) The alcohol bakes off, so this is a snack the whole family can enjoy!

Whiskey Pretzels

2 sticks of butter, melted
1/3 cup + 1 tblsp. brown sugar
2 tsp garlic powder
1/2 tsp red pepper flakes
3 tblsp whiskey
1 16 oz bag of salted pretzels

In a small bowl, mix melted butter, brown sugar, garlic powder, and red pepper. Add whiskey and stir well. Place pretzels in a large bowl. Pour butter mixture over pretzels and stir well until all pretzels are coated. Spread evenly in one layer on a parchment lined baking sheet. Bake at 300 degrees for 30 minutes, turning every 10 minutes. Let cool completely and store in a tightly sealed container for up to a week.

And yes. My husband grabbed the whiskey for me. Black Velvet. Hmmm..
Classy, very classy.

Heather

2 Comments

Chicken & Turkey

Pistachio Crusted Chicken with Creamy Dijon Sauce

100_9913.jpg

All my life I have been a rule follower.
Well.….er, most of the time. I don’t want any pictures or artifacts surfacing to prove me different so I will amend completely change my statement.
Most of the time, I was a rule follower. I tried to do the right thing, and felt guilty if I didn’t. I am still like that. No matter how ridiculous it was that my newly turned one year old had to pay to get into the children’s museum a year back, I just couldn’t bring myself to lie say he wasn’t one yet.
I am just that person who tries to follow the rules
So….are there rules for what you should eat during each season? Because if the answer to that is yes, I am really a rebel right now.
Something about 100 degrees for me just screams………chicken, mashed potatoes and gravy?
Well, it did the other night. Tender chicken inside a crunchy, nutty pistachio coating, smothered in a creamy dijon sauce.All while the temperatures really heat up outside.
Definitely not bikini body food, I can assure you of that—although no worries on this end.
That ship sailed a long time ago.
I don’t know what it is about the hot weather, but it really made me want to cook up this meal, but it did. I can’t seem to stop now. I have been baking cookies, and even thinking about making…..soup?
I think I have turned a corner.
I might just be….a real rule breaker.
Some might even say…a rebel.

Pistachio Crusted Chicken with Creamy Dijon Sauce

Chicken:
4, 4 oz boneless, skinless chicken breasts, pounded about 1/2 inch thick
3/4 cup shelled, salted pistachios
1 1/2 cup plain panko bread crumbs
2 tsp salt
1 tsp black pepper
1 tbslp brown sugar
salt, pepper
2 eggs
2 tblsp lemon juice
2 tblsp cornstarch
Olive oil for sauteeing

Sauce:
3 tblsp butter
2 tbslp finely chopped shallots
2 tblsp flour
1 cup heavy cream
1 1/2 tblsp dijon mustard
1/2 tsp salt
1/4 tsp pepper
1 tblsp fresh thyme leaves or 1 tsp dried

Preheat oven to 350 degrees. Set aside pounded chicken breasts. In a food processor, pulse pistachios until finely ground. Add panko, salt, pepper and sugar. Pulse once or twice until combined. Pour mixture into a container for dredging the chicken, set aside.  In a shallow bowl, whisk together the eggs, lemon juice and cornstarch. Heat olive oil in large saute pan on medium heat. Salt and pepper each chicken breast and dip into egg mixture. Dredge in breadcrumb pistachio mixture. Place in pan, and repeat with other chicken breasts, placing in pan being careful not to crowd. Saute for 3-4 minutes and turn over and repeat on other side for 3-4 minutes, until crust is golden brown (watch heat-if it is too high, the pistachios will burn). Remove pan from heat and place in preheated oven for 8-10 minutes or until cooked through). Let rest while you prepare the sauce.
In a small saucepan, heat butter on medium heat until it begins to melt and add shallots. Turn heat to low stirring the shallots and butter until shallots become soft and fragrant. Add flour and whisk until a roux is formed. Add cream and whisk until smooth. Keep whisking and add mustard, salt, pepper and thyme. Whisk until smooth and heated through about two minutes. Drizzle sauce over chicken and serve. (The sauce is excellent on mashed potatoes too!).

Heather

Leave a Comment

Uncategorized

Zucchini Salad

This post goes out to all those gardener friends of mine who I just know will soon, if not already, have tons of delicious zucchini to enjoy. If you are wondering what to make-this post is for you!
I love zucchini. I would probably even call it my favorite vegetable. I just love it in soups, pasta and even raw in salads (although my favorite way to prepare it is sauteed in a little olive oil until brown and crispy-yum!). I came across this salad recipe recently and made a few changes. The result? A new and different salad that is sure to please the palate and the need for new and different zucchini recipes! And….if anyone is looking for a way to get a few zucchini off of their hands, I would be more than happy to take them…
just sayin’!

Zucchini Salad

4 medium zucchini sliced 1/4 inch thick
olive oil for drizzling
1 garlic clove, finely minced
1 tblsp dijon mustard
1 tblsp maple syrup
2 tbslp red wine vinegar
salt
pepper
4 tbslp olive oil
1/2 cup shaved parmesan cheese
1/4 cup pine nuts, toasted
2 tblsp chopped fresh basil

Slice zucchini and place on one layer on a baking sheet. Drizzle with a little olive oil. Roast for 15 minutes at 450 degrees or until cooked through, slightly browned, but still firm and tender. Let cool. Meanwhile, mix next 7 ingredients together and whisk until well blended. Pour over salad until dressed to your preference (I dont use all of the dressing-it refrigerates well for up to 2 weeks. Just let it come to room temperature before serving). Sprinkle salad with parmesan, pine nuts and basil. Serve at room temperature.

Place

Heather

Leave a Comment

Uncategorized

Sangria

This drink is a favorite at parties. I found this recipe a long time ago and it was written up as “Super Bowl Sangria”. I thought that was so funny because it really doesn’t sound like a super bowl sort of drink! I played around with it each time I made it at book club, summer barbecues or girls nights in. Each time I made it a little differently and came up with the perfect recipe. This is such a refreshing drink, but beware, it tastes like juice and can be consumed rapidly with complete and utter disregard for the way you would feel the next morning. Proceed with caution, but enjoy thoroughly!

**This is a make ahead recipe as it needs to chill overnight**

Sangria

1 20 oz can pineapple tidbits, undrained
1 lime, cut into wedges
1 lemon, cut into wedges
1 orange, cut into wedges
1 bottle red wine, any variety
2 shots gin
Splash orange juice
1 10 oz. container frozen strawberries, with juice, thawed
2 cups lemon lime soda

In a large pitcher, add pineapple. Squeeze lime juice from wedges into pineapple, toss squeezed wedges into the pitcher. Repeat with lemon and orange. Add red wine. Stir. Add gin and orange juice. Stir. Cover top of pitcher tightly with plastic wrap and refrigerate over night. Right before serving, add strawberries and lemon lime soda. Serve over ice or on its own. Don’t forget to fill the glasses with some of the delicious wine soaked fruit! You may want to double this recipe. It goes fast!

Heather

Leave a Comment

Uncategorized

Blueberry Breakfast Bread

Does anyone else have this weird thing with food?
Should I explain???
Ok-I LOVE anything with blueberries. Seriously–blueberry muffins, blueberry pancakes, blueberry pie…..keep’em coming! I cannot get enough of them!
A bowl of blueberries?
Um….No thank you.
Ok? Isn’t that weird? How can I LOVE the food when it is being carried about by a tasty vessel, but I cannot bring myself to squash one little, tiny blueberry between my teeth and enjoy it.
Well. I guess I never have publicly proclaimed to be normal. I guess I am just now formally submitting my proof. 🙂
So…speaking of blueberry things…I made this unbelievable blueberry breakfast bread the other day. Made with whole wheat pastry flour, but super moist and delicious with tons of juicy blueberries throughout and just enough sweetness to be enjoyable but not too much that you can’t call it …breakfast.
It was easy too and when I baked it, the kitchen smelled wonderful. The top of this bread turned golden brown and crunchy as it baked…perfect for pulling off out of the oven to taste test.
I mean, I don’t do that. But I imagine that it would be so good, you would almost pull off and test the whole top and then be thankful that you made two loaves when it was time to photograph the bread for your blog.
Er….or…something like that.
This is a must try especially if you have kids. My kids wanted some every morning and I felt good giving it them with a side of fruit and yogurt for breakfast. They loved it and so did I. Try it out-you will love it too.
Just don’t offer me a bowl of blueberries to thank me though.
I will be just fine going without.

Blueberry Breakfast Bread

2 1/2 cups whole wheat pastry flour
1 cup all purpose flour
1 1/2 tsp baking powder
1 tsp baking soda
1 tsp cinnamon
1/4 tsp salt
2 eggs
2/3 cup brown sugar
1/4 granulated sugar
2 tsp vanilla extract
2/3 cup lowfat buttermilk
1/2 cup canola oil
1 3/4 cup fresh blueberries, tossed in 2 tblsp cornstarch

Preheat oven to 350 degrees. Mix together flours, baking powder and baking soda, cinnamon and salt. Set aside. In large bowl, beat eggs and sugars on medium speed. Add vanilla, buttermilk and canola oil. Mix well until blended. Add dry ingredients to wet and mix on low speed until combined. Add blueberries, folding gently into batter. Pour into a greased loaf pan and bake for 55-65 minutes until top is golden brown and toothpick inserted in middle comes out clean. Cool in pan for 10 minutes. Turn over onto wire rack and cool 1 hour. Serve. Wrap remaining loaf tightly in plastic wrap and store at room temperature for no longer than three days.

Heather

Leave a Comment

  • « Previous Page
  • 1
  • …
  • 28
  • 29
  • 30
  • 31
  • 32
  • …
  • 38
  • Next Page »

Heather

I am a midwestern girl who grew up in the big city, but now enjoys her days as a stay at home mom in the suburbs. Who says spending time in the kitchen has to be boring? I hope to inspire your family kitchen with some new ideas, fun recipes and great tips.

Stay Up to Date

Get all the latest tasty goodness straight to your inbox!

Girl and her Kitchen

Join us!

Hey! I am the GIRL in the kitchen and I am so glad you decided to visit. Love to cook and eat? You will find some great recipes on this site, whether you are looking to eat healthy, splurge on a dessert, make dinner or host a party-I have it all! Sometimes I’ll give you a story along with my recipe, other times, I want to take you straight to the food!  Whatever the reason that you decided to visit, I am so glad you joined me in the kitchen! Feel free to take a look around the site, and please…stay awhile!

Archives

Popular Categories

  • Appetizers
  • Breakfast
  • Crafts
  • Salads and Dressings
  • Side Dishes
  • Vegetables and Fruit

Most Popular Posts

Corner Bakery Cafe Giveaway!

Corner Bakery Cafe Giveaway!

Filed Under: Reviews

Bacon Cheddar Skillet Cornbread

Bacon Cheddar Skillet Cornbread

Filed Under: Breads, Quick Breads and Rolls, Side Dishes

Puffy Pancakes {Perfect for Valentine’s Day!}

Puffy Pancakes {Perfect for Valentine’s Day!}

Filed Under: Breakfast, Valentine's Day

100 Days of Real Food Cookbook Review {and Giveaway!}

100 Days of Real Food Cookbook Review {and Giveaway!}

Filed Under: Vegetarian

Copyright © 2026 · Divine theme by Restored 316