• Email
    • Facebook
    • Instagram
    • Pinterest
    • Twitter

Girl and Her Kitchen

Plan. Make. Eat. Design. Craft. Create. Celebrate. Life.

  • Home
  • About the Girl
  • Recipe Index
  • We LOVE
  • Weekly Menu

Appetizers

Caprese Dip

Ahhhh….
Just got back from a girl’s weekend with some amazing friends and I highly recommend that all women partake in this at some time in their busy lives. It was so….relaxing.
We talked, laughed and seriously sat in our pajamas for hours on end. Honestly, I cannot even remember the last time I did that, and if I did, I must have been sick in bed! That just doesn’t happen that often (ever) when you have kids. But I will tell you, it was the best.
Part of the reason for the pajamas could have also been because besides talking and laughing, I do believe I ate more than I have in a long time. And that is coming from me, someone who really loves to eat. I tasted an array of delicious things my friends and I made: buffalo shrimp, reuben dip, cinnamon coffee cake, pumpkin chocolate chip bread, chocolate covered strawberries-you name it-I probably ate it this weekend. Luckily, our pajamas were all very loose fitting. I will be sharing some of these delicious recipes with you soon, but today I am going to share something seriously dangerous.
Yes, it’s true.
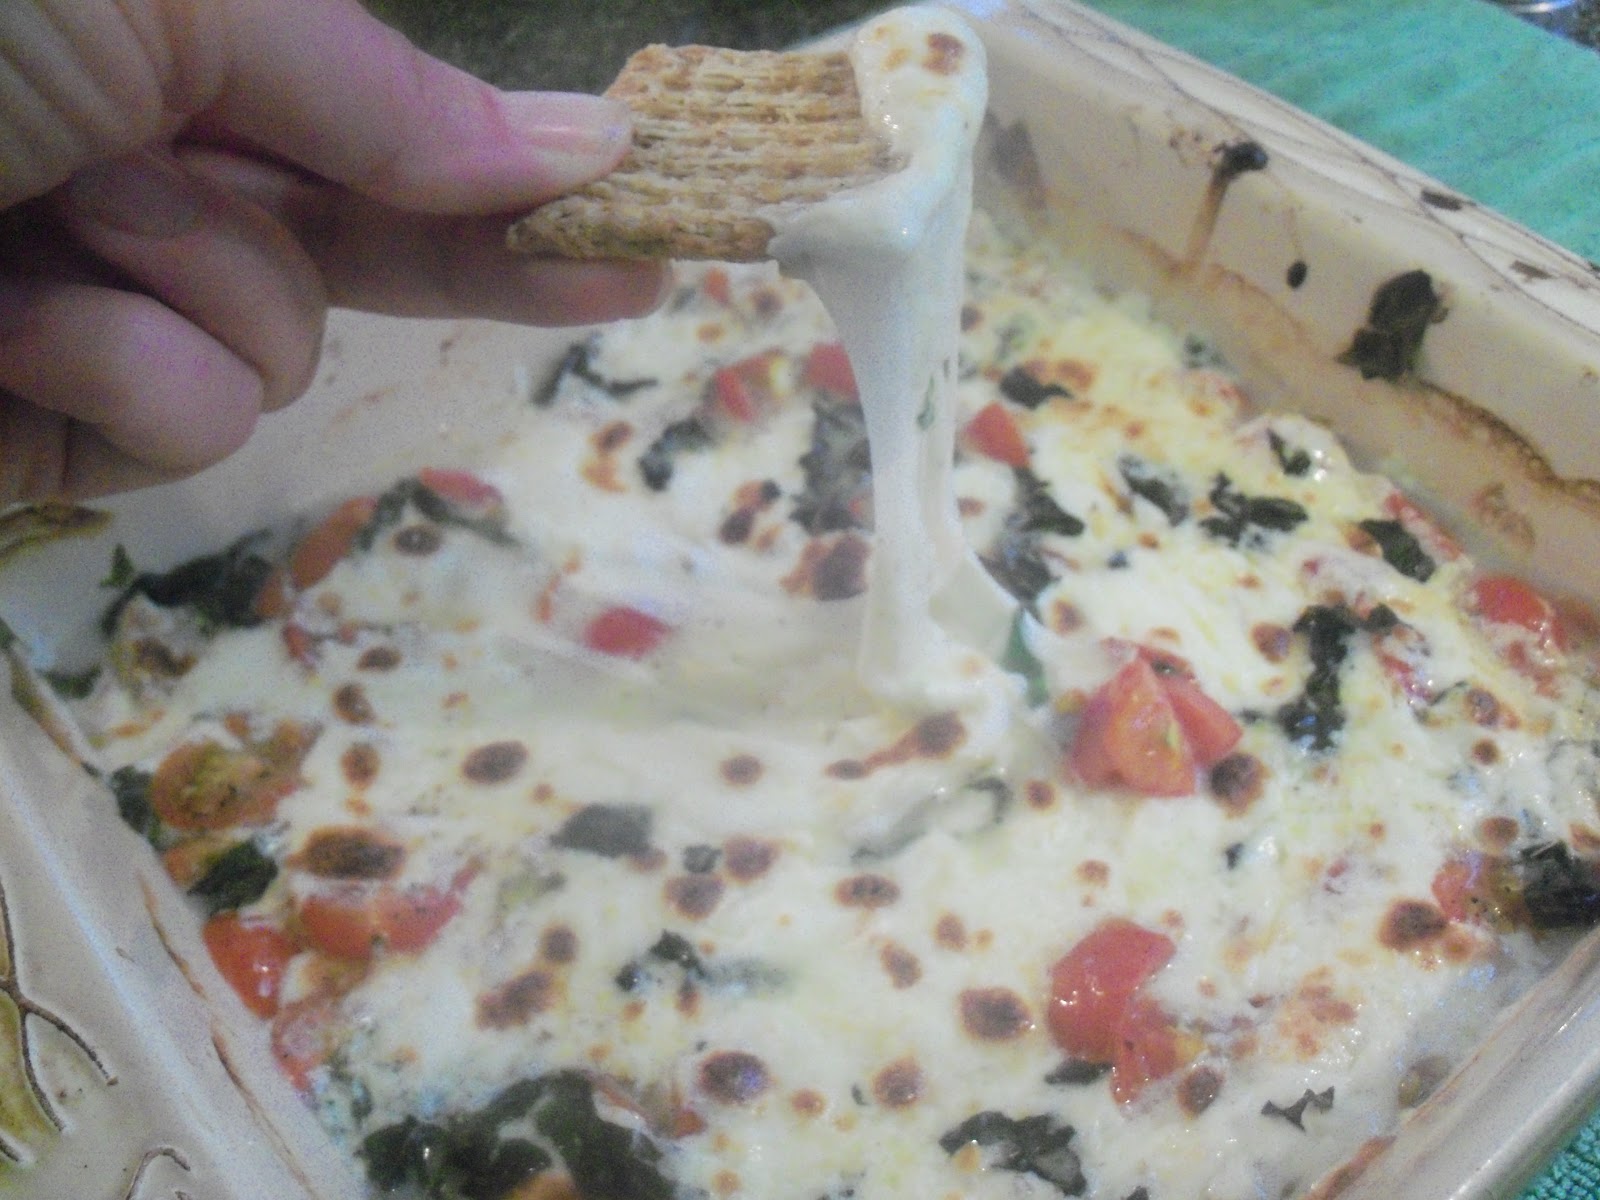
This dip is just that. Dangerous.
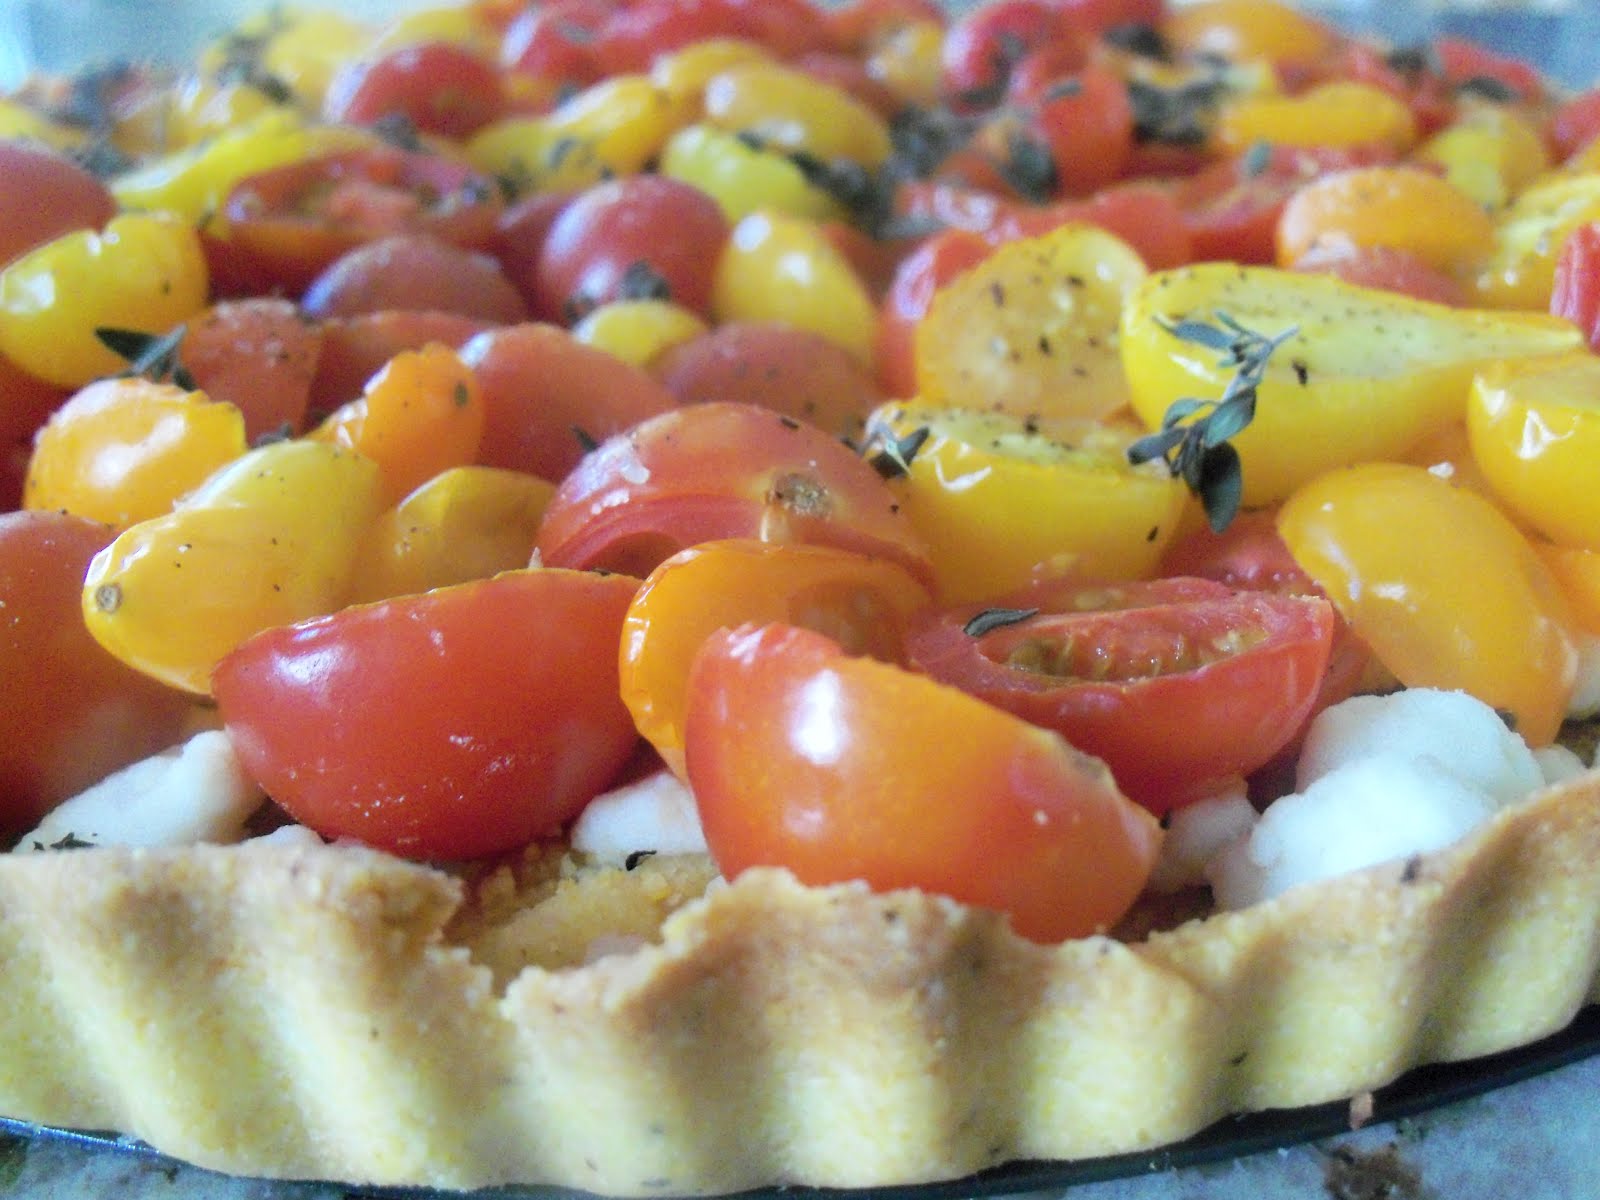
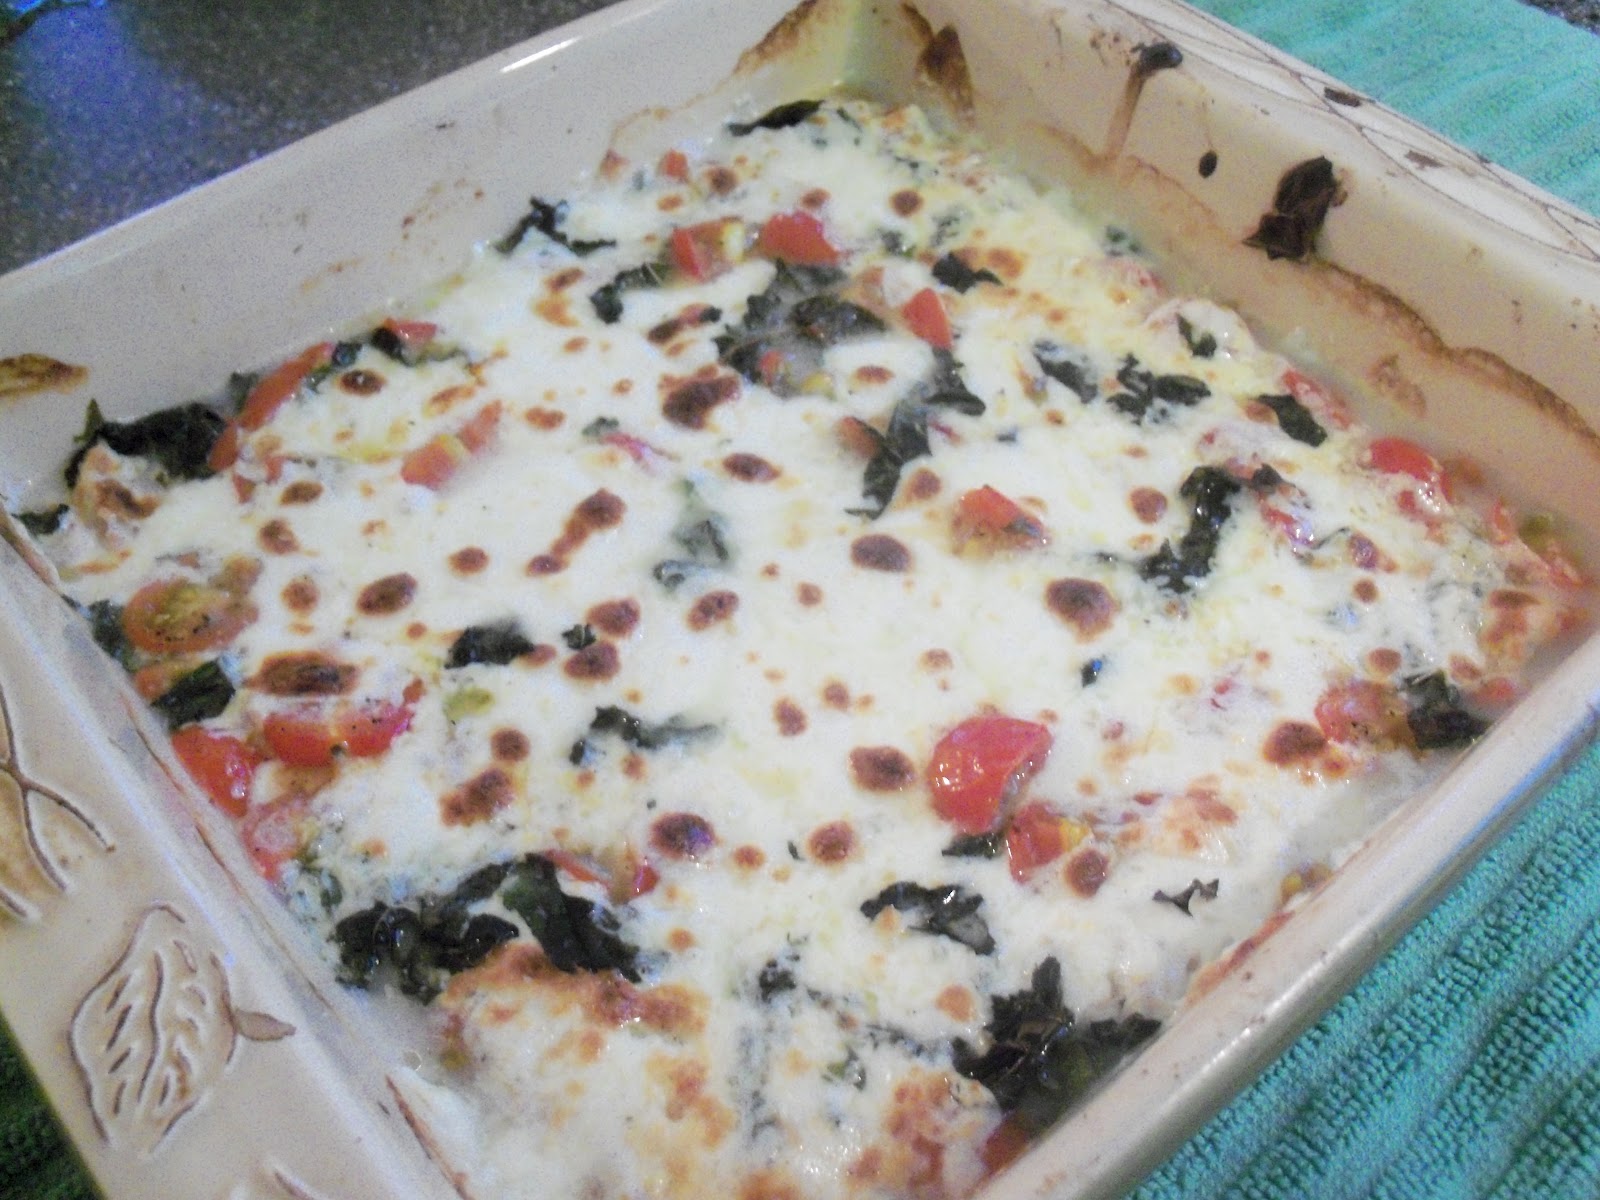
It was a pretty big hit with everyone, but I mean who doesn’t love a dip that is made primarily with cheese? Not many people can attest to that. This was the perfect combination of tomatoes, cheese and basil. A caprese salad at its best, but hot and slathered on crackers and bread. Mmmmm……
I honestly think I may have eaten most of the dip, but my friends are so sweet that they kept assuring me that I didn’t. They are really too nice trying to make me feel better, but really, let’s be honest, I ate a lot of it..
This dip was perfect for a girls night in, because it really needs to be eaten quickly (no problem there) so it really is not the perfect dip for a party. Once it comes out of the oven, it is hot, bubbly and creamy, but as it cools, it gets harder and not so easy to “dip”. Not that this small issue kept us from eating it even after it was cooled, but it really is unbelievable before it cools when it is still hot and gooey.
I would also like to mention that part of going away with the girls would not be possible without the help of my wonderful husband who not only took on all of the responsibilities of the children this weekend, but kept the house clean and…wait for it…. there was an apple crisp waiting for me when I got home.  
Whaaaat?
No, I am not kidding.
The man who really doesn’t cook, made me one of my favorite desserts to welcome me home. Can he be any better? I don’t think so. I ate a lot this weekend, but I definitely had room for apple crisp made just for me by a seriously amazing man.
I thought I struck gold my marrying the man who liked to clean, but now he bakes too?
This could get interesting.
I will be blogging about that recipe soon, but for now, feast your eyes on this amazing cheesy dip and …..make sure you buckle the children in as you speed off to the store to gather the ingredients for this one. Enjoy!

Caprese Dip

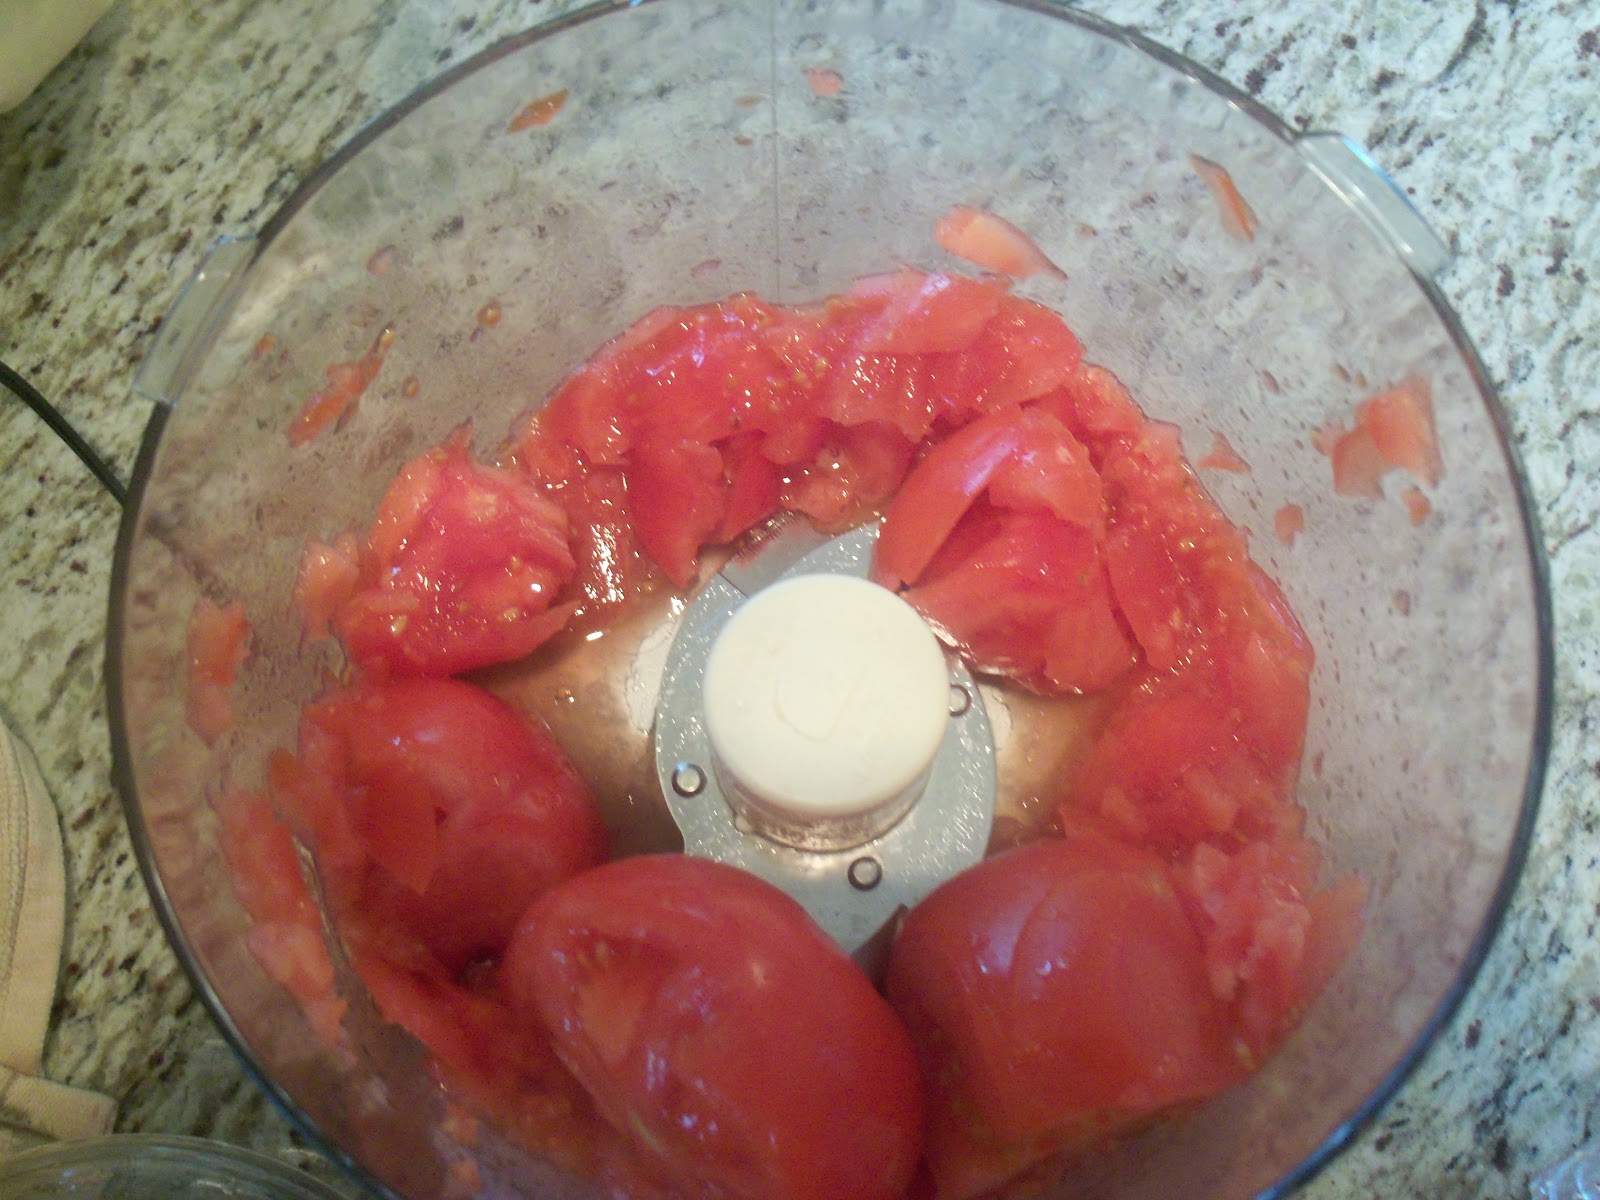
1 pint cherry tomatoes, halved and quartered
salt and pepper
1 16 oz log of fresh mozzarella, cut into small pieces
3 tblsp chopped fresh basil

After cutting the tomatoes, put them in a colander. With a paper towel, press down on the tomatoes, squeezing the juice out as much as possible. Place in 8×8 baking dish. Toss with salt and pepper to taste. Add mozzarella and toss. Add basil and gently stir until all the cheese, tomatoes, and basil are well distributed. Bake at 400 degrees about 20 minutes until cheese is melted. Put broiler on. Place dip under broiler for about 5 minutes or until the top is lightly browned and bubbly. Serve with crackers, toasted baguette slices or chips.


Heather

Leave a Comment

Uncategorized

Fresh Tomato Sauce

I am definitely someone who gets bored of the same thing over and over. My husband teases me on a daily basis about it. I will spring into action switching out my children’s toys, proclaiming that they are so sick of this or that and that we have to move it upstairs and change around what toys they have downstairs…blah, blah, blah. When I am done ranting, my husband usually chuckles and says, “it was really YOU that was sick of the toys. I know it.”
He is usually right.
The same applies to food. Get this…EVERY DAY my husband has a bowl of cereal, orange juice, and coffee for breakfast. EVERY DAY! Oh sorry, not EVERY DAY. On the weekends he gets a little crazy and has waffles or something, but literally, Monday thru Friday, he eats the same breakfast and has done this since we have been married (almost eleven years).
Sometimes I will even try to entice him.
Me: “Hey, just so you know there are some bagels for breakfast if you want….”
Him: “Oh thanks.”
Me: “They are really good. Fresh, chewy, delicious.”
Him: “Mmmm…they sound great.”
Me: “You are really not going to eat them are you?”
Him: “No I am not, but thanks.”
So. Frustrating.
He doesn’t understand it. He is usually laughing at my frustration. (Real nice, right?) “Why do you care?” he always asks. “I like my cereal, orange juice and coffee.”
I don’t know why I care. I just do. Sheesh.
I am the exact opposite of that. I probably do not eat the same breakfast all week. I always have something different for lunch. I just get bored. I don’t know what it is. Don’t you think I wish that I could eat a chicken breast and broccoli everyday for lunch? I mean come on, a lot of problems would be solved if I could do that! It is just not in the cards for me.
I am like that with cooking too. I have some tried and true recipes, and I really do love them, but every time, they come out a little different. I might add this or that. It is always fun to see how it turns out.
My tomato sauces are a prime example of this. I probably have five different sauces that I make, all very different, but all very good. Sometimes, it isn’t even a recipe. It is just throw whatever I can find that has tomatoes in it into a pot and simmer away.
This sauce is one of my all-time favorites. If you are looking for fresh, look no further. I make this all year around, but I will tell you, with fresh garden tomatoes, it is definitely a little slice of heaven.
I use this sauce for a variety of things….over pasta, as a pizza sauce slathered on my homemade pizza dough or even as a sauce for chicken or eggplant parmesan. Sometimes I make a big batch of this and freeze it. It is so wonderful to have it on hand for a variety of dishes.
I will be posting a number of tomato sauce recipes on this blog as time goes on, and they are all worth a try, but this one definitely ranks as one of my favorites. Simple, yet delicious. I am sure you will agree.

Fresh Tomato Sauce

Makes about 4 cups–I usually make twice or three times the amount and freeze any leftovers!

3 large garlic cloves
1/4 cup olive oil
3 pounds very ripe plum tomatoes
2 – 6 oz cans tomato paste
Salt
Sugar
Pecorino Romano cheese
3 tblsp fresh basil leaves, torn into small pieces

Slice tops of tomatoes and cut in half so all pieces are even. In a stockpot with a lid, heat olive oil. Lightly smash garlic cloves with the back of a knife so they are split. Add to olive oil and swirl them around as they cook.

In the workbowl of a large food processor, start pulsing tomato halves in batches until liquidy, although chunks of tomatoes are still evident.

When garlic is slightly browned, add tomato sauce to pan. Continue until all of the tomatoes are pulsed and poured into the stock pot. Bring to a boil. Turn heat down to low and simmer for 30 minutes. Remove cover. Add tomato paste, salt, sugar, romano cheese to taste. Stir well and frequently for 10 minutes until cheese is completely melted. If your spoon comes across the garlic cloves, smash with spoon and stir. Cover with lid slightly askew to let some steam out, and simmer for 1 hour on low heat. Taste. Add more salt or sugar if necessary. Stir in basil. Serve over pasta and generously sprinkle with more pecorino romano cheese and basil leaves if desired.

NOTE: I do not give measurements for the sugar, salt and romano because it is a preference thing. Add a little at a time. Two teaspoons of salt and sugar, a tablespoon of romano. Taste after it has cooked into the sauce. Add a little more until sauce tastes like you want it to. Once you get the taste right, the next time you make it, you can add your designated amounts.

Heather

Leave a Comment

Breads, Quick Breads and Rolls Pizza

Basic Pizza Dough

100_9240.jpg

So today I was flipping through the newspaper…you know those three minutes, if even, that we have in the morning to sum up everything that is going on in the world, check the weather, and maybe, just maybe catch a glimpse of the entertainment news?
Okay, who am I kidding? Let’s switch that around.
…you know those three minutes, if even, that we have in the morning to sum up everything that is going on in the entertainment news, check the weather, and maybe, just maybe catch a glimpse of what is going on in the world?
Seriously, moms, you get it. There are times when our minds can only handle so much.
Well, anyways, this morning, I happened to see an article about these new cookbooks that are designed for busy moms who need to do the majority of their cooking during their kids’ naptimes only to finish off a few things at mealtime. Genius right? I need to get some of those, but in the meantime, I thought I would share some recipes here and there that fit that bill. (See TIPS tab for cookbook titles and authors).
For instance, did you ever think that you could prepare homemade pizza in time for a weeknight dinner? I know, I know, it is really easy to call the local pizza place and have a hot meal delivered right to your door. I agree–we all need to do that sometimes. But, homemade pizza is sooooo much better. Like, no contest, better. So, on those nights where you can barely find a second to cook, order that pizza from your favorite place. But, if you have a bit of time during your child’s naptime, give this pizza dough a chance. It doesn’t take long with a little planning, and the results are really worth it. I will share my fresh tomato sauce recipe soon…
Homemade dough, fresh tomato sauce, fresh mozzarella and a few of your favorite pizza toppings and you have a pizza that will leave you second guessing that pizza delivery place.

NOTE: There are two rising periods for this dough. If you are making it on a weekend when you have tons of time (haha)…no worries, just start it early. But, if you are trying to make it on a weekday, make the dough right when your child goes down for a nap. Let it rise for 1 1/2 hours and then right when you hear your child wake up and before you moan, “already????” stretch it on to the baking sheet so it can rise the 2nd time. If it needs to rise longer than one hour, before you finish it off, that is fine. Just leave it covered until you are ready to prepare, which at that point, should only take a few minutes before you throw it in the oven! Pizza for dinner! 🙂


Basic Pizza Dough-makes 1 pizza serving 6

1 envelope active dry yeast
1 1/3 cups warm water (105-115 degrees)
2 tsp sugar
2 tsp salt
4 cups all purpose flour
Olive oil

Sprinkle the yeast over the water in a small bowl.Add sugar. Let stand for 5 minutes while yeast comes alive and gets creamy. Stir until dissolved. In a large bowl of a stand mixer fitted with a dough hook, combine the flour and salt. Add the yeast mixture and mix with dough hook until a soft dough forms. If dough seems too sticky, add a little more flour. If dough seems too dry, add a little water. Let the mixer knead the dough for 10 minutes until it is smooth and elastic. Coat another large bowl with olive oil. Remove dough from mixing bowl and add to oiled bowl turning dough to coat. Cover with plastic wrap and place in a warm, draft free place. Let rise until doubled about 1 1/2 hours.
Brush a 15x10x1 baking sheet with olive oil. . With your fist, flatten the dough. Place the dough on baking sheet and and stretch and flatten to fit. Cover with plastic wrap and let rise for about an hour. Preheat oven to 450 degrees. Bake pizza dough for 15 minutes. Remove, add sauce,cheese and toppings. Bake for 15 minutes or until cheese is melted, browned and bubbly.

100_9242.jpg

Heather

Leave a Comment

Salads and Dressings Vegetables and Fruit

Christina’s Salad

100_9270.jpg

You know when you share a meal with someone and it is really good, you constantly connect that food with that person? Well, it always happens to me, and this last time, this salad I had, was out of this world.
Salad is such a funny thing to me. My mom used to always say that she only liked salads when someone else made them. When she made them, they seemed so boring. And this is coming from my mom…who is an amazing cook!! But… It really is true! Did you ever go out to dinner and order a salad before your meal? It could seriously be lettuce a few cucumbers and a cherry tomato, but something always tastes…different. The dressing is creamier, the vegetables more crisp, the presentation prettier. Whatever it is, you always silently swear that if you could make salads that tasted this good, you would always eat salad, and you would probably lose loads of pounds on a daily basis. Right? Oh, sorry..is that just me?
Regardless, a salad is something we all bank on, so why do we have to be boring with it? This salad I am about to share with you is anything but boring.
My friend Christina invited my daughter over for a playdate with her daughter. The two are good friends and they love to play together. As usual, Christina was very nice and invited me and my other two children over as well, and asked us to stay for lunch. I gladly accepted. Well, sadly, that day, my son and middle daughter were not feeling well so my husband, who was on spring break, offered to stay back with them while I took my eldest on the playdate.
What? I get to take the easiest child on a playdate and just sit…and talk….and not run after a toddler…even once? Um….YES! 🙂 This day is looking up after all! I mean, I am really sad the other two aren’t feeling well…but LET’S GO!
When we arrived, Christina asked if I could help prepare a salad with her and of course I said yes. I love cooking with friends and family. It always makes the process even more enjoyable. So, we chatted and chopped fruit and veggies for the salad. It was topped with coconut chicken and this AMAZING, yet simple dressing. I would have never thought to throw all of these things together into one salad, but let me tell you, the result was perfection! She said she was inspired by a salad she ate at a restaurant, but this salad will always be Christina’s Salad to me!
Obviously the company was the best part of this afternoon, but this salad was a sure second! Thanks Christina!

100_9265.jpg

Christina’s Salad

This will feed you and three friends well-you may possibly even have leftovers! Well–maybe!

Coconut Chicken:
4 – 4oz boneless skinless chicken breasts
1 egg
1 tsp cornstarch
1 tsp lemon juice
1/2 cup panko bread crumbs
1/2 cup sweetened flaked coconut
1 tsp salt
canola oil for the pan

Salad:
4 cups loosely packed mixed greens
1 cup sliced and quartered cucumbers
1/2 cup blueberries
1/2 cup sliced strawberries
1/2 cup raspberries
1/4 cup dried cranberries
1/2 cup blue cheese, crumbled
1/3 cup pecan halves

Dressing:
1 cup prepared ranch dressing
2-3 tblsp raspberry preserves

Mix dressing ingredients, whisking preserves until completely blended. Place in fridge. Preheat oven to 350 degrees. Heat 1 tblsp canola oil in an oven safe pan on medium heat.. In one shallow bowl, combine panko, salt and coconut. In another shallow bowl, combine egg, corn starch and lemon juice. Beat well. Dip chicken breast in egg mixture and then press into coconut mixture. Place in hot frying pan and continue with rest of chicken breasts. Cook chicken 4 minutes and then carefully flip over cooking four minutes on other side, being careful that coconut is not burning. Turn off heat and transfer pan to oven. Bake chicken for 10 minutes or until no longer pink and juices run clear. Remove from oven and set aside.
Meanwhile, in a large salad bowl, place lettuce, cucumbers, and berries giving it a light toss. Add dried cranberries, pecans and blue cheese. Set aside. Slice chicken into thin strips. Divide salad up into four bowls. Place chicken strips on top of each bowl of salad. Remove dressing from fridge and drizzle on top of salad. Enjoy with friends!

100_9271.jpg

Heather

Leave a Comment

Beef Soups & Stews

Stuffed Pepper Soup


100_9211.jpg

Ok, so it is supposed to be warm out.

I know, I know. It is only April, BUT, it was warm about a month ago. The weather teased us. It made me switch out all my kids clothes to their “summery” stuff and now they are waking up everyday and putting on dresses with no sleeves and arguing with me for hours about why it is SO not fair that I am not letting them wear that to school. The warm weather tricked me into making foods like that started with words like, “grilled”, “fresh” and “cool”. This weather made me crave summery drinks like margaritas (okay, okay, I always crave margaritas, but still…). I started going for my daily runs outside and really liking it so much better than the boring indoor track I usually run on.
It tricked me, and now I have finally realized it.
Well, what is a girl to do? There is only one answer in my book.
I dragged out my soup recipes again and realized that these recipes and I could be in for the long haul.
I mean, what is better than a warm bowl of soup, some crusty bread, a family sitting around the table talking, while a fire crackles in the fireplace? Not much in my book.
Except, my husband refuses to let us use the fireplace right now. I really don’t understand it. When I asked him the other day to light a fire, he looked at me with the look. You all know that look. The, “I am hoping you are joking and if you aren’t I am really concerned why you would EVER ask me such a thing” look? You know what I am talking about right? Well, obviously, he wasn’t for the idea, mumbling something about it being hot in the house already with the stove on and a steaming pot of soup and the oven baking bread all day and heating up the house. And, he mentioned at the end:
“You do know it is April, right?”
Yes, I do. But, the question is, does Mother Nature know?
I am not sure.
I am hoping soup weather leaves us soon, but in the meantime, this is a really good one to enjoy!

Save Print
Stuffed Pepper Soup
 
Ingredients
  • Stuffed Pepper Soup
  • 1 lb extra lean gound beef
  • 1 cup green pepper, diced
  • 1 cup red, orange or yellow pepper, diced--(I used a combo of red and yellow-1/2 cup of each)
  • 1 cup finely diced onion
  • 3 cloves finely minced garlic
  • 2 14.5 oz cans diced tomatoes
  • 2 cups tomato sauce
  • 2 cups low sodium chicken broth
  • 1 tsp dried marjoram
  • salt and pepper
  • 3 cups cooked brown or white rice
  • Grated cheese, if desired
Instructions
  1. In a large pot, brown ground beef or ground turkey, drain fat if there is any
  2. Season with salt and pepper,
  3. Set heat to medium and add peppers, onion and garlic.
  4. Cook about five minutes.
  5. Add tomatoes, tomato sauce, chicken broth, marjoram and salt and pepper.
  6. Cover, simmer for 20 minutes.
  7. Add rice and gently stir to combine.
  8. Sprinkle with grated cheese if desired
3.5.3226


Heather

Leave a Comment

Beef Crockpot

Crockpot Tamale Casserole

Is the crockpot the most wonderful invention ever or what? I mean, whomever invented this had to have busy moms in mind. The luxury of starting your dinner in the morning and coming home to the smell of something delicious simmering away and best of all, no dinner prep to be done! It is actually so wonderful, it makes me want to cry. It is like having a personal chef who is taking care of the cooking so you can just hang out with your kids and relax.


There are two things I HATE and I stress, HATE about crockpot recipes. The first is simple. Sometimes I feel like they all taste the same. I think you need something really different and unique to get out of the “chicken simmering in campbell soup” type of recipes. Not that those aren’t good sometimes, it is just when you make more than one, they begin to taste like the same meal, just recycled. The second thing I really, really do not like is when the recipes instruct you to cook the whole meal on the stove top FIRST before placing it in the crockpot. I mean, what is the point of a vessel that cooks your meal for you, if you have to cook it all first? So, when I am looking for great crockpot recipes, I am looking for ones that I can pretty much throw everything in there and call it a day. This is one of them. Besides the initial assembling of ingredients and some last minutes add ins, this is a cook all day, no fuss meal that you and your family will love.


I love you crockpot. I really love you.

Crockpot Tamale Casserole


1 lb. ground turkey or very lean ground beef (if you prefer beef with more fat in it, you do need to cook and drain it before putting it into the crock pot)


1 15 oz can tomato sauce


1 14.5 oz can diced tomatoes


1 packet taco seasoning or 2 tblsp of your own blend
1 1/2 cups frozen corn


1 1/2 cups shredded cheddar cheese


1 8.5 oz box corn muffin mix


1/3 cup milk


1 egg


Salsa, olives, sour cream


Place ground turkey in crockpot. Break up with spoon. In small bowl, combine tomato sauce, diced tomatoes, and taco seasoning. Pour over ground turkey. Gently mix in corn. Place lid on crockpot and cook on low for 8 hours. During last hour, sprinkle cheese over top of casserole. Mix cornbread mix with milk and egg. Spoon on top of cheese on casserole. Cover and cook for last 45 minutes of cooking time or until cornbread topping is fully cooked through. Serve with salsa, sliced olives and sour cream.


Heather

Leave a Comment

Cookies & Bars

Cheesecake Cookie Squares

100_9026.jpg


Okay, I think the title should sell you right there.

Cheesecake.

Buttery graham cracker crust.

Cookies.


All tucked into one, delicious, wonderful little square.


I mean, seriously? These are so good, I hate them. I mean, I love them. But then I hate them. I am sure you can see how that can work.

I first saw these pictured on pinterest. You know, that site that I can spend hours on only making me realize how un-creative I am, what terrible physical shape I am in since I have no evident ripples on my abs (well, not the good kind), and the question of the day is why don’t I have a two story craft and imagination room for my kids? What the heck?

Yeah, that site. Well, I am obsessed with finding recipes on this site. They seem to be the most amazing recipes in the world. When I saw this, I couldn’t even believe it. Cheesecake and cookies…all in the same dessert.


What more can you ask for? Well I guess you could add a chocolate truffle layer, or a triple chocolate brownie layer, or a cream puff layer, or a ….well, I digress. I will stop.
For now.


Cheesecake Cookie Squares

Crust:
2 cups graham cracker crumbs
6 tblsp unsalted butter, melted

Cheesecake Layer:

10 oz cream cheese, room temperature
1/4 cup sugar
1 egg
2 tsp vanilla extract

Chocolate Chip Cookie Layer:

5 tblsp unsalted butter, room temperature
1/3 light brown sugar
3 tblsp sugar
1 tsp vanilla
3/4 cup flour
1 cup chocolate chips

Preheat oven to 325 degrees. Line and 8×8 inch pan with parchment paper leaving a little overhang and spray with cooking spray. Set aside. Combine cracker crumbs with butter in a mixing bowl and press firmly into jparchment lined pan. Bake in preheated oven for 8 minutes. Remove and keep oven on. In a bowl, cream together cream cheese and sugar until smooth with an electric mixer. Mix in egg and vanilla and beat until smooth. Pour cheesecake batter into prepared crust. In a clean bowl, cream butter and sugars together until light and fluffy. Add vanilla and mix. Slowly add flour until batter is smooth and well combined. Fold in chocolate chips. Drop cookie batter in spoonfuls evenly over cheesecake layer in baking pan. Use all the cookie dough. Bake for 30 minutes or until cheesecake and cookie dough is set well. If not done, return to oven for five minute increments until set. Give the pan a gently shake-nothing should jiggle. When done, remove pan from oven and let cool for 15 minutes. Remove bars using parchment overhang to pull out of pan. Cool on a cooling rack for an hour. Cut bars and serve. Store remaining bars in a refrigerator in a tightly sealed container. Enjoy!

100_9030.jpg

Recipe adapted from Brandy’s Baking

Heather

Leave a Comment

Appetizers Side Dishes Vegetables and Fruit

Heirloom Tomato and Goat Cheese Tart

100_9205.jpg

Oh I love this.

I think you will too.This is one of those things that you make for the family and by the time the family actually arrives at the table….most of it is…well, gone. Yes, I admit it. I nibbled at this so much, almost an entire slice was missing before dinner even started.


Ok, I feel better now. Admitting you have a problem is the first step, right?

The first time I made this I had a friend over for lunch. A looooong time ago when she and I actually had time for things like that. You know, time for things like…lunch. I made this delicious tart, a simple green salad and some grilled shrimp. We could not get enough of this tart. It is shameful to say that I think said friend and I consumed the entire tart.

Just the two of us.


It was sad.

It was so good though.


I would do it all over again if I had the chance.


I will not name this friend in lieu that she comes over for lunch soon and we can repeat the whole process again. I probably won’t even make the shrimp and salad this time. I mean, who needs that when you have a whole tart to consume. Then we can feel better about ourselves and say, “well, we only had tomato tart for lunch.” It almost sounds like a diet if you say it that way.


It was just that good.


Although this is called an “Heirloom” Tomato tart, I have found using almost any sort of tomato works. This last time I made it, I actually just sliced cherry tomatoes in half and dumped them on. It was pretty to look at. It was very hard to eat. All of the tomatoes kept falling off, but I didn’t mind. That’s what a fork is for.


Feel free to use any combination. If you are using large tomatoes, slice thinly and layer in a pretty circular pattern. If using smaller tomatoes, make sure to cut them in half so you don’t have them bursting all over your oven. I made this tart and served it for dinner with some grilled chicken, steamed broccoli and a green salad. It was a hit. The only bad news that night was that there were no leftovers for my lunch the next day.


I hate it when that happens.


Heirloom Tomato and Goat Cheese Tart


Cornmeal Shell:

2/3 cup stone ground yellow cornmeal
2/3 cup all purpose flour
1/2 tsp salt
1/4 tsp pepper
2 tblsp cold, unsalted butter, diced
2 tblsp olive oil
4-5 tblsp cold water

Filling:

5 ounces crumbled goat cheese
1 1/2 lbs heirloom tomatoes, sliced into 1/4 inch slices or 1 1/2 lbs of your favorite tomatoes
1 tblsp chopped fresh thyme
1/2 tsp salt
1/4 tsp pepper

Preheat oven to 400 degrees. In a food processor, pulse cornmeal, flour, salt and pepper until combined. Add butter and olive oil, pulse until crumbly-DO NOT let the mixture turn into a big ball of dough. Add water slowly through chute while processor is on. You should have a smooth dough mixture.

Remove dough from processor and form into a tight ball. Cover with plastic wrap and refrigerate for 15 minutes. Remove, unwrap and with a rolling pin coated lightly with flour, roll dough into a 12 diameter circle. Press into a 11 inch fluted tart pan, pressing dough lightly into sides and bottom. Bake tart shell at 400 degrees for 20 minutes. Remove from oven. Sprinkle crumbled goat cheese on the bottom. Top with tomatoes. Over tomatoes, sprinkle thyme, salt and pepper. Return to oven and bake for 15 minutes. Allow tart to cool for at least 5 minutes before slicing.

Like this?


Heather

Leave a Comment

Snacks Vegetables and Fruit

Dreamy Fruit Dip

100_9206.jpg

What, I ask you, is better than ripe, fresh cut fruit?
Easy! Ripe, fresh cut fruit dipped in one of the best fruit dips of course!

This dip was actually contrived from a cake I used to make. It was called an angel lush cake. Some of you might have made this cake…it used to be on the back of vanilla pudding packages. The idea was to make this delicious mixture, spread it on an angel food cake and top with strawberries. It was really good, but the actual cake part was a distant second to the delicious pineapp-ly, creamy, wonderful pudding mixture, now known as my fruit dip recipe!

I decided to make it without the cake and –voila! Pineapple Fruit dip was born. This dip is amazing served with strawberries, bananas and even graham crackers. It is addicting, I am giving you fair warning, but it is a great, fresh addition to your dessert table, especially for summer get togethers. I also find it is a fun, after school treat for the kids too.

My kids loooooove fruit, but the fruit dip is just icing on the…..well, fruit?

Pineapple Fruit Dip

1 20 oz can crushed pineapple, undrained

1 3.4 oz box instant vanilla pudding
1 8 oz container cool whip, thawed

In a medium bowl, pour pineapple, with the juice in. Sprinkle vanilla pudding on top. Mix well. Let stand one minute. Fold in cool whip and chill for one hour. Serve with strawberries, bananas or dipping vessel of your choice!

Heather

Leave a Comment

Appetizers Chicken & Turkey Main Dishes

Cowboy Quesadillas

100_9202.jpg
I do love quick dinners. Seriously, it is so difficult to cook these days with my little guy running around. My evenings usually go something like this:
The girls are playing and I finally get my son interested in something. I tip toe away and start prepping dinner. I turn to grab an ingredient and like a ghost in the night, he is RIGHT behind me, grabbing onto my legs and begging to be picked up.

I ask, encourage…ok, let’s get real….BEG him to go back and play with his toys, but before you know it, I am one handed stirring a pot of boiling liquid, chopping with one hand and wondering if instead of diced peppers, the recipe could handle one whole pepper just dumped in. I am skipping ingredients because I cannot focus and by the time my husband walks in the door, I am desperate.


“Take HIM!” I beg.

And then, finally, I can cook.

Although, now, the girls are bored and looking for something to do…and it is usually in the kitchen.

So when I come across a quick meal, or one that can be made ahead of time, I am ecstatic.

This is one of those quick dinners. And, an extra bonus, it is really good! I made the chicken mixture and the dipping sauce when my son was napping, and then quickly assembled these at dinner time and it only took minutes. I served them with some crunchy pepper strips that I cut up earlier too, so dinnertime prep was extremely minimal which equals one happy mom.

My kids loved it and they for some reason loved the name too. Somehow we were all getting really goofy at the dinner table and kept saying, “Howdy pardner!” It was a little weird, but actually kind of funny. I think it is hysterical that they pretty much thought they summed up cowboys in those two little words. And really, they now probably believe that these quesadillas were a main staple of cowboys back in the day.

Oh well. I will set them straight one of these days. Along with the fact that policeman will not

actually come our door to arrest anyone just because they weren’t listening to their mom, and that the gum they swallowed will not, in fact, stay in their stomachs for seven years.

There is plenty of time for all of that.


Cowboy Quesadillas


1/2 cup brown or white rice (I used brown)

1/2 cup black beans
1 1/2 cup diced, cooked chicken
1/2 cup frozen corn, thawed
1/2 cup diced tomatoes
1/3 cup barbecue sauce
2 cups shredded monterey jack cheese
8 medium tortillas, any variety
Olive oil or cooking spray

Combine rice, beans, chicken, corn and tomatoes. Add barbecue sauce and stir until coated. Divide into 4 even portions. Heat skillet. Drizzle olive oil in skillet or coat with cooking spray. Place one tortilla in hot pan. Sprinkle 1/4 cup cheese on tortilla and one portion of barbecue chicken mixture. Sprinkle another 1/4 cup cheese on top. Place second tortilla on top and press down gently with a spatula. Heat until golden brown and slightly crisp about 2-3 minutes. Flip carefully and cook for 2-3 minutes on other side. Flip onto a plate, slice in wedges (I used a pizza cutter) and serve with barbecue ranch dipping sauce.

Barbecue Ranch Dipping Sauce

1 cup ranch dressing
3 tblsp barbecue sauce

Mix well and serve with quesadillas.


Heather

Leave a Comment

  • « Previous Page
  • 1
  • …
  • 31
  • 32
  • 33
  • 34
  • 35
  • …
  • 38
  • Next Page »

Heather

I am a midwestern girl who grew up in the big city, but now enjoys her days as a stay at home mom in the suburbs. Who says spending time in the kitchen has to be boring? I hope to inspire your family kitchen with some new ideas, fun recipes and great tips.

Stay Up to Date

Get all the latest tasty goodness straight to your inbox!

Girl and her Kitchen

Join us!

Hey! I am the GIRL in the kitchen and I am so glad you decided to visit. Love to cook and eat? You will find some great recipes on this site, whether you are looking to eat healthy, splurge on a dessert, make dinner or host a party-I have it all! Sometimes I’ll give you a story along with my recipe, other times, I want to take you straight to the food!  Whatever the reason that you decided to visit, I am so glad you joined me in the kitchen! Feel free to take a look around the site, and please…stay awhile!

Archives

Popular Categories

  • Appetizers
  • Breakfast
  • Crafts
  • Salads and Dressings
  • Side Dishes
  • Vegetables and Fruit

Most Popular Posts

Corner Bakery Cafe Giveaway!

Corner Bakery Cafe Giveaway!

Filed Under: Reviews

Bacon Cheddar Skillet Cornbread

Bacon Cheddar Skillet Cornbread

Filed Under: Breads, Quick Breads and Rolls, Side Dishes

Puffy Pancakes {Perfect for Valentine’s Day!}

Puffy Pancakes {Perfect for Valentine’s Day!}

Filed Under: Breakfast, Valentine's Day

100 Days of Real Food Cookbook Review {and Giveaway!}

100 Days of Real Food Cookbook Review {and Giveaway!}

Filed Under: Vegetarian

Copyright © 2026 · Divine theme by Restored 316