• Email
    • Facebook
    • Instagram
    • Pinterest
    • Twitter

Girl and Her Kitchen

Plan. Make. Eat. Design. Craft. Create. Celebrate. Life.

  • Home
  • About the Girl
  • Recipe Index
  • We LOVE
  • Weekly Menu

Breakfast Muffins & Scones

Strawberry Rhubarb Oatmeal Muffins

Strawberry+Rhubarb+Cover+Photo.jpg

I am that friend that doesn’t have a garden, but absolutely loves sharing your yield! Anytime-seriously, I am a grateful taker and will probably make you something with my bounty. You know, that bounty that you provide? I feel very blessed that I have many friends who garden, because I do not.

Last weekend, my kids and I went to the garden center to pick up some flowers and they were so interested in the vegetables. They were begging me for a garden which I knew was just not a possibility with the lay out of the yard (and my husband’s resentful behavior if you try to block one bit of his yard for mowing purposes).  You know how it goes right?

But they were so insistent. When you have three, very cute and well behaved in that moment children begging you for something healthy and beneficial, let me tell you, it is hard to say no. Did I mention we were at the garden center on Memorial Day weekend on an absolutely beautiful day when probably everyone else in my town was there too? Yeah, that gives you a little sense of urgency as well. So, I am sure you can finish this story.

We perused the vegetable aisle and came home with lavender, cucumbers, strawberries, a bag of potting soil and a large box to grow them in.

Stop laughing right now.

Ok, go ahead, because it is actually pretty funny.

So, that was pretty random, but we went with it and we came home with our…er…bounty. I think the funniest moments came when my gardening friends saw what I was trying to do.

“Um…cucumbers?” One friend asked, trying her best to be nice. “In that box?”

I nodded and pretended to have some idea of what I was doing.

She saw right through me and I caved. I admitted to have no idea.

Another friend a few days later said in her nicest tone, “You need something for the cucumbers to grow up on. Were you going to put that in soon?”

Um…OF COURSE! I mean, what did you think? That I DIDN’T know that cucumbers need something to climb. I mean, everyone knows that…right?

Except me. Because honestly I had no idea. I am not sure what I really thought actually. Well, I guess I did. I thought I would come out one morning and several plump cucumbers would just be laying in the box.

I mean, if it happened that way, I would garden all the time.

So, back to the moral of the story, thank goodness for friends who garden and share with other friends. (that should be on a tshirt!)

Recently I have had a few friends offer me some rhubarb which just happens to be one of my favorite things to eat. I love the tart flavor and the texture of rhubarb and have had fun trying it in a bunch of different things.  A friend and I were recently laughing about rhubarb (seriously that is where I am in my life I suppose. Laughing and telling stories about rhubarb.)  She was saying how everyone says that they LOOOOVE rhubarb, but really, what do we love about it? That it is drowning in sugar and mixed with strawberries right? I mean, does anyone really love rhubarb just on its own? Is anyone out there crunching away on delicious rhubarb? Anyone?

Just today I visited a friend’s garden and her husband told me that he eats it raw, dipped in sugar. He let me try it and it was actually good. Not sure that I would prefer that over a buttery, crumbly rhubarb cobbler, but it was fun to try!

So naturally I will make all sorts of tasty desserts with the rhubarb, but to start I thought I would try out a healthy, yet delicious muffin recipe that we can all enjoy without drowning our rhubarb in pounds of sugar.

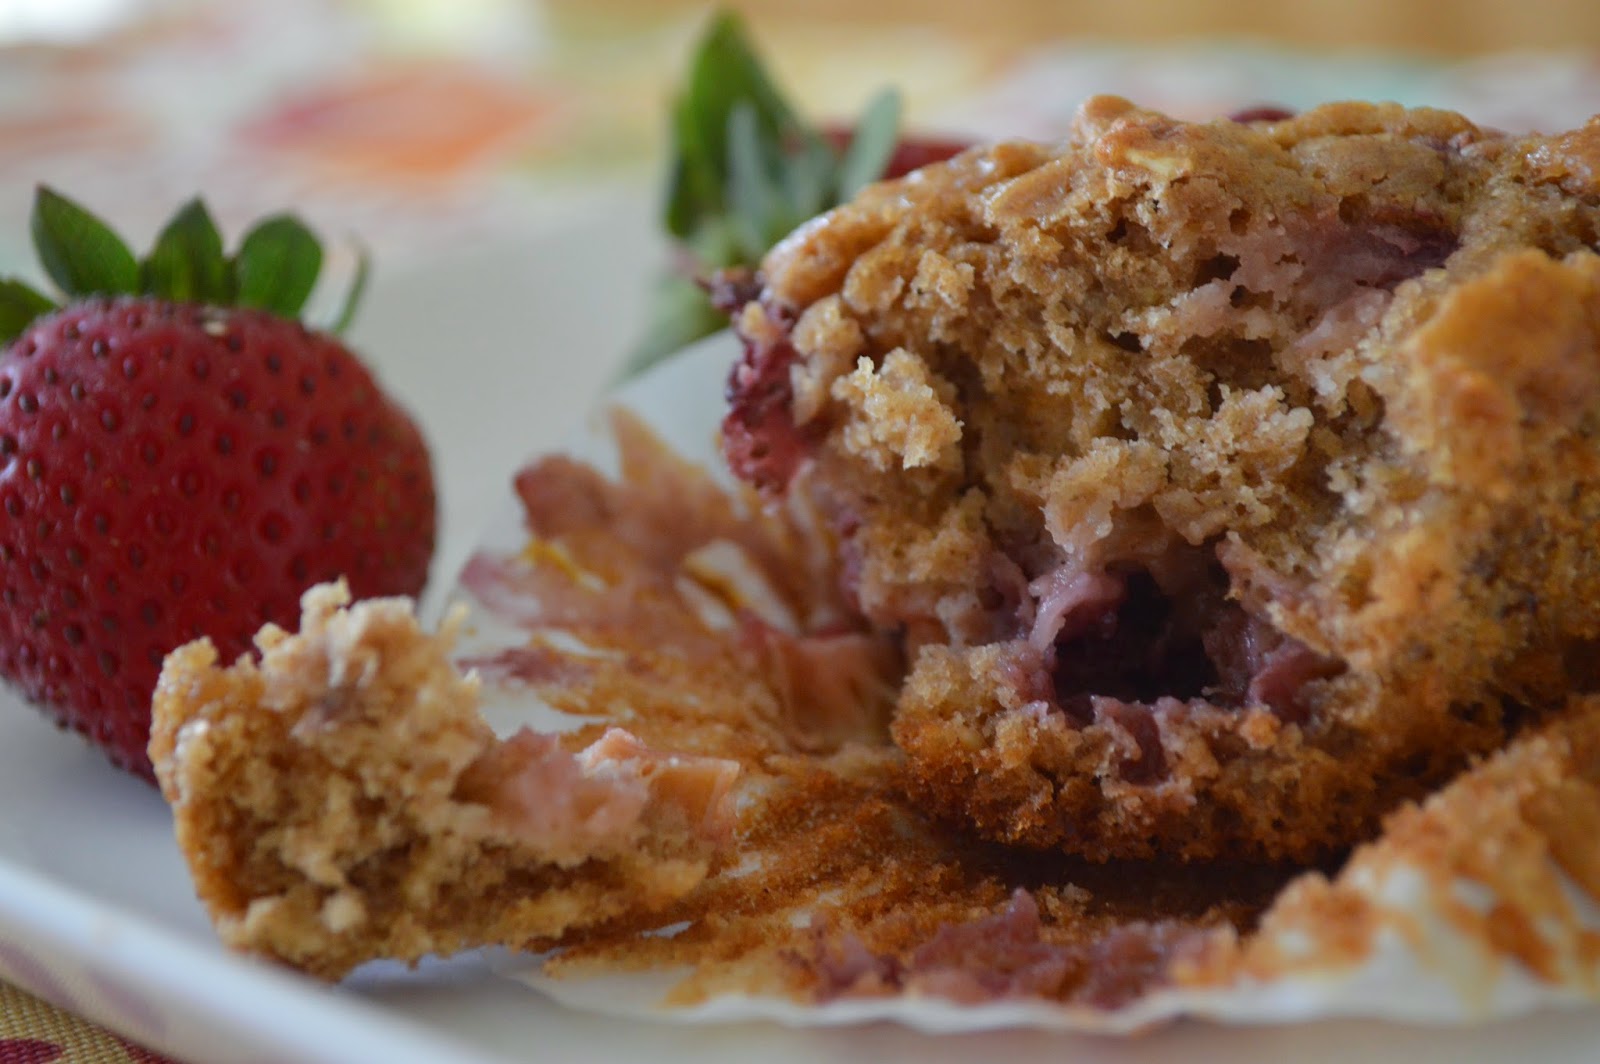
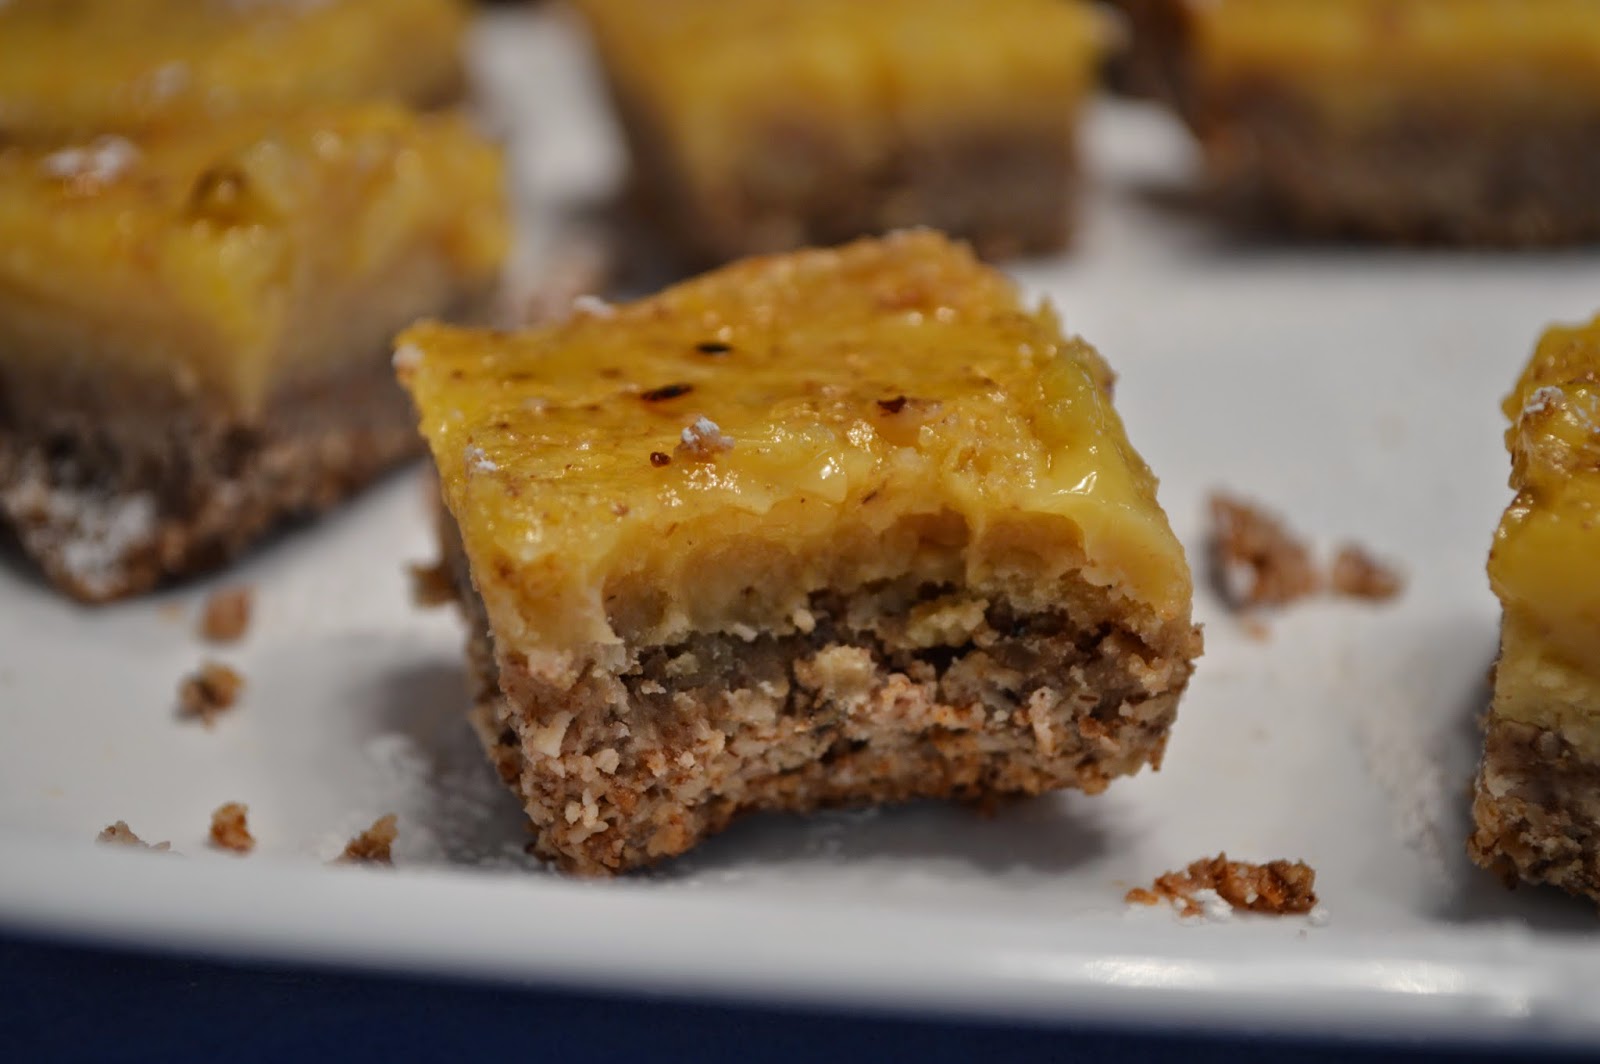
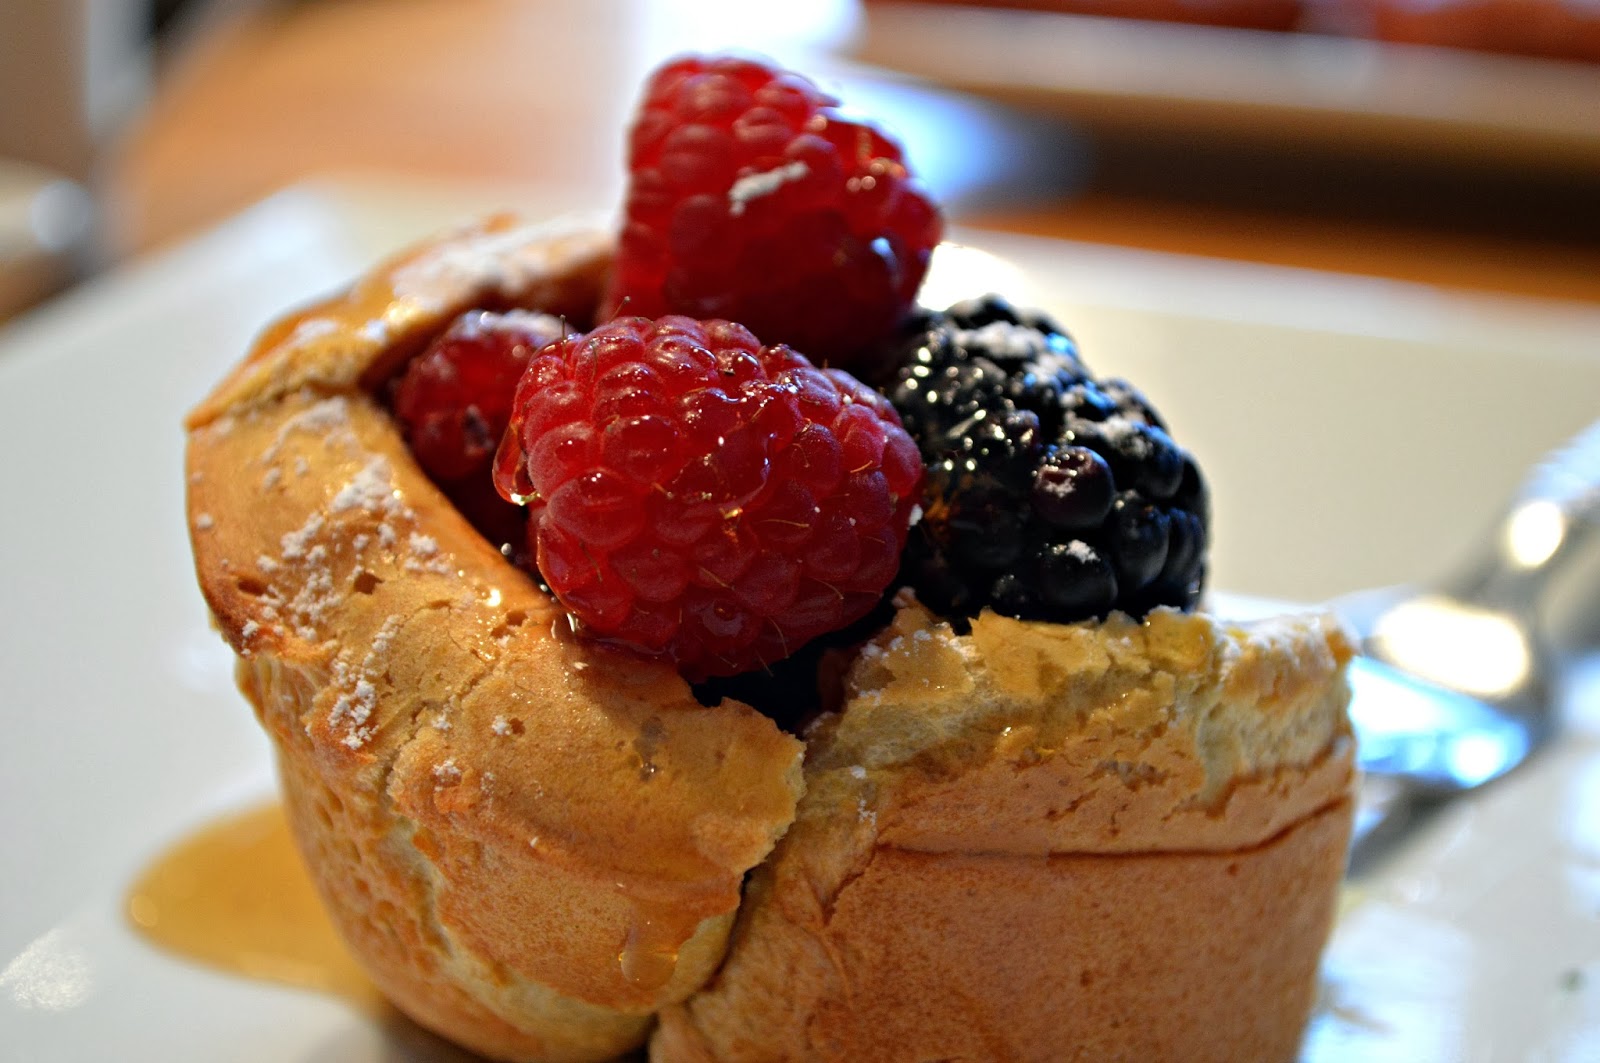
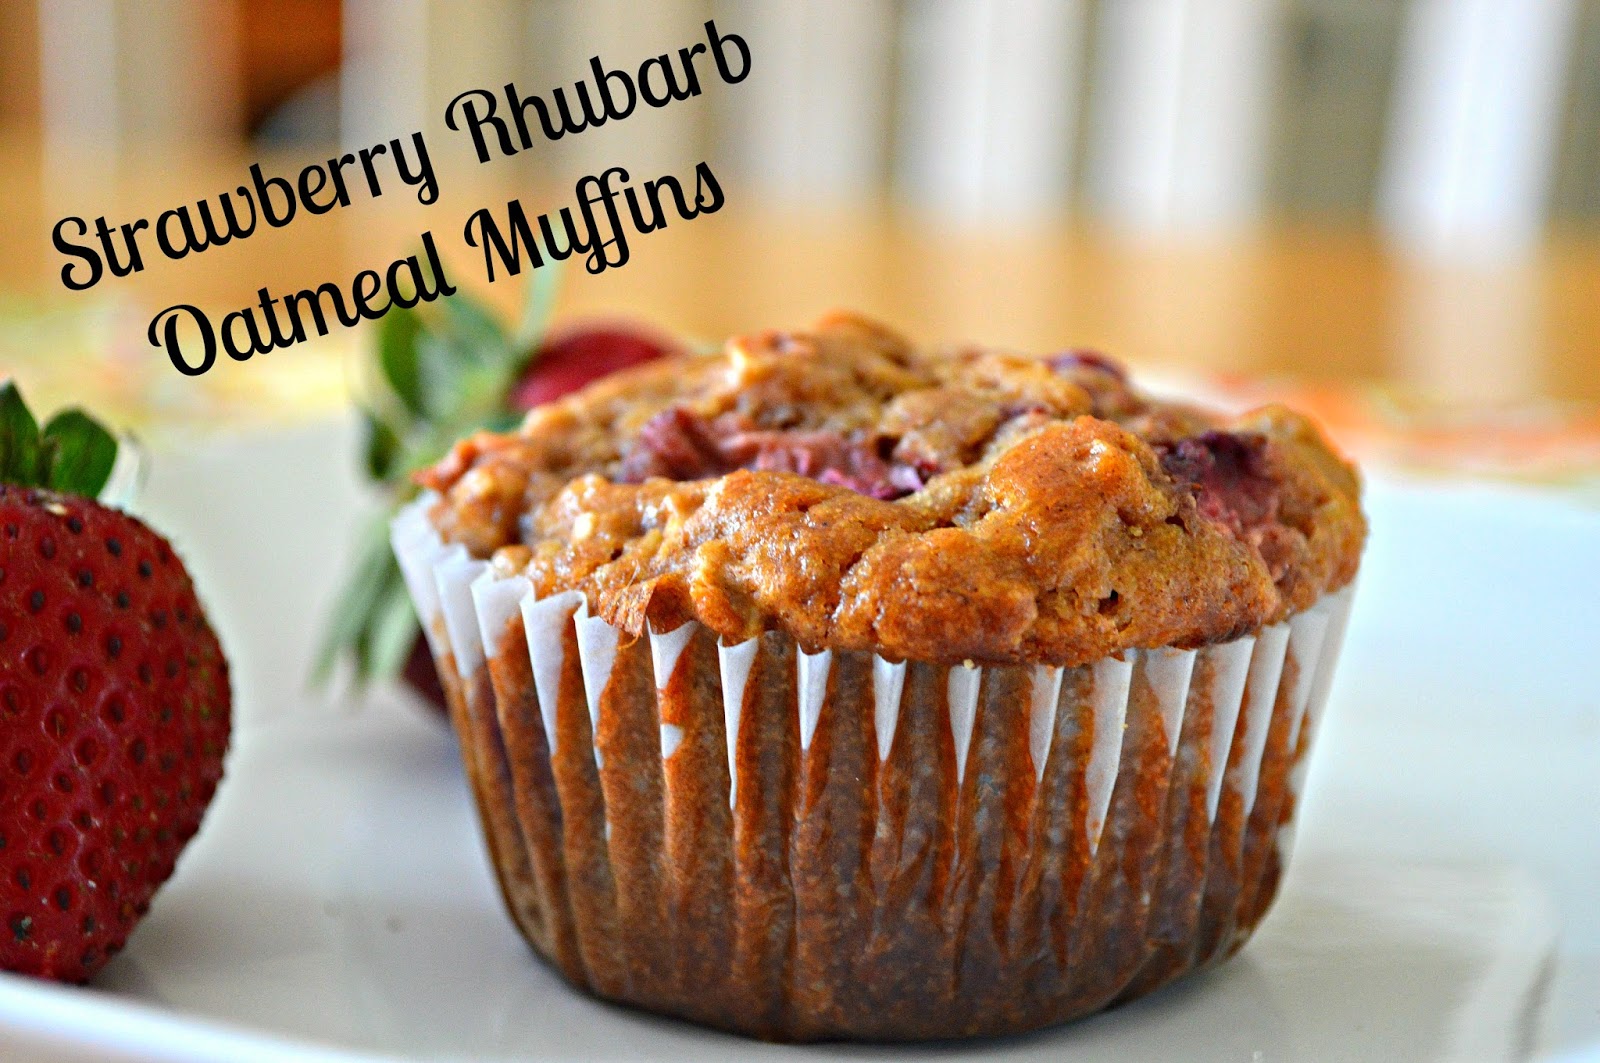
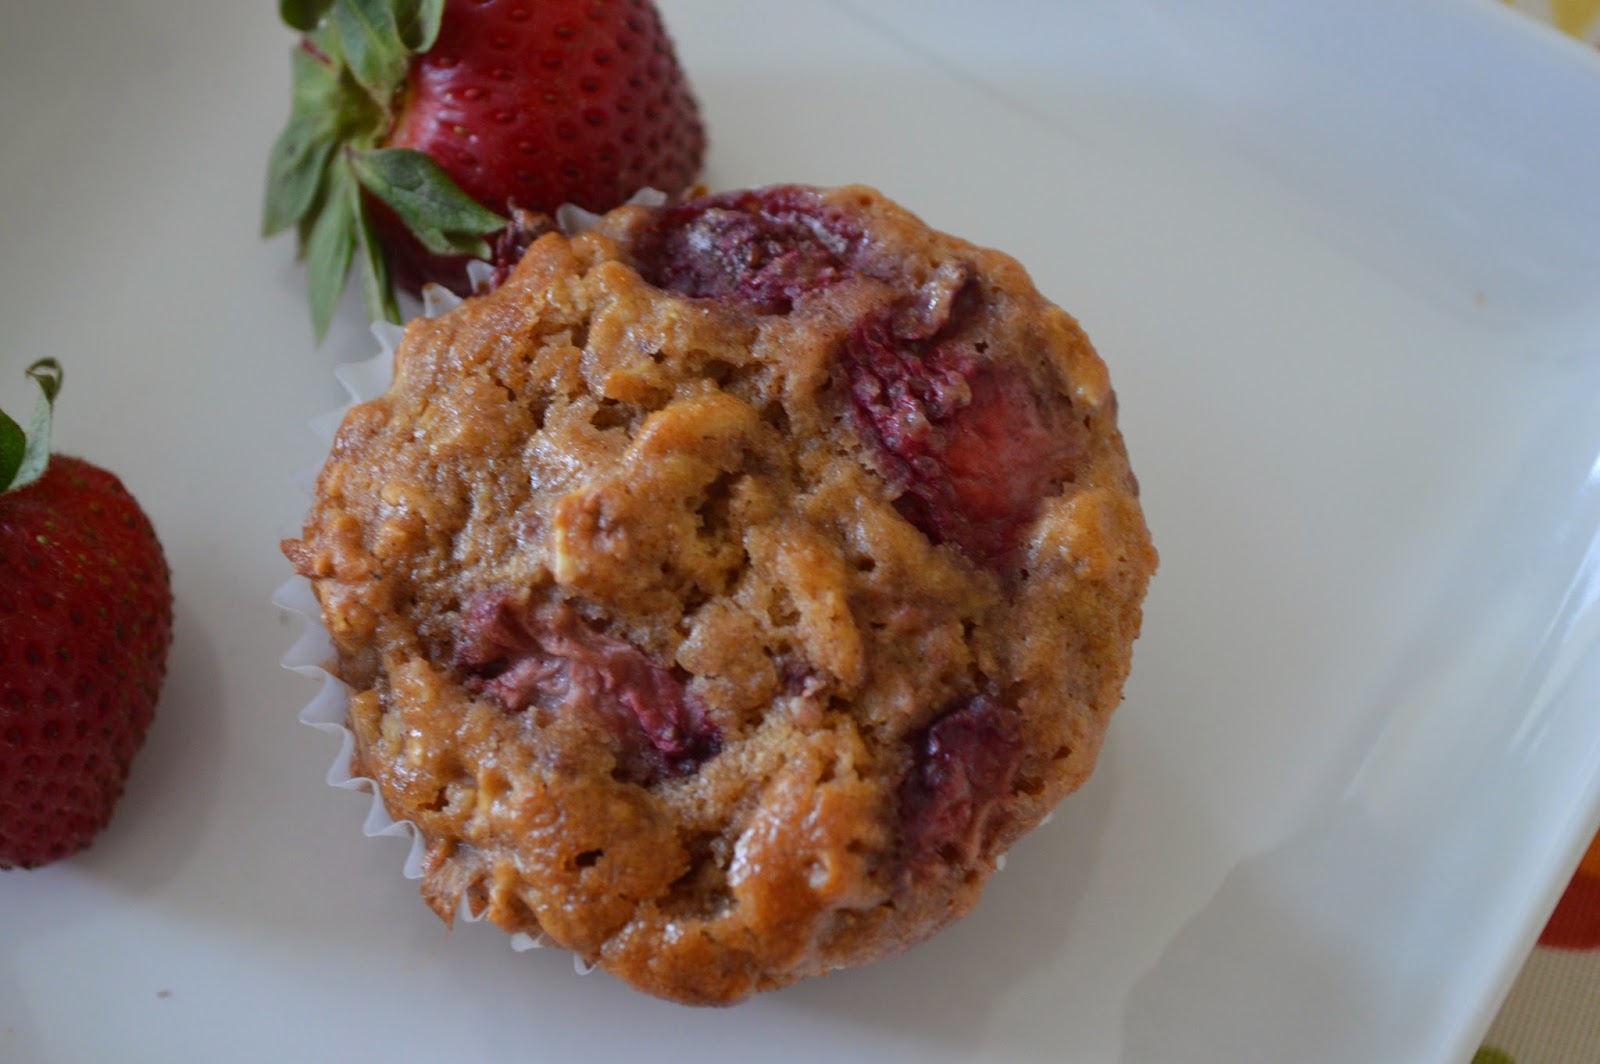
These muffins are tender and moist and filled with healthy ingredients. My kids love these for breakfast or a snack. Feel free to swipe them with a bit of creamy butter, or just eat them on their own. The sweet strawberries and tart rhubarb just remind you that summer is just about here.

Strawberry Rhubarb Oatmeal Muffins

Makes 18 muffins

*I tried to create a rhubarb recipe with no refined sugar. That being said, the rhubarb still remains a little tart in the muffins unless you sprinkle with a little sugar and let it sit. I like them without the brown sugar or with it, but if you have picky kids that will notice the tartness, you may want to add the brown sugar step. It is still only 1 tblsp in a whole batch of muffins, so we are still doing pretty well!*

1 cup rhubarb, sliced in in 1/2 inch slices and then cut in half
1 cup fresh strawberries, sliced
1 tblsp brown sugar (optional-see note above*)
1 egg
1 cup buttermilk
2 tsp lemon juice
1/2 cup maple syrup
1 tblsp honey
1/4 cup unsweetened apple sauce
1/4 cup oil (I used coconut oil, but you can use canola or a light olive. Or, use 1/4 cup melted butter)
2 1/2 cups whole wheat pastry flour
1 cup rolled oats
1 tsp cinnamon
1 tsp baking soda
1 tsp baking powder
1/4 tsp salt

Combine the strawberries and rhubarb in a small bowl and sprinkle brown sugar over it if you are using the sugar. Let it sit to the side. In a medium bowl, mix the flour, oats, cinnamon, baking soda, baking powder and salt.

In a large bowl, whisk the egg until yellow and creamy. Add the milk, lemon juice, maple syrup, honey, applesauce, and oil. With a hand mixer on low, mix until well combined. Slowly add the dry ingredients mixing just until mixture is wet and combined. Do not over mix. Fold in fruit mixture. Let batter rest for 10-15 minutes. This “resting” period allows the batter to absorb the liquid in the fruit making for a better muffin. Do not skip this step! When you are letting the batter rest, preheat the oven to 350 degrees.

Line a muffin tin with paper cupcake liners. I use an ice cream scoop to fill the liners, but fill them about 3/4 of the way full. Bake at 350 degrees for about 25 minutes. Let cool in the pan for about 15 minutes and then serve. Muffins can be stored in a sealed container for two days, or you can freeze them for about a month.


Heather

Leave a Comment

Christmas Cookies & Bars Desserts Gluten free

Flourless Peanut Butter Cookies with Dark Chocolate Drizzle

The month of May is designated “Celiac Disease Awareness Month” and in honor of all those who live with this disease, I wanted to share a recipe with you all. Those affected with Celiac Disease cannot have gluten and can have serious health problems if they do. Besides those with Celiac Disease, I know many people that live a gluten free life since it makes them feel better and it has become their lifestyle. Many who hear the words “gluten-free” tend to think that all treats like cake, cookies and other sweets are completely off limits.

I have a recipe for you today that you can enjoy-completely gluten free.

Not only that, but it is really easy, doesn’t include that many ingredients and tastes delicious.

Interested?

Head on over to my Kids in the Kitchen column over at Little Lake County to find the complete, mouthwatering recipe there!

Enjoy!

Heather

Leave a Comment

Gluten free Pies and Tarts

Lemon Bars {Gluten-Free!}

I am definitely a chocolate girl, but there is just something about a light, tart, lemony dessert just makes my mouth water. It is one of those flavors you just cannot stay away from and surprisingly (for me) really love! These lemon bars are light, creamy and delicious, and even better yet for some of you…gluten free! I have a delicious lemon bar recipe that is not gluten free that I will share soon, but these are wonderful, and thought I would share first for all those out there that live gluten free.
These are really easy too, a surprise if you have ever made lemon bars from scratch before. My other recipe, while wonderful, takes a lot of time and effort (squeezing what feels like a hundred lemons!). I know you will be able to whip up this recipe quite easily  for a Mother’s Day brunch or any spring entertaining!

Lemon Bars (Gluten Free)

Crust:
1½ cup gluten free oats, measured then ground into flour (I used my food processor)
1/2 cup pecans, pulsed a few times in a food processor
2 tblsp sugar
1/4 tsp sea salt
4 tblsp butter, melted

Filling:
4 eggs
1 tbslp lemon zest
6 tblsp lemon juice
5 tblsp honey
1/2 cup gluten free oats, ground very finely into flour
2 tsp sugar

Preheat oven to 350 degrees. Line a 8×8 baking pan with parchment paper making sure to leave paper overhang and spray or grease lightly with cooking spray or butter.  In a small bowl, mix 1 1/2 cups oats ground into flour, pecans, sugar, sea salt, and melted butter until well combined. It should look like coarse sand. Press very firmly into the baking pan. Bake for 12 minutes and take out to cool slightly. While crust is cooling, beat eggs with lemon zest, lemon juice, honey, oats and sugar until a smooth creamy batter is formed (it will be very liquidy). Pour the batter onto the crust. Carefully place on the middle rack in the oven and bake for 20 minutes. Cool 10 minutes and then refrigerate for 3 hours or more. To serve, lift out of pan using parchment paper overhang. Slice, sift powdered sugar on the top and serve. Refrigerate leftovers.

*Note: If you do not want to use sugar, replace sugar in crust with coconut sugar and sugar in filling with stevia. If you need a nut free dessert, replace pecans with another 1/2 cup oats and increase the butter by a tblsp.* 


Heather

1 Comment

Crafts Valentine's Day

Show Me Some Love {Part Two of the Fun!}


“Roses are Red” Valentine Wreath
I just love the fun wreaths that are floating around out there. And I love even more to see one of those cuties hanging on my front door! This is one I saw a few years ago and I actually put it together last year.  Although I do not have many photos, I will do some step by step instructions to help you out.
Supplies:
*Styrofoam wreath  I believe mine is 14 inches
* A plethora of felt  (red, pink, white)
(“Would you say I have a plethora?”)…” anyone know that line? (“Anyone?, Bueller…Bueller?”)  Ha, I crack myself up! I think I purchased 10 sheets of each
*glue gun, glue
*good fabric cutting scissors
 *a good movie
This wreath is not difficult at all which means you can put it together while you are watching all your favorite shows (Sherlock, Downton Abbey).
 
Step 1: cut each sheet into four to six sections (rectangles), depending on how big you want your roses.


 Step two: cut each rectangle in a circular motion, beginning with the outside and working your way to the center. As you can see they do not need to be perfect, though I did round the edges a bit.

Step 3: Wrap the felt in a circular motion, beginning in the center and working your way out to make your roses.  They will for the most part stay together so if you want to do a few at a time before gluing them on go for it. 

Step 4: Assemble your wreath by gluing your roses on in whatever pattern you wish. Then when you are finished either glue a piece of ribbon to the back as a hook or you can wrap material like I have done and tie it off. 

 Have a Happy Valentine’s Day!


Abby


Heather

Leave a Comment

Crafts Valentine's Day

Show Me Some Love {Part One of the Fun!}

BE MY VALENTINE
When Pottery Barn came out with their cute Valentine envelopes that hung on chairs I said, “I need those!”. Then I looked at the price, and… yikes!! So, a sister of mine took on the task of making the envelopes while I fell in love with the heart idea.  So fun, right? Creating this craft using either method results in you getting something super easy and cute. I made one for each member of our family so during the month of February they can expect to find a card or sweet treat each day reminding them of how much they are loved! It’s also an added bonus for people like Heather and I who just don’t have enough Valentine’s Day decor…this adds to the holiday making it more festive!

You will see that I sewed mine,I know how to sew, however, it is not necessary! Glue works great and looks just as good!
Here’s what you need:
*Felt, both soft and the sturdier sheet.  The sturdier felt is about 12X16 inches. Both are found at the craft store right next to each other. 
*Glue gun or sewing machine
*White writing pen, paint, or embossing thread (for names)
*Ribbon for tying, and ric rac for trim

 Step 1: Make a heart or envelope shaped template.  I used card stock and the good old trick I learned in grade school, fold the paper in half, draw an “ice cream cone” shape along the crease and cut away.  This worked great and this way you can choose the size you want based on the size of your chairs.

Step 2: Use your heart template to make another template, only this time cut the top half of the heart off.  This is going to be used to make the pouch for all the goodies.

Step 3: Use your heart template to cut 2 hearts, 1 of the soft felt and one of the sturdier.

Step 4:  Use your half heart template to cut 2 half hearts, 1 of the soft and one of the sturdy.

Step 5: Write, paint or embroider names on your soft felt half hearts.  An easy way to do this is to go to your computer, choose a font and size  you like and type all the names out on paper first. Then, place the paper with the typed name behind the piece of  soft felt and hold it up against a window.  The name will show through and you can trace it on the felt using a marker to better help you paint, write, or embroider. (They have these great disappearing markers at the craft store that I use for quilting. The ink just disappears after so many hours.  Its awesome)

Step 6: Start assembling, Glue or sew the two half heart together with a piece of ric rac between the two. Then determine where you are going to place your ribbon.
(My chairs have no wooden bars going across the back. If yours do, feel free to insert your ribbon at the top and bottom or just at the top if you like.) Using a straight pin, secure the ribbon just until you are ready to glue or sew it.  Then begin to glue or stitch the ric rac between the full hearts and then glue and secure the ribbon.  (The pictures are better at explaining this than I am!!!) 

Step 7: Glue your half heart sandwich onto the full heart, leaving the top open for the pouch. 

Extra: I use a lighter on stray threads, ric rac, and ribbon to keep them from fraying.  To do this simply bring the flame close enough to only melt the strays away.  The flame will not touch the fabric but the heat from the flame will do the work.  If you are nervous about this you can always use the fun stuff they sell at the craft store to accomplish this same goal. 

Now all that’s left is to tie them to your chairs and fill them with love.

Happy crafting!!!
Abby

Heather

Leave a Comment

Crafts Valentine's Day

Homemade Valentines

We are big fans over here of making our own valentines. I know, I know, it takes a lot longer, but I feel like it is away to get the kids involved more than just writing their name on a card. Not to say that we have not done that too some years, but if we have the time, we love making them.

Last year, we made these cute little flower lollipop valentines that were a lot of work to cut out, but really cute and fun! This year we are making minion valentines for school. Can you say ADORABLE? The kids absolutely loved the design and they weren’t that hard to make (we already started!). My daughter has a birthday this month, so along with the minion ones, we also made some cute rice krispie ones for her birthday party. They are adorable, and once again, easy enough for the kids to do mostly on their own!

Interested in trying them out? Check out my post on Little Lake County in my monthly column over there: Kids in the Kitchen with Girl and Her Kitchen. They are easy and fun and sure to make for some fun family time!

Also…did you know that Girl and Her Kitchen is on PINTEREST? Follow us HERE now!

Heather

Leave a Comment

Desserts Valentine's Day

Decadent Chocolate Pudding {Perfect for Valentine’s Day!}

It is funny to think about a time in my life where I actually did not care for chocolate.

I know you probably don’t believe me, but it’s true!

I liked it, but I didn’t really crave it. That was a really long time ago. Now, even the thought of chocolate sends me tearing up my pantry looking for a small square of it. I am a dark chocolate fan, I know the chocolate wars get pretty intense over the milk versus dark, but I am a die hard dark chocolate fan. I guess you can add white chocolate in there (NOT a fan), but let’s face it, we all know it isn’t really chocolate, so let’s stop fooling ourselves.

This pudding is made up of the richest, most decadent chocolate flavor you can get without biting directly into a bar of chocolate. It is swirled into the creamiest of pudding recipes and far better than the boxed stuff you can buy at the store that’s made mostly of chemical flavors! This says homemade all the way, but it is actually easier than you may  think! I made dinner for a few friends this week and whipped this up in no time for them. I even had time to make some fresh whipped cream, which is a must I might add.

I found this recipe in one of my older cookbooks (did I mention I collect them?), and this recipe was written a long time ago. Of course, that immediately tipped me off that it would be delicious…wasn’t everything made better a long  time ago? I tweaked it just a bit, and the result was this delicious pudding that I could call my own.  This is a perfect treat for Valentine’s Day, a special occasion, or just a fun family dessert.

I would like to lie to you to tell you that you won’t want to make this again and again, but I just cannot do it.

It is simply that addictive.

Decadent Chocolate Pudding

3 tblsp cocoa powder
3 tblsp cornstarch
1/4 tsp salt
1 cup whipping cream
3 large egg yolks
2 1/2 cups whole milk
1/2 cup sugar
2 tsp vanilla
5 ounces bittersweet chocolate, finely chopped

In a medium bowl, whisk together cocoa powder, corn starch and salt. Pour the cream in slowly, whisking until nice and smooth. Whisk the eggs into the mixture one at a time. In a 3 quart saucepan, add the milk and sugar and heat, stirring frequently until sugar is dissolved. Heat to a simmer and watch carefully! Do not let the milk boil over. Pour a cup of the hot milk mixture into the bowl with the cream, cocoa and cornstarch mixture. Whisk. Repeat with a second cup and whisk very quickly. Continue with one more cup, repeating the quick whisking process. Carefully pour the mixture back into the saucepan. Warm over medium heat until it comes to a full boil …once again, carefully making sure it does not boil over. Once it is boiling, start your timer for 2 1/2 minutes and whisk vigorously. Make sure you are careful not to splash the hot mixture out of the pot. Scrape the bottom while whisking. Remove from heat and stir in vanilla and chocolate. Stir gently until chocolate is completely melted. Spread into a storage container, cover the top with plastic wrap to act as the pudding “skin” so one does not form. Cover, chill for 3 hours or longer. Serve chilled with fresh whipped cream. Store in the fridge, and eat within 3 days…if it lasts that long!

Heather

2 Comments

Cookies & Bars Desserts Gluten free Valentine's Day

Gluten Free Chocolate Chip Cookies {Perfect for a Valentine’s Day Treat!}

We are so lucky to have an awesome gluten free guest blogger! Welcome back Amy, who is bringing us more of her delicious gluten free treats! 

The idea of chocolate chip cookies and cookie pops started as a simple request from my husband for cookies.  Well, not really cookies, but the cookie dough, for him to eat straight out of the bowl.  He’s asked me for his own personal bowl of dough before, since he usually sneaks several bites of mine while I’m making the actual cookies, and I continually shoo him away, reminding him that he cannot double dip!  So I set off to make one of the recipes you can find on Pinterest for ‘Chocolate Chip Cookie Dough Dip’.  The word ‘dip’ should have been my first clue that it wasn’t going to be a salmonella-free version of the traditional cookie dough.  Alas, the dip was more like a frosting and we decided it would be pretty good on brownies or maybe even the chocolate chip cookies themselves.
Deciding that cookies were finally going to be made and any experimenting with safely edible cookie dough would have to wait, I headed downstairs to round up my ingredients (As a side note, I keep my gluten free flours in labeled containers in a small freezer chest.  The stay fresher longer, especially the brown rice flour, which can go rancid quickly if left at room temperature).  As I found my cookie sheet, I saw my heart-shaped Wilton cookie pop mold peeking out from under my baking towels. Yes! I had completely forgotten I bought this at our local Goodwill last fall, and now seemed like the perfect time to give this a try.
Gluten free chocolate chip cookies are one of the easiest recipes to convert yet one of the hardest cookies to perfect.  Everyone loves chocolate chip cookies and everyone has a particular taste they associate with them, which is very, very hard to recreate in a gluten free version.  Most gluten free chocolate chip cookies you will find will have a gritty texture to them, mainly from the type of gluten free flour that is used.  Some will have a more bland taste than you might remember from the wheat version, and some may have an odder shape to them – either really small and puffy or really large and flat.  Like most of cooking or baking, getting to the gluten free chocolate chip cookie that you really like is a process of trial and error.  But at least you can eat most of what you experiment with!
Below is the gluten free chocolate chip cookie recipe I use.  It’s a slight modification of the original Toll House version that we all know and love.  I used softened coconut oil for the shortening and a blended mix of gluten free flours, including Authentic Foods Superfine Brown Rice Flour.  That particular flour is a little more difficult to find and more expensive than a Bobs Red Mill pack at Target (check Amazon and watch for free shipping!), but well worth it.
Oh – the edible cookie dough recipe!  Just skip the eggs, add a little more butter, reduce the flour by ¼ C and omit the leavening ingredients.  It actually looks and tastes like a chocolate chip cookie dough pie crust…an idea for another recipe!
Chocolate Chip Cookies –  Gluten Free!


½ cup coconut oil, softened (or shortening)                             
½ cup butter, softened                                                                      
¾ cup brown sugar                                                                               
¾ cup sugar                                                                                             
2 eggs                                                                                                   
2 tsp vanilla                                                                                             
2 1/4 cup brown rice flour blend
1/2 tsp xanthan gum
1 tsp baking soda
1/2 tsp baking powder
1 tsp salt
2 cups chocolate chips


1.       Preheat oven to 375 F.  Grease a large cookie sheet or cookie pop tin with coconut oil or shortening.
2.       Cream coconut oil (or shortening), butter, sugar and brown sugar together in a large bowl with a mixer on medium speed, until light and fluffy. Add eggs and vanilla and continue to mix well. In a separate, medium bowl, mix together flour, xanthan gum, baking soda, baking powder, and salt. Add dry ingredients to wet and mix well. Fold in chocolate chips. Drop dough onto cookie sheet by  tablespoon and place them about 2″ apart on the cookie sheet. If using a cookie pop tin, drop about a tablespoon of dough into mold and press in to form. Insert cookie pop stick and cover with an additional tablespoon of dough into mold and press in to form. Insert cookie pop stick and cover with an additional tablespoon of dough. Bake in oven for 9-11 minutes for  cookies, 13-15 minutes for cookie pops. Let cookies cool on cookie sheet approximately two minutes, remove from the pan and place on a cooling rack. For cookie pops, allow cookies to cool almost completely in the tin, letting the cookie stick set in place. Gently remove cookies from tin using a rubber scraper. Store cookies in an air tight container for up to three days.


Heather

Leave a Comment

Breakfast Valentine's Day

Puffy Pancakes {Perfect for Valentine’s Day!}

Do you put up Valentine’s Day decorations?

I am always a bit disappointed when I take out my Valentine’s Day bin of decorations, and realize how very little decorations I actually have.

This weekend, I told the kids, “Let’s put up our decorations!” I mean, is there really a good time to decorate for Valentine’s day? January does seem a tad premature, but then waiting until February? It seems like a lot of hassle for only 14 days of show. I don’t like unnecessary hassles.

So, we popped open the bin…only to find a wooden “LOVE” sign, a heart door hanger, a few towels, an angel holding a heart and a wreath.

All hell broke loose next.

“This is it??” my kids cried in disbelief. I mean, after over twelve stuffed bins of Christmas decorations, I can understand their confusion.

My oldest shook her head and wondered aloud, “Is this worth it Mom?”

I, in an effort to keep the Valentine Spirit alive (is that a thing?) put on my best holiday smile and dug to the bottom, praying I would find something good. I felt something, and pulled it out.

A Dora The Explorer Valentine book. My youngest snatched it from me with a smile as the older two groaned.

“Seriously mom?” their expressions both read.

I had to salvage things. After the thirty seconds it took for them to decorate for the holiday, I had an idea.

Breakfast. A good, fun, sort of Valentine-y breakfast.

Whipped up in under 20 minutes, delicious and fun, this breakfast saved Valentine’s Day. Almost a month before it even arrives.

You will have to try it too. Dare I say, it is quick enough to even make on a school morning? I think it is! Easy, delicious and creative, your kids will demand more! They will forget about all of your holiday shortcomings and revel in the deliciousness that is a home-cooked breakfast.

Enjoy.

 Puffy Pancakes

1 cup milk
6 eggs
1 1/2 tblsp sugar
1/2 cup whole wheat flour
1/2 cup all-purpose flour
1/2 tsp. salt
2 tsp. vanilla

1/4 cup canola oil, OR 1/4 cup butter, melted, OR 1/4 cup coconut oil, melted

Preheat oven to 400 degrees. Combine eggs and sugar in a blender. Mix until pale yellow and creamy. Add remaining ingredients.Spray a muffin tin with nonstick spray or an oil mister. Add batter to each cup, filling half way. Bake for 13-15 minutes, until golden brown and puffy. Let cool for five minutes, you will notice the middle sinking in a little. That is good! Serve warm with syrup, fresh berries, powdered sugar, whipped cream or yogurt and nuts. Let your kids fill them up with their choice of ingredients, and voila! Breakfast.

Heather

3 Comments

Crafts

Stacked Frame Wall Display

Aren’t these so fun?! And isn’t my little guy adorable?! Ha, sorry had to brag on my little guy. Anyway, in addition to looking great they only cost me about $30. Yes you heard me correctly. Who wouldn’t want to make these?!! And there are so many different ways to make these suit your specific needs.  So read the list of supplies, head to the store, and lets get crafting.

Supplies:
*MDF board (I got mine at Home Depot. It is long so I just had them cut it there into 3 equal pieces, around 24X16 (they will do it for free) $8

* 3 picture frames (I got mine at Hobby Lobby for about $4 each. Mine are 11X14 so if you want something smaller cut the big boards down a bit.
* Spray paint, I used Krylon paint for the blue and white. Super inexpensive at Walmart and a great brand.  Rustoleum is good paint too if you want to get that at the Depot as well. I did two coats of each. (Do not go cheap on spray paint, you will regret it.)
* Acrylic paint for the strips. I also purchased this at hobby lobby. Its called Tangerine, if you like the color. $.50
* Americana gel stain, also at hobby lobby in the acrylic paint section. $.50
*painters tape
*industrial velcro, (hardware store)
*Sand paper med grade
*Wall hanging claws
*Pictures- a friend took ours and I printed them at costco. They were under $2 a piece. Pretty sweet deal!!
And that’s it!! Lets get going. I didn’t take too many pictures of the above set so I have shown you with one I made for my daughter. 

Step 1: Paint your boards, two of one color and one of the other. Same with the frames.
Step 2: Sand down the edges and lightly all over the boards if you want to give them a more rustic feel like I did with my son’s. Wipe them down with a rag when you are finished. 

 Step 3: After the boards have dried, tape off your spacing. For my son’s I did about every 3 inches, for my daughter’s it was the width of the tape.  You can make these however wide you want, in whatever direction, in whatever pattern (chevron, diamond shaped). 

 You can see in the picture below that I made small marks along the center to make sure my tape stayed straight. 

 Step 4: Paint your stripes. On my son’s frame I used the tangerine acrylic paint and my daughter’s I used some pink spray paint I had left over from a lamp I did for her room. After you paint the stripes pull the tape off carefully and let dry. 

 Step 5: To use the gel stain you will need a sponge brush and a clean rag. Swipe your brush across the board and then immediately wipe it. Don’t be afraid because this will look a little dark, you will do some sanding to soften the color later. I did this on every board in my son’s room as well as the frames. Swipe and wipe, Swipe and wipe.:) 

Step 6: Sand wherever you feel you want to soften the swipes.  I mostly wanted to make sure no swipe marks were visible. I liked leaving a more rustic look on his.  My daughters frame I completely omitted the stain step.  So if that’s your preference do that.  

Step 7: Attach the wall claws to the back of the board. Its easier to attach these before you attach the frames. (not like I know from personal experience or anything)

Step 8: Velcro time!! I cut mine in half  lengthwise and then attached them to the middle of my frame, top, bottom, and sides. Then I did some measuring to determine where the other part of the velcro needed to end up on the board.  The best thing to do is measure your board and measure your frame and then do some centering according to those measurements.  After that stick your velcro on the board, put your pictures in the frames, and attach the frame to the board.  

 Step 9: Give yourself a big pat on the back for your amazing work!! 

Abby

idea from Sixsisterstuff

Heather

Leave a Comment

  • « Previous Page
  • 1
  • …
  • 15
  • 16
  • 17
  • 18
  • 19
  • …
  • 38
  • Next Page »

Heather

I am a midwestern girl who grew up in the big city, but now enjoys her days as a stay at home mom in the suburbs. Who says spending time in the kitchen has to be boring? I hope to inspire your family kitchen with some new ideas, fun recipes and great tips.

Stay Up to Date

Get all the latest tasty goodness straight to your inbox!

Girl and her Kitchen

Join us!

Hey! I am the GIRL in the kitchen and I am so glad you decided to visit. Love to cook and eat? You will find some great recipes on this site, whether you are looking to eat healthy, splurge on a dessert, make dinner or host a party-I have it all! Sometimes I’ll give you a story along with my recipe, other times, I want to take you straight to the food!  Whatever the reason that you decided to visit, I am so glad you joined me in the kitchen! Feel free to take a look around the site, and please…stay awhile!

Archives

Popular Categories

  • Appetizers
  • Breakfast
  • Crafts
  • Salads and Dressings
  • Side Dishes
  • Vegetables and Fruit

Most Popular Posts

Corner Bakery Cafe Giveaway!

Corner Bakery Cafe Giveaway!

Filed Under: Reviews

Bacon Cheddar Skillet Cornbread

Bacon Cheddar Skillet Cornbread

Filed Under: Breads, Quick Breads and Rolls, Side Dishes

Puffy Pancakes {Perfect for Valentine’s Day!}

Puffy Pancakes {Perfect for Valentine’s Day!}

Filed Under: Breakfast, Valentine's Day

100 Days of Real Food Cookbook Review {and Giveaway!}

100 Days of Real Food Cookbook Review {and Giveaway!}

Filed Under: Vegetarian

Copyright © 2026 · Divine theme by Restored 316