• Email
    • Facebook
    • Instagram
    • Pinterest
    • Twitter

Girl and Her Kitchen

Plan. Make. Eat. Design. Craft. Create. Celebrate. Life.

  • Home
  • About the Girl
  • Recipe Index
  • We LOVE
  • Weekly Menu

Crafts

Fun Fall or Holiday Wreath

Okay, so here is my very first posting. I’m sure you’re all looking at it going, “uh yeah, we 
can tell!” 
I promise they will get better!
So, I realized the fall wreath I had was looking pretty old and shabby and I didn’t really want to put it out again so I decided to make one. Lets be honest, it’s not actually a wreath, but it hangs like one. Originally, I saw this idea in red and white, but I already have so many holiday wreaths I want to make, or already own. So instead, I decided to change the design a bit and switch colors. This ended up being one of those “nap time” projects–you know the one you get started on and when you are almost at the finish line, you hear your baby making noise, but not yet crying, so you hurry to put the finishing touches on? 
I love a good long project, don’t get me wrong, and you will see plenty of those but I also like to see something come to completion quickly. There are plenty of the “never ending” things in our lives, it’s fun to get to the quick and happy.  
On that note, here are some quick instructions.  If you are one of those that has more fall than winter decor then do it in a pretty red or green.  The sky is the limit when it comes to putting one of these together.
 First, you are going to want to grab yourself some parchment paper and roll that out. Next, determine what size you want your letter, number, whatever, to be.  I literally just started drawing a line with pencil, and stopped when it looked long enough for me. It’s kind of fun to round the edges out, but you could also box them off or leave them straight, again, up to you.  (If you are doing it for winter it’s kinda fun to really curve
up the edges like a candy cane.)  Don’t worry about getting it perfect the first time, that’s what erasers are for.  When you are happy with your design, go ahead and cut it out, cutting about an inch extra all the way around. Then get ready to pin it to some burlap.  

Next cut two letters out of the burlap, one for the back and one for the front.  Then grab a template for your design.  I used chevron and just drew the template myself. If you need help there are tons and tons of free templates online you can print and use. It helps if your template it is on some sort of card stock or poster paper.

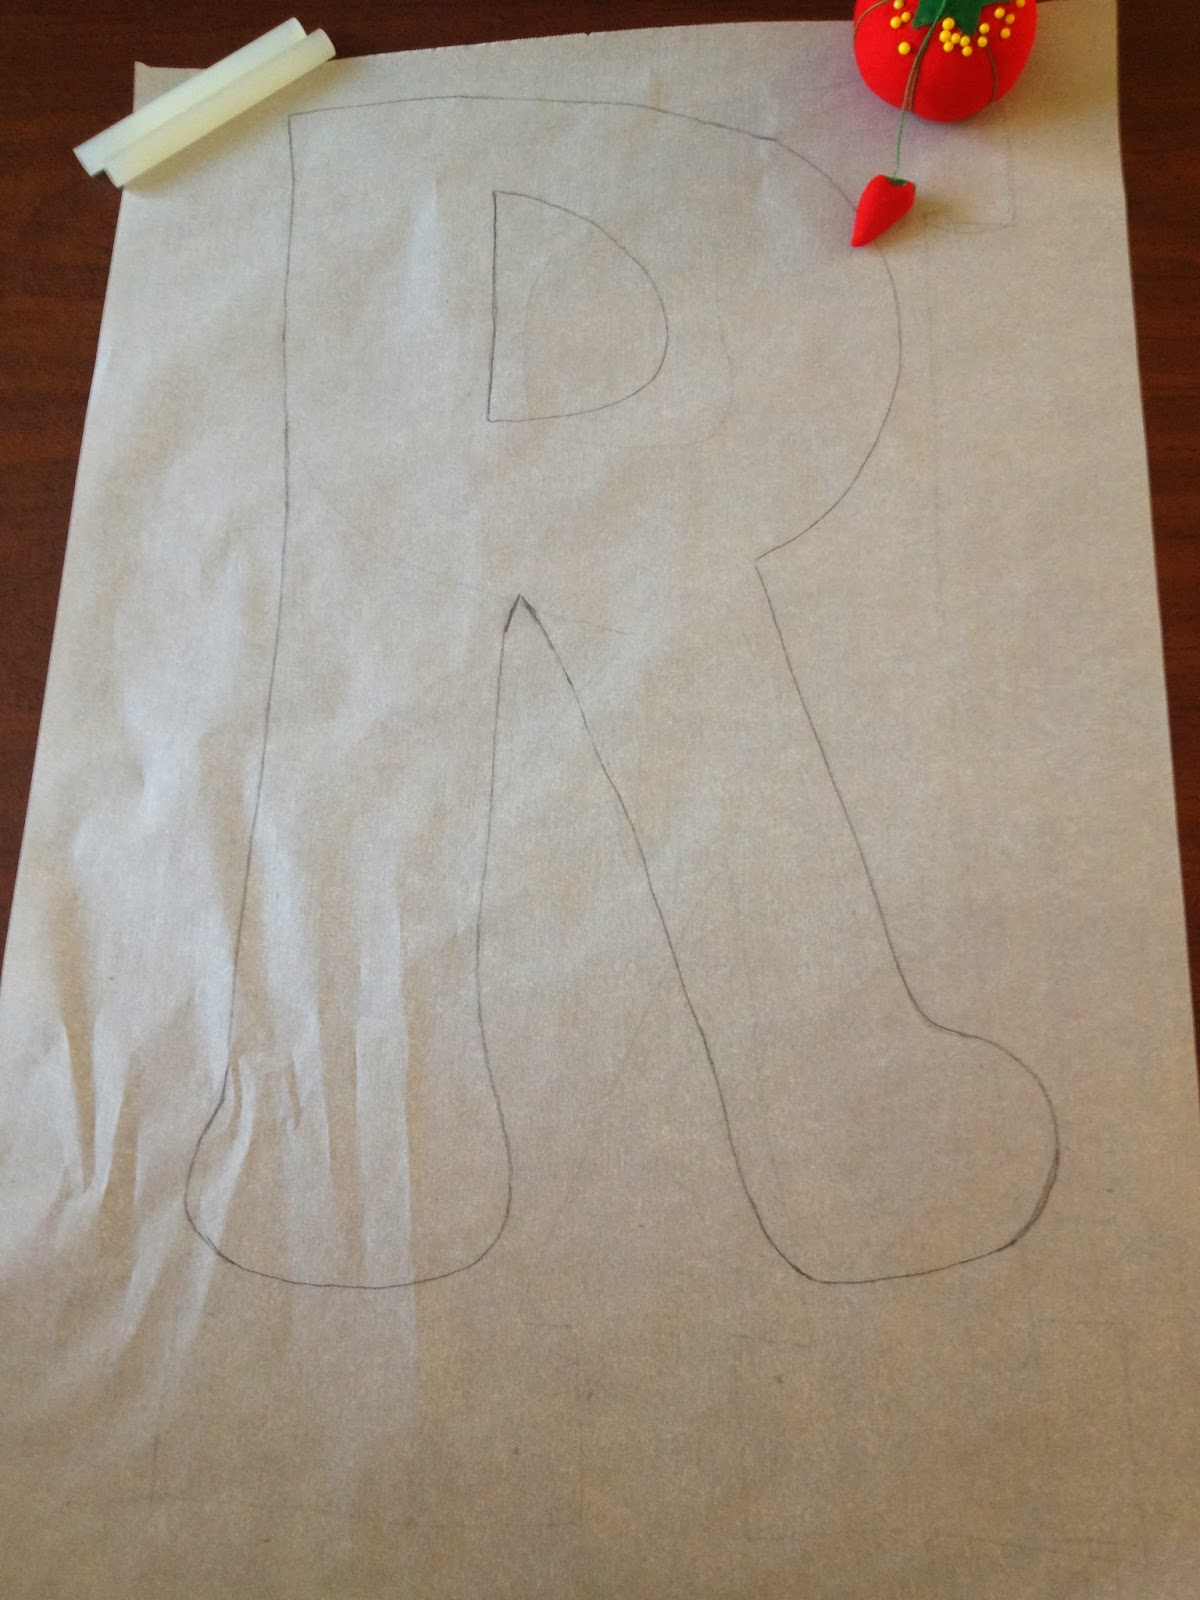
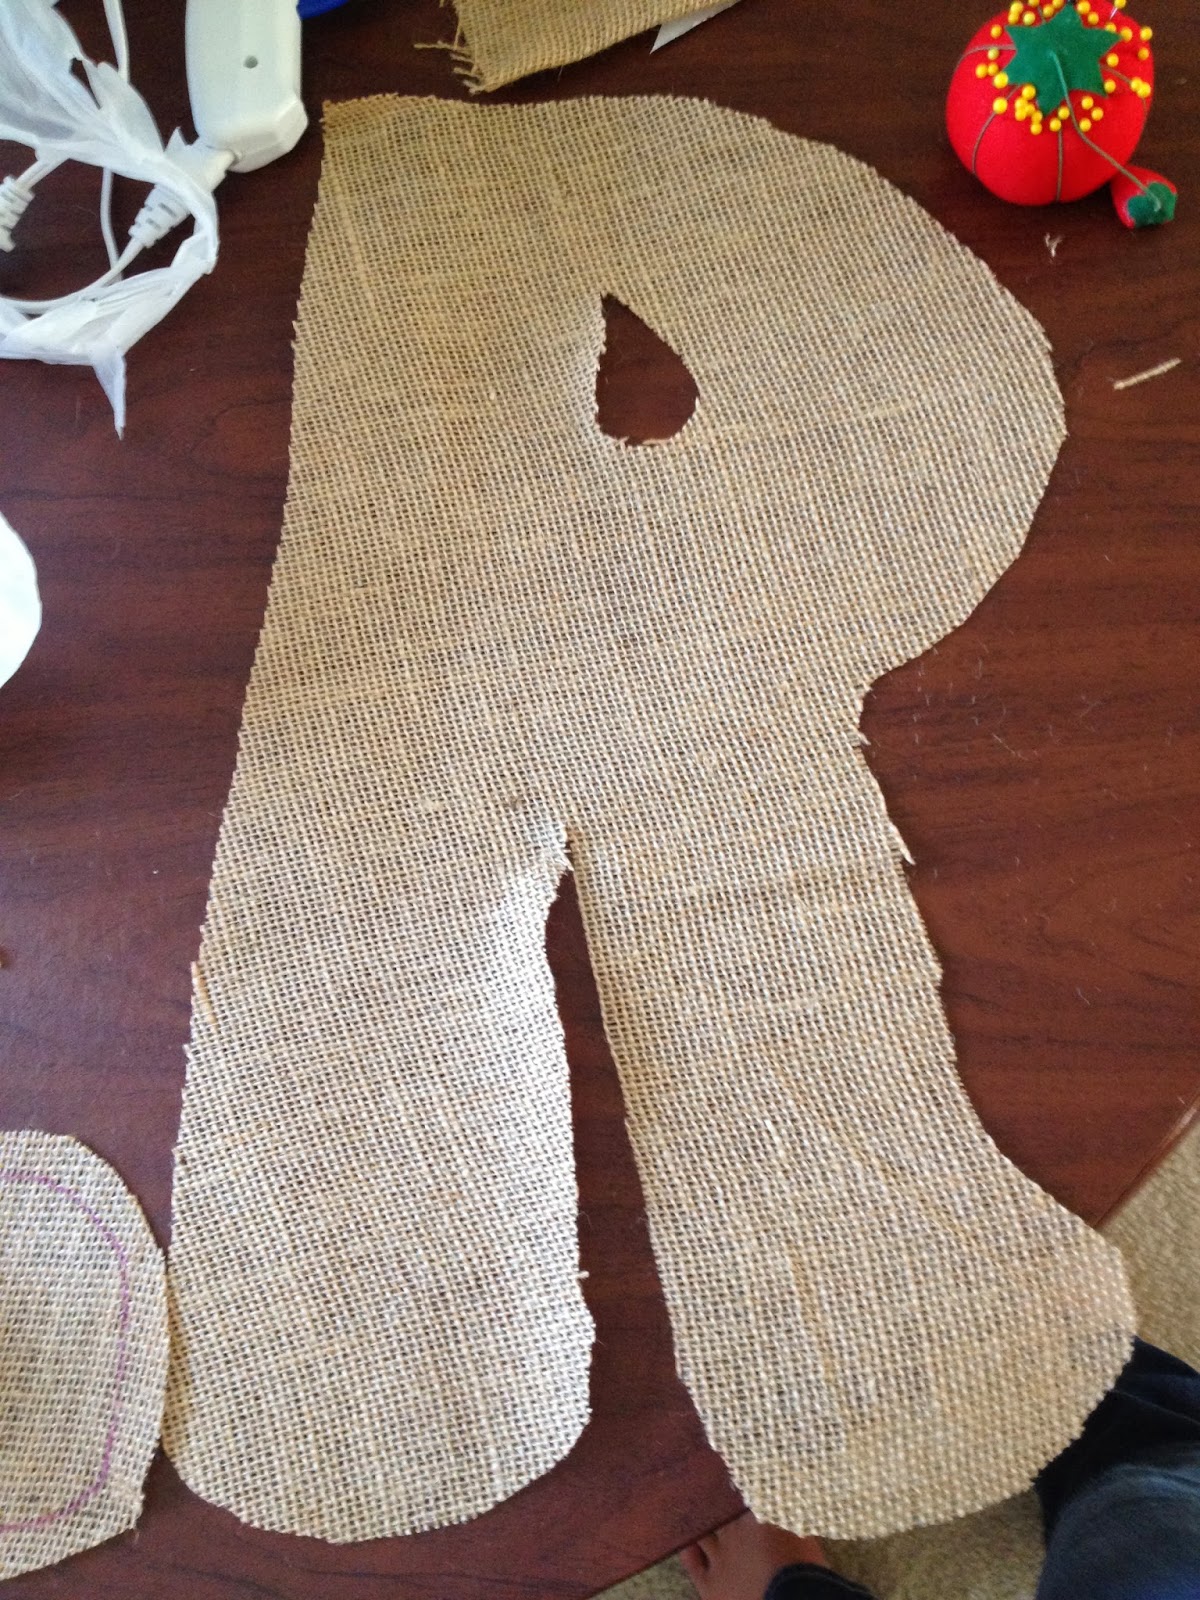
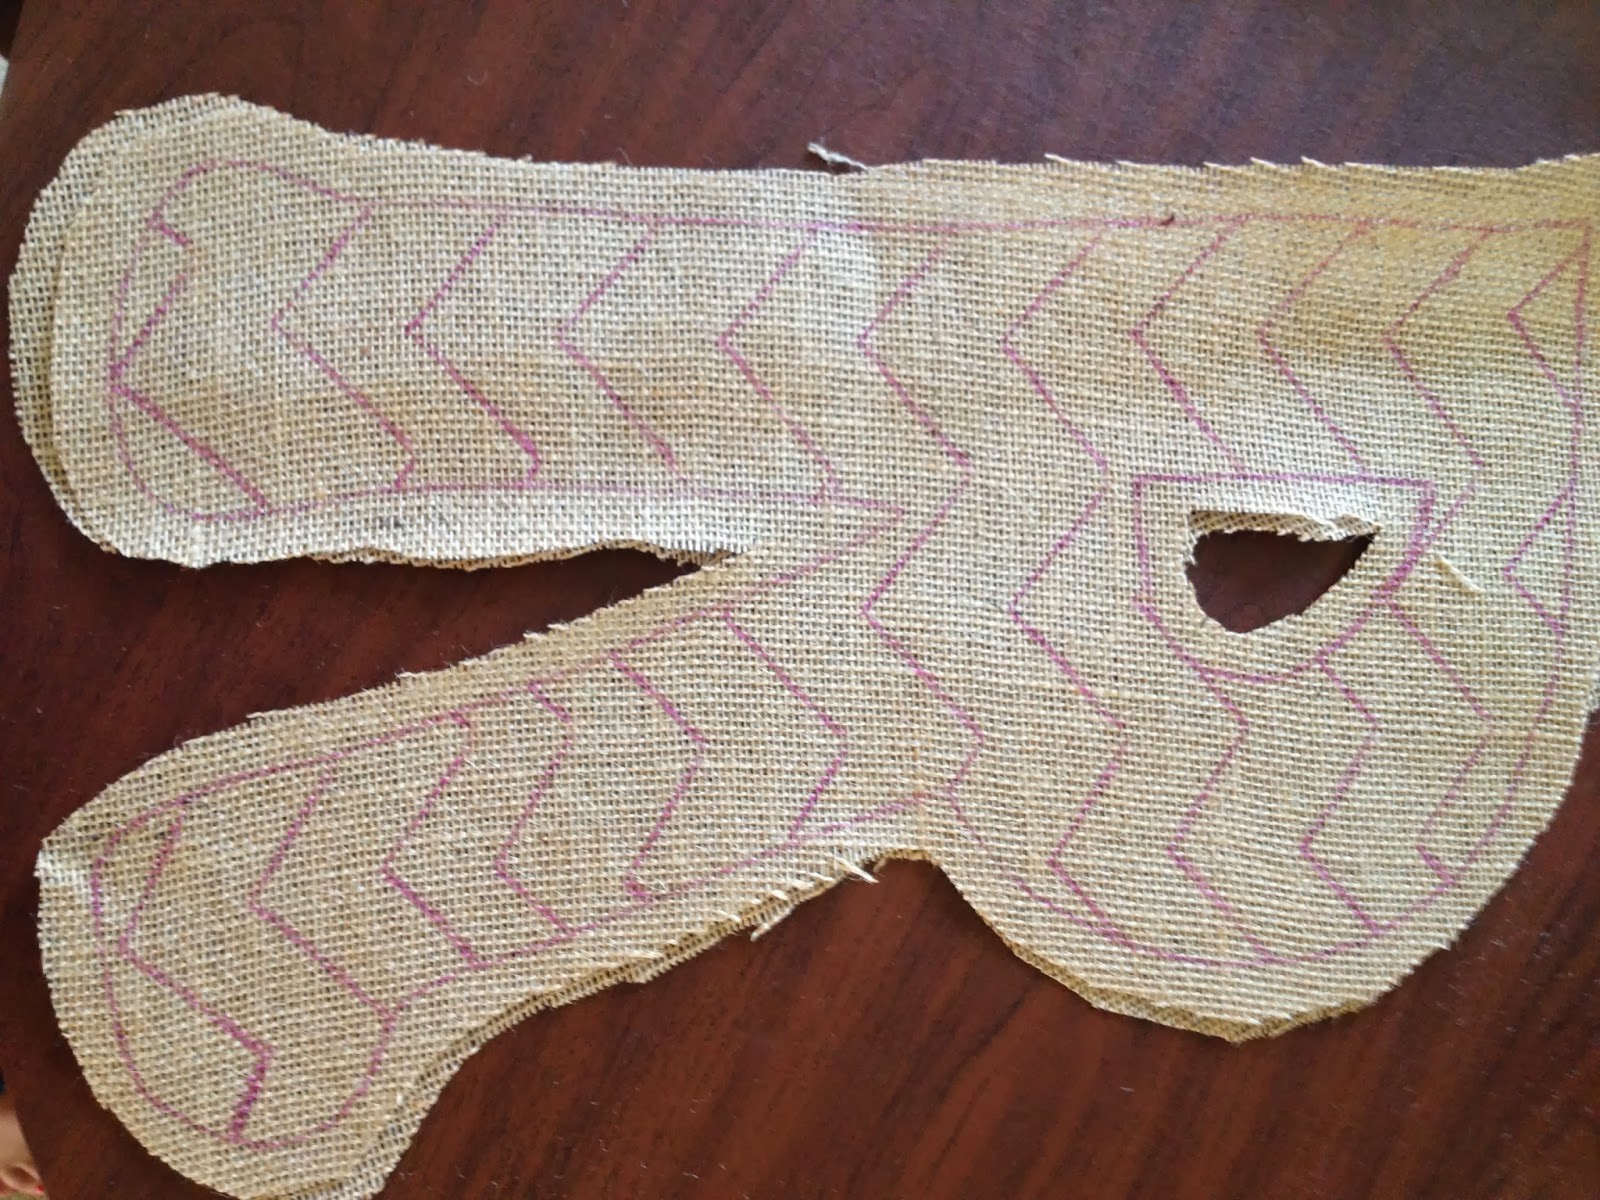
Draw on your design and then lay the top on some old cardboard or a garbage bag.  I went to good old Hobby Lobby and got some acrylic paint and then went to work.  It dries relatively quickly, which is really nice.

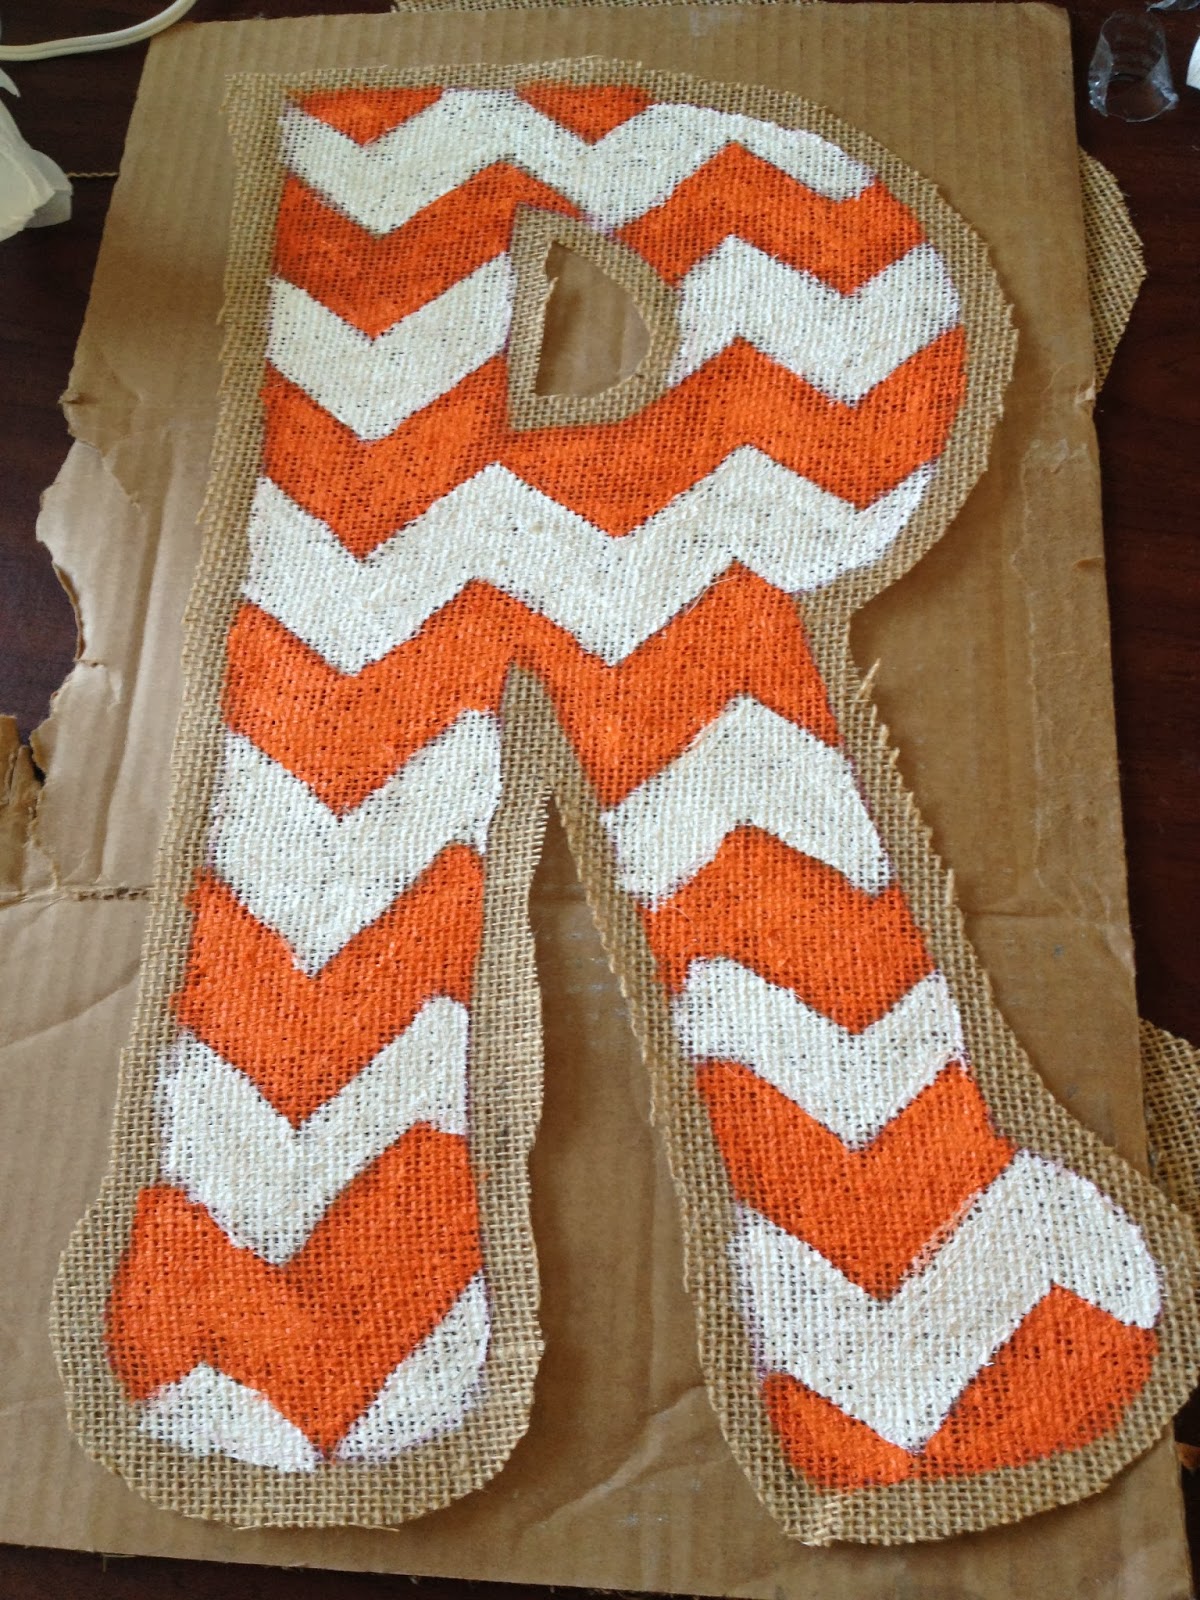
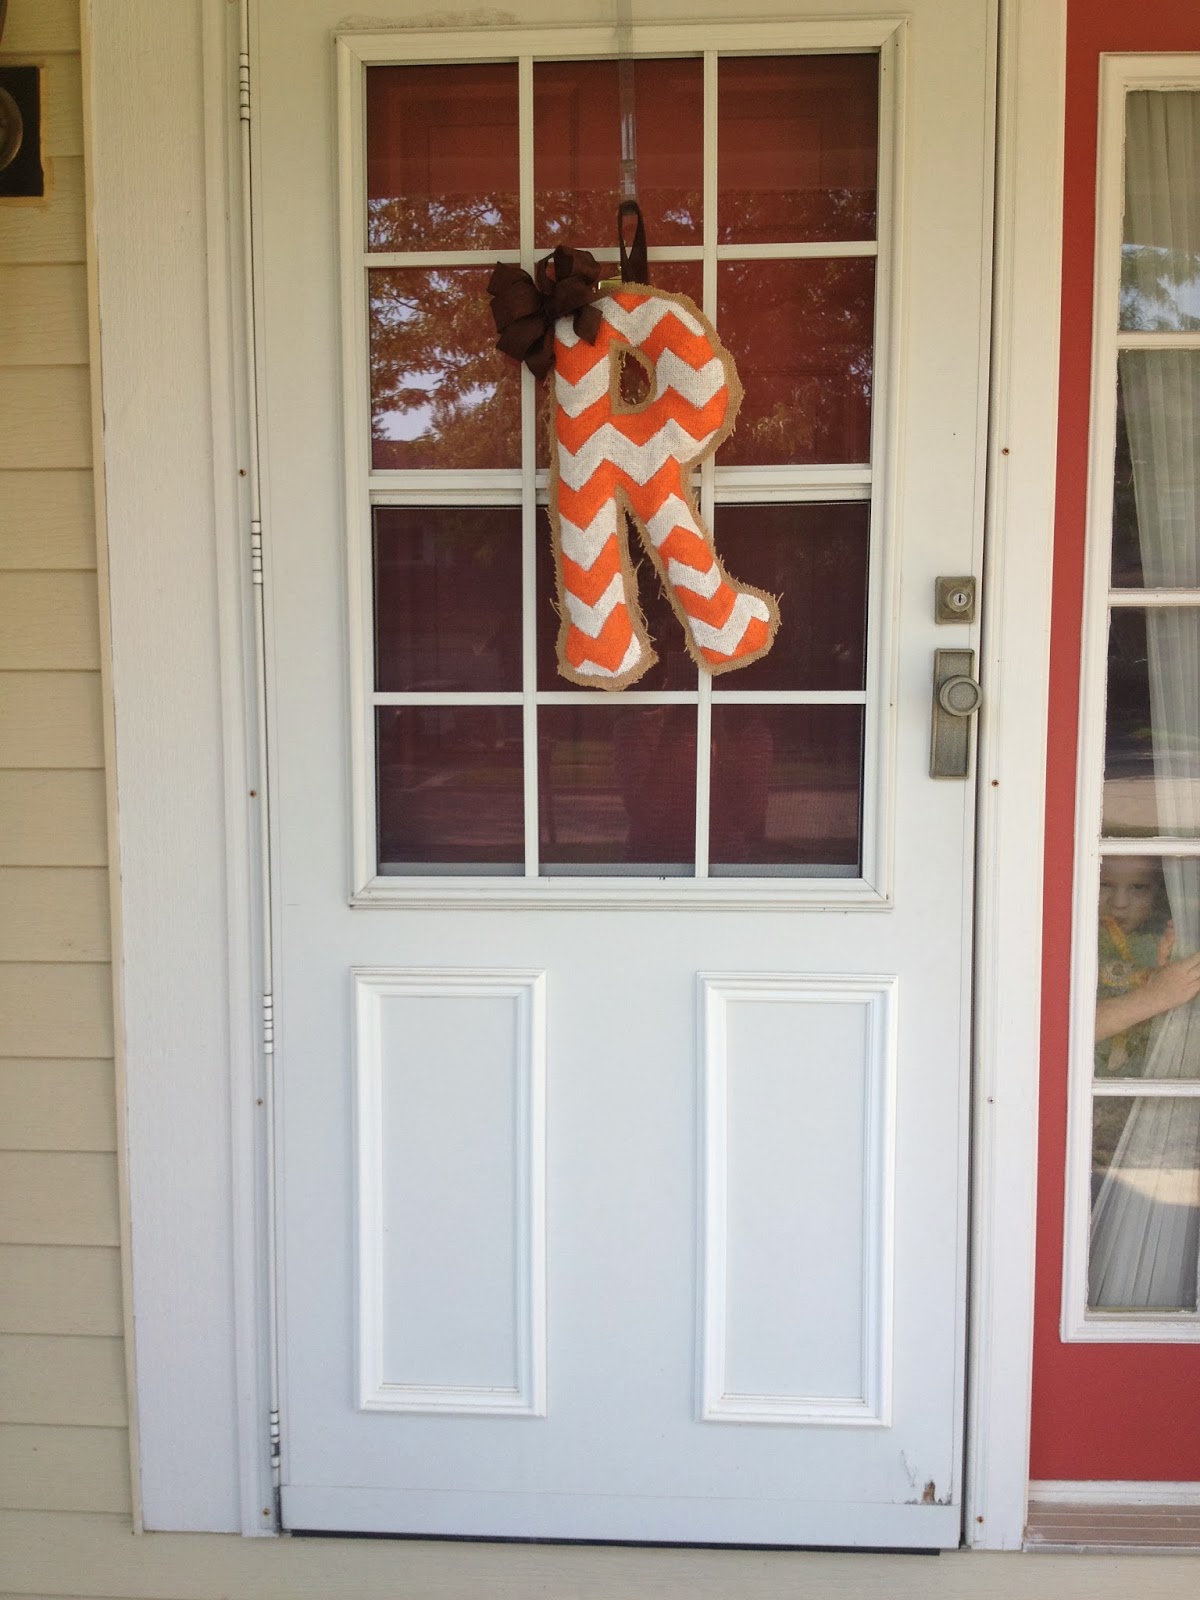
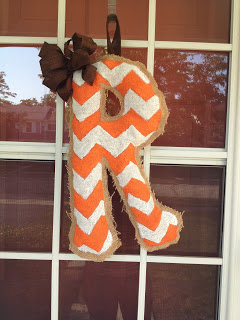
When the paint is dry you will need a glue gun and some stuffing of some sort.  I used an old pillow I had.  You can use plastic bags, or batting from your local craft store.  I began to glue at the top, leaving the extra burlap on the outside of my letter unglued. Then I just continued to stuff and glue until I was finished.  You Do Not want to wait until the end to stuff, it will be near impossible.  So just do a little at a time. When you are finished add some sort of a hook or loop to the back and if you want, a little fun bow to the front to give it an extra pop!! (idea from live a little wilder.) 🙂

Happy Crafting, 
Abby

Heather

Leave a Comment

Breads, Quick Breads and Rolls Breakfast

Whole Wheat Banana Breakfast Bread

So…purely for your enjoyment (and so I can overwhelm you with loads of muffin recipes) I have started a new feature: Good Mornings, a place that will soon be loaded with delicious breakfast recipes.

Have I told you how much I love breakfast? It is one of my favorite meals (love breakfast, love dinner, hate lunch).  I love variety too, so I am not one that can eat oatmeal everyday for breakfast and feel satisfied. This is purely in contrast to my husband who has eaten a bowl of cereal, a cup of coffee and a cup of juice for at least the last thirteen years of his life (since we have been married) only veering off that routine on the weekends where he really shakes things up with pancakes, eggs, and even french toast!
Today, I am giving you a really yummy breakfast idea that is a lot like my banana bread recipe, but less like cake and more like breakfast. I worked on my original banana bread recipe for awhile to get the taste and texture just right, but taking out the dessert like quality of the original and making it healthier without sacrificing flavor.
I am sure you are going to like it…and good morning!
Whole Grain Banana Breakfast Bread
1/2 cup canola oil or coconut oil, melted
3/4 cup honey
2 tbsp unsweetened applesauce
2 eggs
2 large overly ripe bananas, mashed
2 cups whole wheat pastry flour
1 tsp baking soda
1/2 tsp baking powder
1/2 tsp salt
2 tsp vanilla
3 tbsp low fat buttermilk

Beat oil, honey and applesauce together, add eggs and mashed bananas and beat well. Add dry ingredients, mixing well. Stir in buttermilk and vanilla. Pour into a greased bread loaf pan. Bake at 350 degrees for 50-60 minutes. If top is still soft, bake in additional 5 minute increments until well set. Cool in pan for ten minutes. Turn out onto wire rack and cool completely. Slice and serve.

Heather 🙂

Heather

Leave a Comment

Uncategorized

Girl and Her Kitchen Welcomes…Abby!

Please help me to warmly welcome Abby to the Girl and Her Kitchen family! She will be posting fun crafts, kids projects, home decor, party ideas and some wonderful recipes as well. She is a dear friend and I feel so lucky that she has joined Kelley and I on our blog. You will not be disappointed, so stay tuned for some of her posts. You may be so inspired and become a super crafter like her…you never know.

Check out her bio and learn more about her in the “About Us” section of the blog. Feel free to leave a welcome message in the comments to show her some Girl and Her Kitchen love!

Welcome Abby! 🙂

Heather

Leave a Comment

Beef Soups & Stews

Beef and Potato Soup

As the weather turns colder, there is nothing better than a pot of soup simmering on the stove for dinner. I feel like soup is such an easy, hearty and comforting meal to serve to the family. Not to mention all the yummy breads you can pair with your soup. I mean, soup without bread is like, well…bread without butter.
I mean, it all comes down to bread for me. Always.
This particular soup is something a little different. I got the recipe from my Aunt awhile back when she prepared it for me and my family on a cold winter day while we were visiting her up north. It was such a delicious recipe, and I had to have it! I have made it numerous times since that cold winter’s day in her kitchen and my family has loved it ever since!

Want the recipe? Head on over to Little Lake County for the full recipe! It is over there on their Tasty Tuesday feature! 
 Need some bread recipes to bake along with this? Check out my recipe index for a few great ideas!
What is your favorite warm winter recipe?

Heather

Leave a Comment

Main Dishes Pasta

Buffalo Chicken Pasta

I love the taste of buffalo anything. Buffalo chicken dip, buffalo chicken in a wrap, ooohhh…I make this really good buffalo ranch chex mix around the holidays. I just love that flavor. Well…except for buffalo chicken wings. That has more to do with the fact that  I cannot bear to eat chicken off of a bone, so it doesn’t count.
This buffalo chicken pasta sounded so good, I could barely wait to eat it! Creamy sauce, tender pasta, hearty chicken with the perfect amount of buffalo kick to it. One problem. If you have kids that really don’t like the buffalo flavor, and you think, “well, they will eat this because it is really yummy!”, it will not work. They will still not like the buffalo flavor and be really mad that this is all that is for dinner. They will moan and whine that you should have left some pasta plain “at least” and that it was way too “spicy!” even going as far to say that their tongue was “burning off” from tasting one miniscule bite.

Oh-sorry I digress.

Anyways, it is the most delicious pasta ever. Try it on a night the kids are at grandmas!

Buffalo Chicken Pasta

4 cups pasta shells (regular or whole wheat), cooked
2  1/2 cups cooked chicken, cubed
1 tblsp butter, melted
1 cup buffalo wing sauce, divided
3 tblsp butter
4 tblsp flour
2 1/4 cups milk
1 tblsp dijon mustard
1 1/2 cups cheddar cheese, grated
1/2 cup parmesan cheese, grated
green onions, blue cheese, cilantro, extra wing sauce for serving

In a medium bowl toss the cooked chicken cubes with the melted butter and half of the buffalo wing sauce. Set aside. In a large saute pan, melt butter until slightly sizzling, but not brown. Whisk in the flour and continue whisking until a paste forms. Slowly whisk in the milk, making sure to whisk out all the lumps of flour until the mixture is smooth. Cook over low heat for two minutes. Add the cheeses and mustard and stir until melted and creamy. Slowly add in remaining buffalo sauce. Add the pasta and buffalo coated chicken. Stir and cook over low heat for 5 minutes until all heated through and sauce has thickened. Serve piping hot with blue cheese, extra wing sauce, cilantro or green onions. Enjoy!


Heather

Leave a Comment

Chicken & Turkey

Macadamia Crusted Chicken

For some reason lately, cooking has been a chore! I think it is because we are so busy with after school activities, the kids seem so tired, especially after the time change, and with that of course, they are cranky! I am not in the mood to cook and would be happy ordering pizza every night to get out of doing so, but that is not how I roll.

I usually love to cook, but that is usually when the circumstances are in my favor. Let’s say, um, when I have time? It is such a challenge to get a hot dinner on the table with everyone sitting down, but for us, it is a priority. This week, I made sure I made something good, even though I would have been rather doing anything else!

Yes, it is true. Girl and Her Kitchen, sometimes, likes to be out of her kitchen!

Last night, I wasn’t in the mood for anything. Usually I have every meal planned out, but what I had on the menu yesterday, just was not flying with me. I opened the pantry about a hundred times, surveying the ingredients that never changed no matter how many times I opened the door, until I noticed a few things I could play with.

Macadamia Nuts (Yum!)

Panko Bread Crumbs (Love!)

Brown Rice (um..okay? Well, good side dish material.)

What happened in just a little bit was a very tasty chicken crusted in a seasoned mixture of bread crumbs and nuts that paired perfectly with brown rice, roasted broccoli and when drizzled with a savory sauce? It was complete.

Dinner is served.

I think my cooking mojo came back!

Macadamia Crusted Chicken

1 cup macadamia nuts
1 cup plain panko bread crumbs
1 tsp dried parsley flakes
1 tsp salt
1/2 tsp pepper
2 eggs, lightly beaten
1 lb. boneless, skinless chicken breast, sliced in half, pounded flat into 1 inch cutlets
1-2 tblsp olive oil
Broccoli, steamed or roasted (optional)
Brown Rice, cooked (optional)
Pineapple Chunks (optional)

Preheat oven to 400 degrees. In a food processor, pulse nuts until finely crushed. Add bread crumbs, parsley, salt and pepper, pulse twice until blended. Transfer to a shallow bowl or platter. In a shallow bowl, whisk two eggs until blended, set aside. Heat olive oil over medium heat in an oven safe, large skillet. Taking the chicken that has been pounded out, first dip it into egg mixture, making sure to cover it well. Then, dredge it in the breadcrumb/nut mixture. Place gently in hot pan (chicken should sizzle when you put it in. If it does not, it is not hot enough. Test it out with a droplet of water before placing chicken in.) When all chicken has been coated and in the pan, cook for two more minutes, and then begin to turn, turning the chicken you placed in the pan earliest, first. When all chicken has been turned, cook for 4 minutes on the other side. Turn off heat, and then carefully place pan into the oven. Bake for 8-10 more minutes (checking for doneness after  8) and remove from oven. Let sit for one minute before transferring to serving platter. Serve hot with broccoli, rice, and pineapple. Need a quick sauce to drizzle? Try this:

2 tblsp soy sauce
1 tblsp teryiaki sauce
1 tblsp pure maple syrup
1 tsp sesame oil
2 tsp rice wine vinegar
1 tblsp corn starch
2 tblsp water

Combine first 5 ingredients together in small saucepan and heat until slightly simmering. In a small bowl, whisk together cornstarch and water. Pour into pan and whisk until thickened, heating for two more minutes or until heated through. Drizzle over broccoli and rice.

**Note, the pictures do not represent chicken pounded thin. I highly recommend  that you pound it thin! **

Heather

Leave a Comment

Candy Halloween

Homemade Peanut Butter Cups

Peanut+butter+cup+cover+photo.jpg

I am in the mood for candy. Like, really in the mood.

Ok, ok, before you all start going crazy on me wondering why I would make my own candy when it is Halloween, knowing that I am soon going to be buried in candy, so on and so on,  please, just hear me out.

These peanut butter cups are not just any candy. They are the richest, most decadent, most delicious morsel of candy you will pop into your mouth this Halloween…or all year for that matter. Layers of dark chocolate sandwich a thick peanut butter spread that just melts in your mouth. These will quickly become your favorite candy. They are so much better than the overly sweet, overly processed candy the kids will come home with after trick or treating.

You will never want any other peanut butter cup again after tasting these. Especially, when you see how easy they are!

Happy Halloween!

Homemade Peanut Butter Cups

Makes 12 Large Size Peanut Butter Cups or 24 Mini Cups

1/2 cup natural (unsweetened) peanut butter (chunky or smooth-your choice)
2 tbslp honey
2 cups dark chocolate chips, melted

Melt chocolate chips in a microwave by placing chips in a microwave safe bowl and heating in 30 second increments and stirring each time, until smooth and completely melted.  In a microwave safe bowl, mix peanut butter and honey together. Place in microwave for about one minute or until soft and creamy. If you are making large cups, use a muffin pan, and if you are making mini cups, use a mini muffin tin. This helps the muffin liners stay steady as you are adding all of the ingredients. Place muffin liners in your tin of choice. For large cups, spoon 2 teaspoons of melted chocolate into tin, and for mini cups, spoon 1 teaspoon. Spread it so it covers the bottom of the liner. Repeat with all liners. Place pan in the freezer to harden chocolate quickly. Remove from freezer and place 2 tsp of peanut butter (large) or 1 tsp of peanut butter (small) on top of the hardened chocolate. Drizzle 2 teaspoons of chocolate over the peanut butter (large) or 1 teaspoon of chocolate if you are making the mini ones. Place back in the freezer for five minutes. Remove pan. Pop peanut butter cups out and try not to devour all at once! Store in an airtight container in the fridge for two weeks or the freezer for two months. Enjoy!


What is your favorite Halloween Candy? Tell me in the comments!


Heather

Leave a Comment

Breakfast Fall

Apple Cider Pancakes

Apple+Cider+Pancakes+Cover+Photo.jpg

I love fall.
Can I say that more than I already have? I firmly believe that if there was a search on how many times I have said this on this blog….well…let’s just say it would be a lot.
Really though, what other time of year can you consume large amounts of pumpkins, apples, apple cider and all the delicious goodies made from the above mentioned things? If I made these things in, say, April, it just wouldn’t feel the same.
I cannot get enough of my fall recipes. They start with desserts and dinners, but now I am even becoming fall festive in the morning. You know, it is one of those, what can I make with pumpkin, apples or apple cider for breakfast.
Apple cider is a particularly fun fall indulgence. Thinking of pancakes and apple cider made my mouth water….but apple cider PANCAKES.
Yes. Give me some of those.
I loved the idea especially since it was so fall-ish.
You know, perfect for my fall obsession.
These pancakes have a delicious tart apple flavor, and are so fluffy and delicious, you will want to make them again and again. Even if it is, say, March. It is okay. Let’s just go with it.
Do you have some time this weekend to make a hot breakfast? I think you will love these too!

Apple Cider Pancakes

1 cup whole wheat pastry flour
1 cup all-purpose flour
2 tsp baking powder
1/2 tsp baking soda
1 tsp salt
3 tblsp brown sugar
1 1/2 tblsp ground cinnamon
2 large eggs
1 cup buttermilk
 4 cups of apple cider, reduced, cooled
4 tbsps butter, melted and cooled
butter for frying, optional
butter, reduced apple cider, maple syrup for serving


In a medium saucepan, pour in 4 cups of apple cider. Heat on medium heat until cider comes to a slow boil. Reduce heat a bit and slowly boil for about 15 minutes until cider is reduced. Do not let it boil over or burn, so check on it frequently. Let cool.
In a medium bowl, mix flours, baking powder and soda and salt. Set aside. In a large bowl, whisk eggs. until light yellow in color. Add buttermilk, 2/3 cup of apple cider, and butter, and mix well. Slowly add dry ingredients and fold in until just combined. Do not over mix. Heat 2 tsp of butter on a  griddle until sizzling. Add 1/4 cup of batter on the griddle and watch for bubbles to appear on the top. When the bubbles begin to pop, flip them over and cook until golden brown. Serve hot with butter, maple syrup or reduced apple cider.

What is your favorite fall recipe?

Heather

Leave a Comment

Cakes and Cupcakes Desserts Fall

Carrot Pumpkin Cake with Warm Skillet Fruit


warm+skillet+fruit.jpg

This is one of those cakes that once I got it into my mind, I could not stop thinking about it. A moist, pumpkin cake, slathered with cream cheese frosting and covered in buttery sweet fruit?
Seriously.
Just delicious.
This is the perfect dessert for fall. Pumpkins, apples, pears. Everything you think of all put together in one scrumptious, beautiful dessert.
Plan to have some friends over for dinner.
This dessert needs to be made, oohhed and ahhhed over, and eaten with vengeance.

Carrot Pumpkin Cake with Warm Skillet Fruit

CAKE:
1 cup flour
1 tsp baking powder
2 tsp pumpkin pie spice
1/2 tsp baking soda
3/4 cup granulated sugar
1/4 cup brown sugar
1 cup canned pumpkin
2 eggs
1/3 cup canola oil
1/2 cup shredded carrot
1/3 cup buttermilk

Preheat oven to 350 degrees. Grease an 8 x 8 pan and line with parchment paper with a slight overhang so you can take cake out of pan. Grease parchment paper. In medium bowl combine flour, baking powder, pumpkin pie spice, baking soda. Set askide. In large mixing bowl combine sugars, pumpkin,eggs and oil. Stir in carrot and buttermilk. Gradually beat in flour mixture. Transfer to pan. Bake for 30-35 minutes or until toothpick comes out clean. Cool for 15 minutes in pan. Remove using parchment paper and cool on a wire rack for an hour or until completely cooled. Frost with cream cheese frosting and top with skillet fruit.

CREAM CHEESE FROSTING:
1 block of cream cheese, softened
1 stick of butter, softened
1 cup of powder sugar
2-4 tblsp milk

Beat cream cheese and butter together until smooth. Beat in sugar and add in milk until you get your desired consistency. Frost cooled cake.

SKILLET FRUIT:
2 pears, sliced
2 apples, sliced
3/4 cup cranberries
3 tblsp sugar
4 tblsp butter

Slice fruit. Heat butter in pan and add fruit. Sprinkle fruit with sugar and cook until softened about five minutes. Let stand covered 5 minutes. Serve over frosted cake.


Heather

Leave a Comment

Breakfast Fall Muffins & Scones

Fall’s Most Perfect Pumpkin Muffin

Pumpkin+Muffin+Cover.jpg

Are you a pumpkin lover or a pumpkin hater?

I know you are out there.
You pumpkin haters. Hating all things pumpkin and raining on our orange parade all autumn long.
Well, this muffin may just about change your mind. It is the perfect mix of healthy and sweet and a great addition to your fall pumpkin recipes!
This is a kid friendly recipe, and best yet, they freeze great, so you can have them on hand all season long.
Interested in the recipe? Head over to Little Lake County and check out my monthly food feature to see the full recipe! Slather it with some delicious pumpkin butter, and you are surely diving in to pumpkin heaven!
Pumpkin+Muffin+with+Pumpkin+Butter.jpg
Want more pumpkin recipes? Click here, here, and even here! YUM!

Heather

Leave a Comment

  • « Previous Page
  • 1
  • …
  • 17
  • 18
  • 19
  • 20
  • 21
  • …
  • 38
  • Next Page »

Heather

I am a midwestern girl who grew up in the big city, but now enjoys her days as a stay at home mom in the suburbs. Who says spending time in the kitchen has to be boring? I hope to inspire your family kitchen with some new ideas, fun recipes and great tips.

Stay Up to Date

Get all the latest tasty goodness straight to your inbox!

Girl and her Kitchen

Join us!

Hey! I am the GIRL in the kitchen and I am so glad you decided to visit. Love to cook and eat? You will find some great recipes on this site, whether you are looking to eat healthy, splurge on a dessert, make dinner or host a party-I have it all! Sometimes I’ll give you a story along with my recipe, other times, I want to take you straight to the food!  Whatever the reason that you decided to visit, I am so glad you joined me in the kitchen! Feel free to take a look around the site, and please…stay awhile!

Archives

Popular Categories

  • Appetizers
  • Breakfast
  • Crafts
  • Salads and Dressings
  • Side Dishes
  • Vegetables and Fruit

Most Popular Posts

Corner Bakery Cafe Giveaway!

Corner Bakery Cafe Giveaway!

Filed Under: Reviews

Bacon Cheddar Skillet Cornbread

Bacon Cheddar Skillet Cornbread

Filed Under: Breads, Quick Breads and Rolls, Side Dishes

Puffy Pancakes {Perfect for Valentine’s Day!}

Puffy Pancakes {Perfect for Valentine’s Day!}

Filed Under: Breakfast, Valentine's Day

100 Days of Real Food Cookbook Review {and Giveaway!}

100 Days of Real Food Cookbook Review {and Giveaway!}

Filed Under: Vegetarian

Copyright © 2026 · Divine theme by Restored 316