• Email
    • Facebook
    • Instagram
    • Pinterest
    • Twitter

Girl and Her Kitchen

Plan. Make. Eat. Design. Craft. Create. Celebrate. Life.

  • Home
  • About the Girl
  • Recipe Index
  • We LOVE
  • Weekly Menu

Christmas Crafts Sauces and Condiments

Holiday Gifts: Homemade Vanilla Extract

Vanilla-ExtractI love giving gifts. I really do fit in that category of those who love to give more than receive. I mean, I obviously love getting gifts as well-let’s not get crazy here-but I truly love selecting gifts and making them special for the person that I am shopping for.

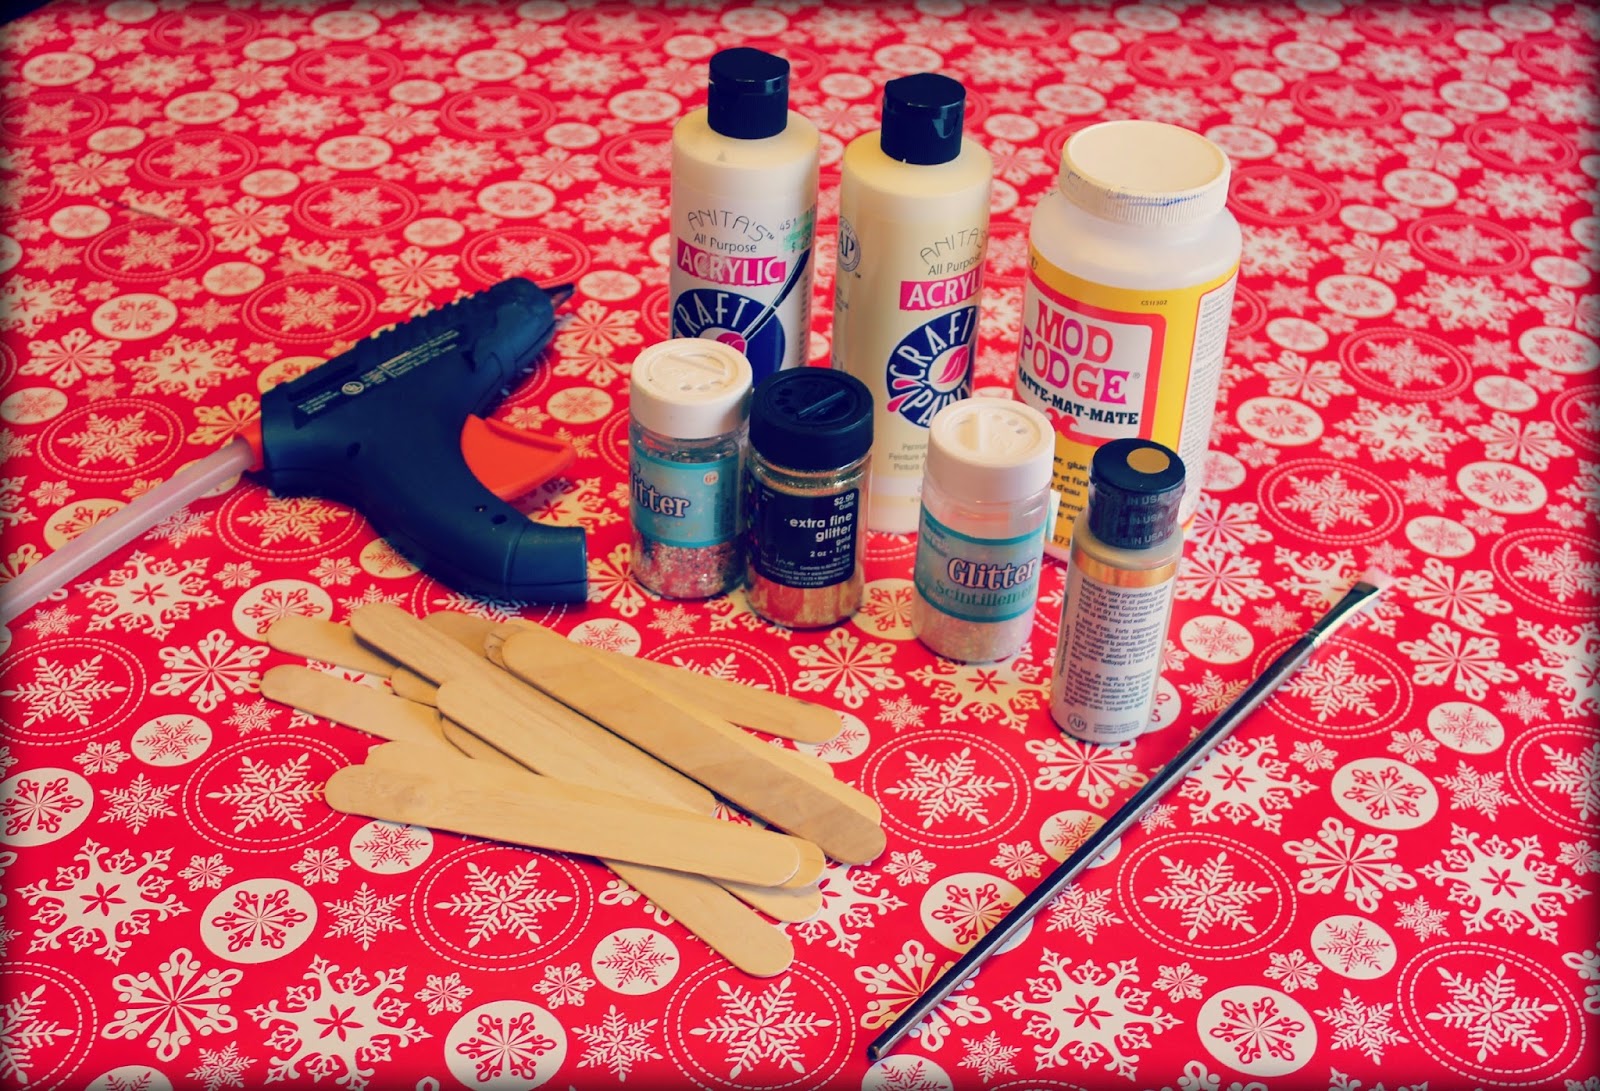
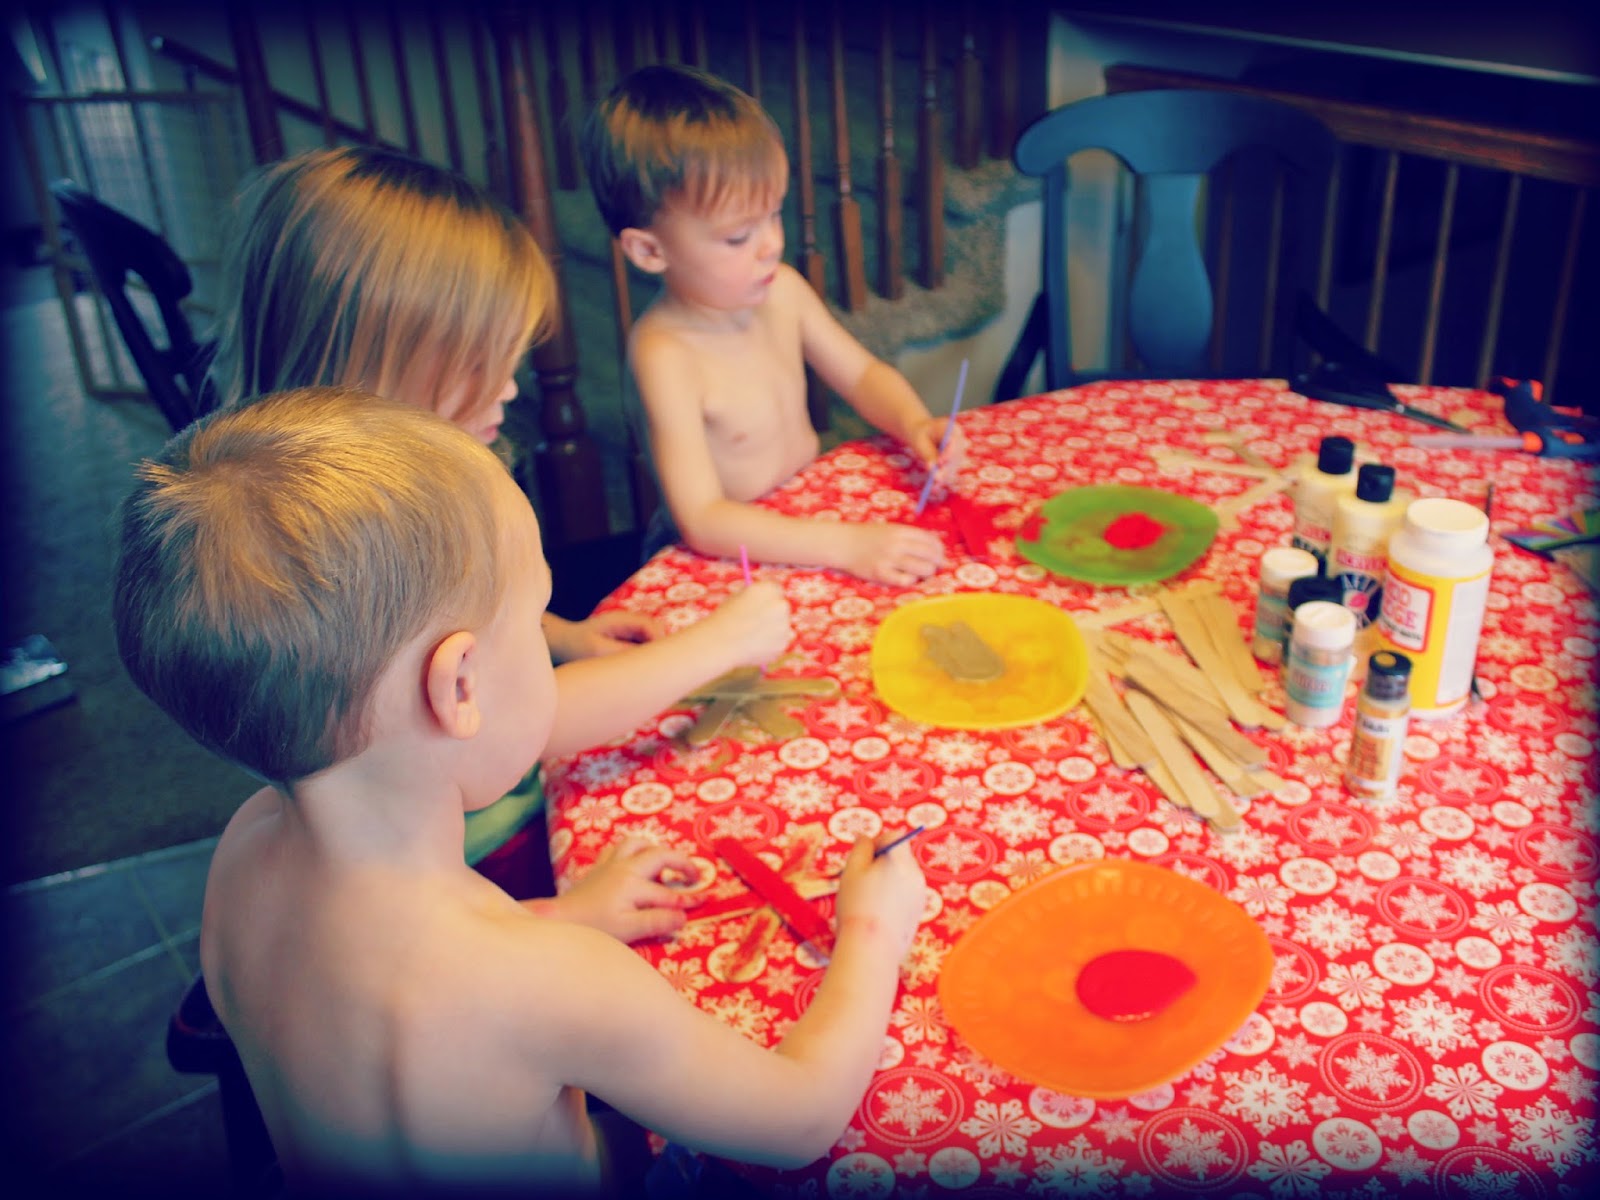
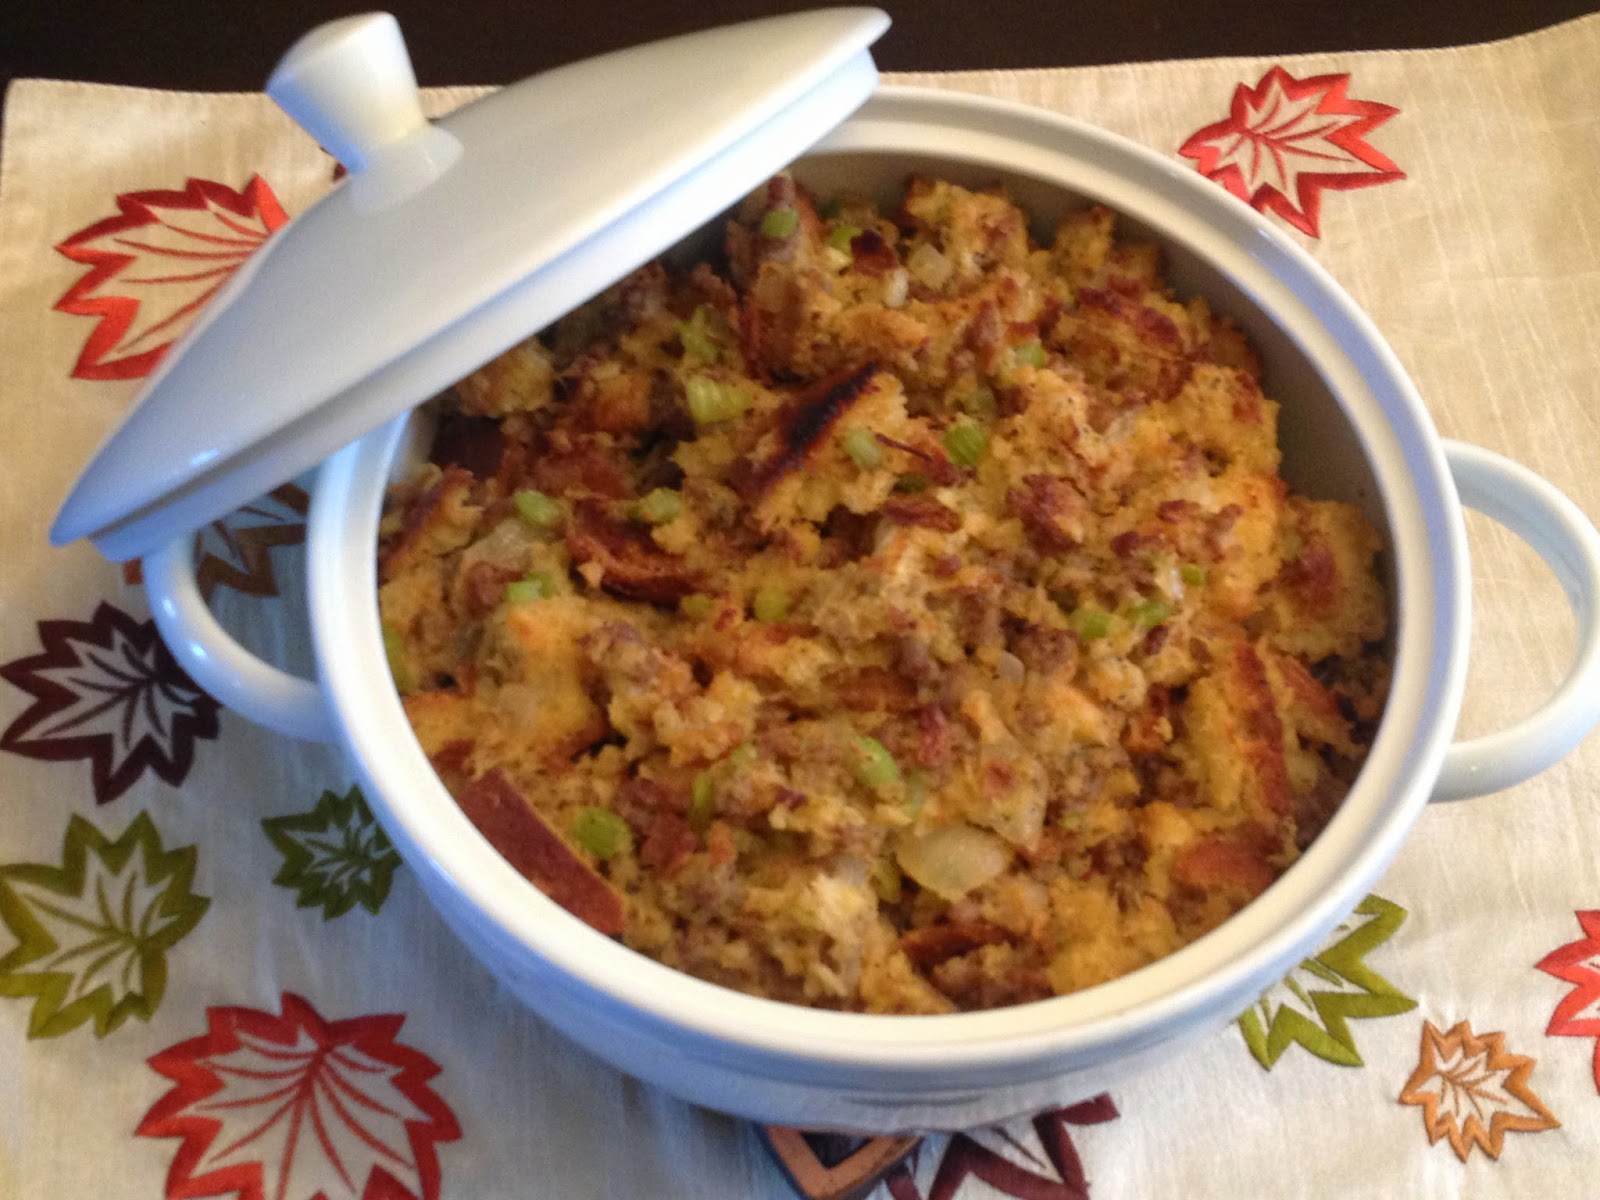
Sometimes though, a homemade gift is even more fun. Usually a homemade gift for me is something that I make…in the kitchen. I will leave the crafts to Abby and Becca on this blog, and I am nice and cozy just staying in the kitchen. Homemade gifts from the kitchen are so fun, and usually, very well received.

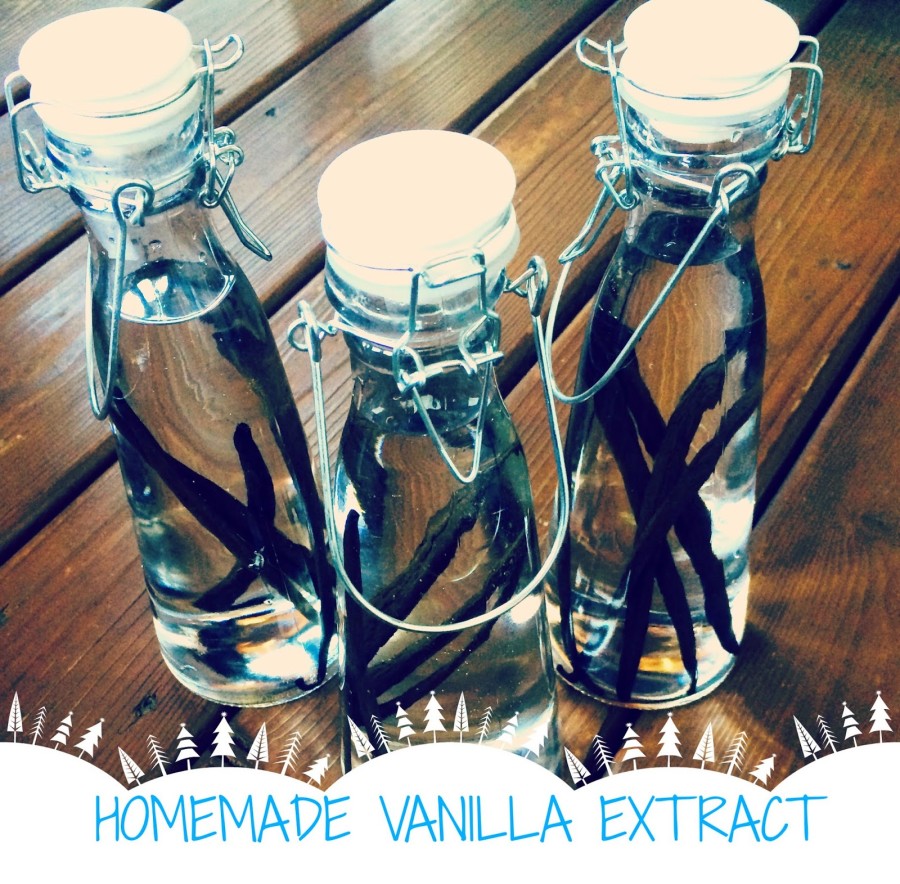
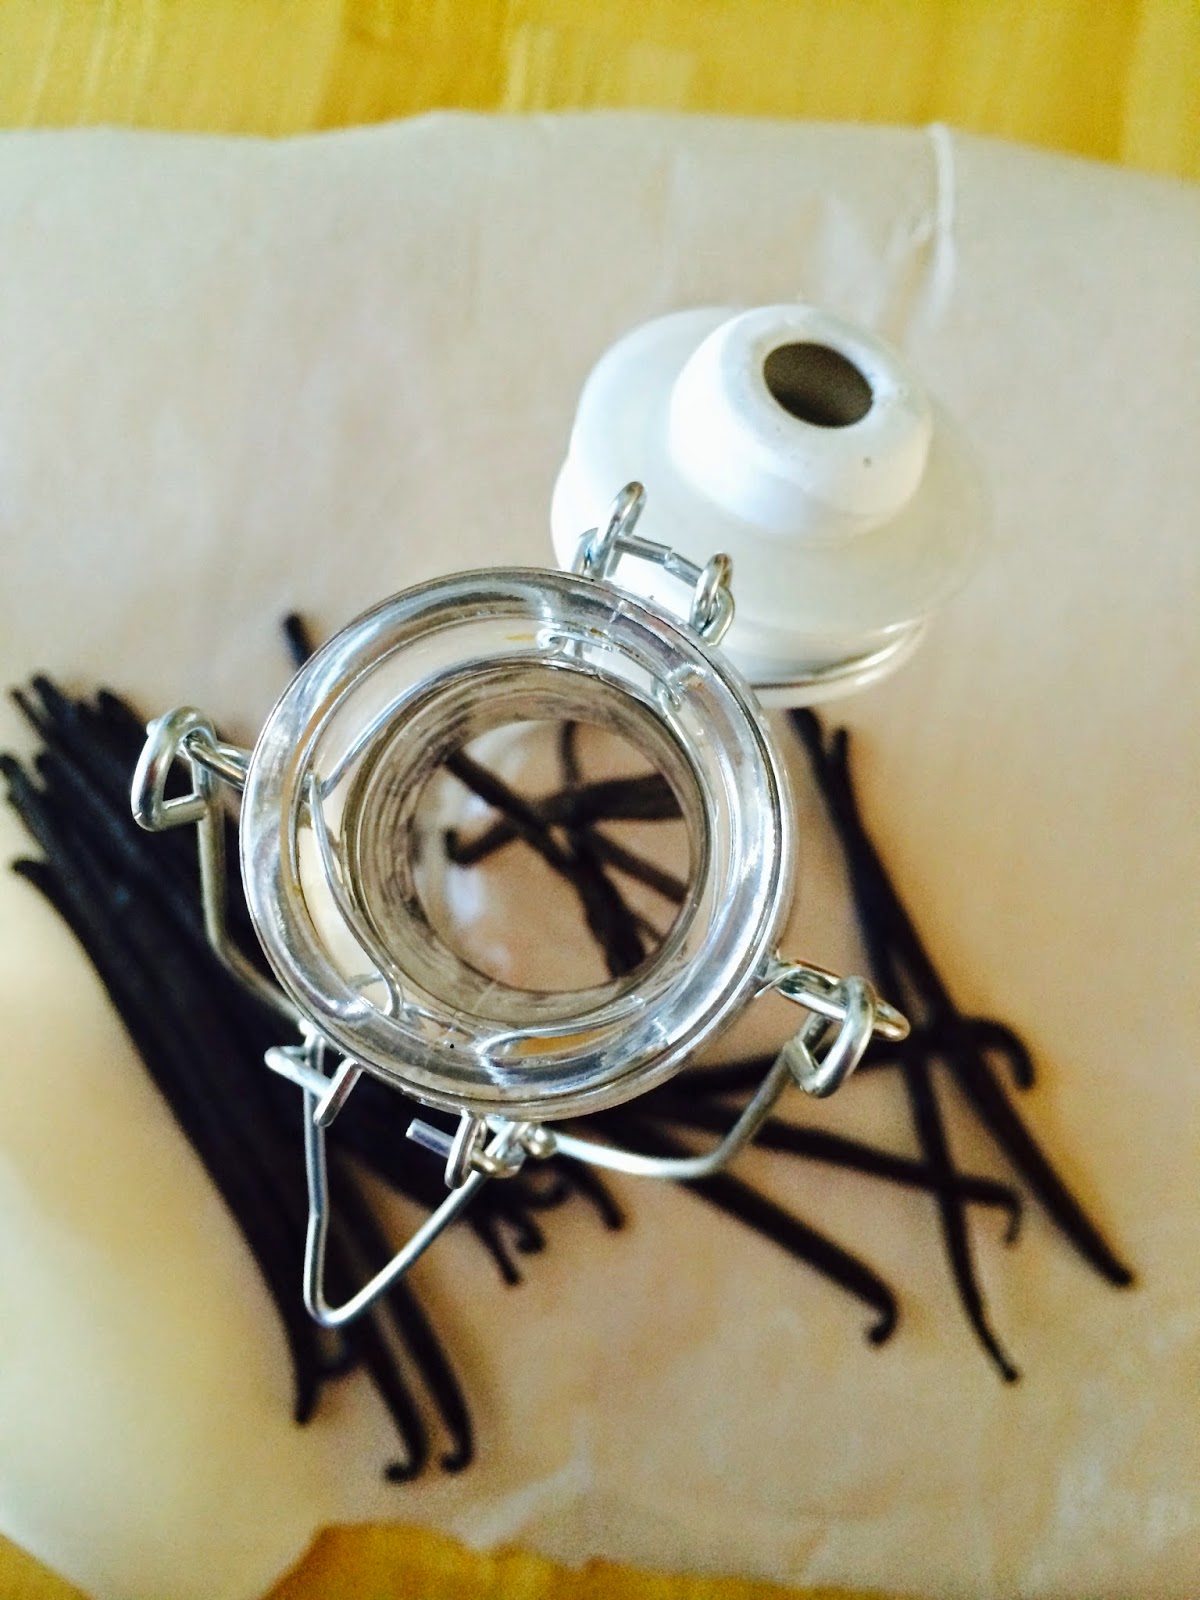
This holiday season, I decided to give something a try that I have been wanting to try for a long time. Homemade Vanilla Extract! Why? Because it’s fun! Also, I love making stuff in my own kitchen so I know exactly what is going into it. Did you know some vanilla extracts have preservatives? Sugar? Corn Syrup? Cr-aazy! This recipe has vanilla beans and vodka. How can you go wrong with that?

It would be very hard to go wrong with that.

Here is the very simple recipe-perfect for gift giving and so pretty to look at!

Homemade Vanilla Extract
You will need:
Decorative bottles or jars
Vanilla Beans*
Vodka (You can also use bourbon, brandy or rum for a more unique vanilla extract flavor)
Make sure bottles or jars are cleaned thoroughly and let dry. Place vanilla beans inside of jar or bottle. The amount depends on how big your container is. A good rule of thumb is for every cup of vodka-3-5 vanilla beans. Fill jar with vanilla beans with vodka. Seal tightly. Let stand for 3-5 weeks in a cool, dark place. As it is sitting, liquid will turn a beautiful amber color. It is late in the game to have fully matured vanilla extract by Christmas, but you can get it started and give out as a gift-just tell the recipient to be patient and give it another two weeks to let the alcohol extract the flavor from the beans before using.  The flavor will become more complex over time, so be patient!
*I buy my vanilla beans from Beanilla and love them! They come fresh and fragrant and I think they make the best vanilla extract, as well as french toast, homemade vanilla ice cream, custard…I can go on and on…

Heather

Leave a Comment

Christmas Desserts Snacks

Homemade Holiday Gifts: Cinnamon Caramel Popcorn

cinnamon caramel popcorn

I happen to be a popcorn-aholic.  Seriously, I don’t go most days without popcorn and have had a popcorn cake for my birthday since I was 3!  I love it!

When my sister (and fellow blogger!) Becca introduced me to this recipe 5 years ago, I thought I had died and gone to heaven.

It is that good.

It’s really great to make for just munching, but also, you can dress it up, as I’ve done above. This makes it perfect to give as a gift in a cute holiday tin or bag.  Great for teacher gifts!

Once you’ve tried it, I know you will be dying to thank me, so I’ll just say ahead of time…

You’re welcome.

Cinnamon Caramel Popcorn

12 cups of Popped Popcorn-(roughly 1/2 cup of kernels)
1 cup nuts (optional)-cashews, almonds, peanuts, pecans
1 cup brown sugar
1/2 tsp. cinnamon
1/2 cup karo syrup
1/8 tsp salt
1 stick or cube of real butter (salted)
1 teaspoon vanilla
1/2 teaspoon baking soda
vanilla candy melts, semi-sweet choc chips, almond bark- pick one or two for drizzling over popcorn
Sprinkles (optional)

Preheat oven to 250 degrees. Place popcorn and nuts (if desired), in a large bowl and set aside.  In a microwave safe bowl, add brown sugar and salt and mix together.  Chop butter into chunks and place on top of brown sugar.  Pour Karo syrup over the top of everything.  Microwave on high for 30 seconds and then stir to combine.  Return to microwave and heat 2 minutes more.  Remove and stir and then return to microwave for 2 minutes more, until hot and bubbling. The butter should be combined by this point.

Remove from the microwave and add vanilla, cinnamon and baking soda.  Stir to combine.  The mixture will foam and rise.  Pour caramel over the popcorn and stir very well, until everything is well covered.

Spread popcorn over a parchment lined cookie sheet.  Place in the oven and bake for 10 minutes, stirring every 5 minutes (will be chewy).  If you want in with a little more crunch Bake for 20 minutes, stirring every five minutes.  I like mine at around 15 minutes.  Play with it and see what you think.

Melt your vanilla candy melts, chips, or bark and drizzle over the popcorn.  Add any sprinkles (optional) and then let cool until the chocolate has set.  Break into chunks and store it in an air tight container…that is, if there is any left!

cinnamon caramel poporn


Heather

1 Comment

Christmas Crafts

Popsicle Stick Snowflakes

snowflakes label
CHRISTMAS is a magical time of year.

Isn’t it the best time to be with family and friends?

This week I wanted to do a fun, but simple craft with Ry and two of his buddies (practically members of the family). I chose something that they would love, but that would also involve things I already had in my “crafting supply”.

Paint, glitter, craft sticks…let’s make SNOWFLAKES!

This easy craft is not only perfect for the Christmas and winter season, but also perfect with the movie FROZEN since that is such a big hit in our house (and I’m sure in many!).

Here’s what you’ll need:

-Popsicle sticks/craft sticks, for a large snowflake (say wreath size) you could use paint stirring sticks

-Hot glue and glue gun

-Paint and paint brushes (I chose acrylic craft paint)

-Glitter

-Mod Podge

-Ribbon/Twine

And yes…I did cover the table in wrapping paper. Number one, because it looks cute, and number two, it protects the table from the paint. Win win.


Step 1: Assemble the snowflakes with hot glue. For the kids they simply told me how many sticks they wanted to use and how they wanted them arranged. (I suggested three and they were all on board). We used three for each of theirs with just a little dab of glue between each stick. I used hot glue because it dries quickly. For my big snowflake I used six large sticks and then cut up another five or so to make the little details on each stick. You can be super creative here and use however many you want.

Step 2: Paint. After gluing the snowflakes I handed over the paint and paint brushes and let the kiddos go to town.We also painted both sides.

Step 3: Add some SPARKLE! They each chose a different glitter and since the kids were pretty heavy handed in the painting department we really didn’t need the Mod Podge that much at all. The kids sprinkled on the glitter and then we let them dry.

Step 4: Add ribbon. I let them each pick their color of ribbon and then cut and glued a looped piece to the back of their flakes. I added their names along with the year. I love adding the year to things that we create because I love to remember when we made them. I have crafts all over my house that have a year date on them and its always fun to turn them over and check on the back to see how long I’ve had them and to remember what stage of my life I was at during that time.

Look at these cute little crafters go! Since I used craft paint/acrylic paint, the boys had to take off their shirts to avoid unnecessary laundry for the mommies.

Obviously you can tell this was a great hit by the smiles and wonderment on their faces. The snowflakes came together quickly, were super easy, and brought a little more JOY to our house this week. I hope you get a chance to do a little crafting with your kiddos this holiday season! Let us know if you make them and where they ended up in your house. Ours ended up on the tree.

Enjoy!

Heather

Leave a Comment

Side Dishes Thanksgiving

Thanksgiving Sides: Sausage and Sage Stuffing

Do you love stuffing? I am one of those people that seriously love stuffing. I think it is probably my favorite part of Thanksgiving dinner. I never make it unless it is Thanksgiving. Does anyone? I will make turkey, gravy, and mashed potatoes, but never stuffing. It just seems…wrong if it is not Thanksgiving!
I just think that I feel it is so special that it should have it’s own holiday. Ha! I bet you thought the turkey was the star on Thanksgiving?  Not at my house. 
I loved my mom’s stuffing and so does my family. This is called stuffing, but it isn’t stuffed in the turkey. This “stuffing” is baked in the oven in a casserole dish. I hope you love it as much as I do. Enjoy!
Sausage and Sage Stuffing
12 cups of torn bread pieces ( I use Italian bread or french bread)
1 1/2 cups of celery chopped
1 1/2 cups of yellow onion chopped
1 lb of bulk Italian sausage 
4 cloves of garlic minced
2 tsp of rubbed sage
2 tsp salt
1 tsp black pepper
3 cups of turkey/chicken stock
Tear bread into bite size pieces, place in a bowl and set aside. In a large pan cook the Italian sausage.  Remove cooked sausage from pan and place in the bowl with the bread.  In the pan with the sausage drippings start cooking the celery and onions. If more fat is needed add a tbsp of butter. Add salt, pepper and rubbed sage.Saute onions and celery until translucent.  Add garlic and cook for 30 secs- 1 minute. Transfer to bowl with other ingredients. Add 3 cups of turkey/chicken stock to stuffing mixture. If you are cooking your turkey you can also add some of the pan juices to this stuffing. This is what I do and what my mom did.  Make sure it is moist enough but not too wet. At this point taste the stuffing and make sure that it has enough seasoning. 
Transfer to a greased casserole dish and bake at 350 for 45 minutes. Cover it with foil for the for the first 30 minutes then take foil off for the last 15 minutes. This recipe serves 4-6 people. I usually double this recipe.  Everyone loves leftovers!

Heather

Leave a Comment

Side Dishes Thanksgiving

Thanksgiving Sides: Dinner Rolls

Dinner Rolls
 I really love to try different roll recipes but this is my never fail, melt in you mouth, go to recipe.  They always turn out–EVERY TIME!!

I bet you are probably saying, “I’m afraid of yeast.” Don’t be! Baking can be great fun and yeast is nothing to be afraid of.  So are you ready? Let’s do this!!

Dinner Rolls
2 packages of yeast (1/4 ounce each) active dry yeast or 4 1/2 teaspoons if you have a larger container
  (I get mine at Costco for $5 and its a huge bag…score!!)
1 teaspoon plus 1/3 cup sugar, divided
1/2 cup warm water (110-115 degrees)
1- 1/4 cups warm milk (110-115 degrees)
1/2 cup salted butter melted and cooled
1- 1/2 teaspoon salt
2 eggs, beaten
6- 6-1/2 cups all purpose flour  (I use half bread flour/ half all purpose, either way works well)
Butter, for serving

 In a large mixing bowl, (I like to use my bosch or kitchen aid mixer with the dough hook), dissolve yeast and 1 teaspoon sugar in warm water. About 10 minutes.  Add the milk, butter, salt, remaining sugar, eggs and 3 cups flour, beat until smooth.  Stir in enough remaining flour to form a soft dough.

Turn onto a floured surface (or leave in mixer); knead until smooth and elastic, about 6-8 minutes.  Place in a greased bowl, turning once to grease top.  Cover and let rise in a warm place until doubled in size, about 1 hour.

Punch dough down.  Turn onto lightly floured surface; divide into 4ths.  Divide each portion into 6 pieces.  Shape each piece into a ball, pinching it underneath to keep them nice and smooth on top.
I like to put mine on a greased jelly roll pan/ cookie sheet with a lip.  That way all 24 rolls can fit on the same pan.  2 greased 9X13 in baking pans will also work.  Cover and let rise until doubled, about 30 minutes. ( I lightly spray the tops with cooking spray and gently place plastic wrap on top)

Bake at 375 degrees for 20-25 minutes or until golden brown.  Lightly brush with additional butter, or if you’re like me, peel the wrapper off half a butter stick and hold then wrapped side in your hand while rubbing the unwrapped side over the tops of rolls.  If you make them on a jelly roll pan you do not need to remove them to cool.  If you make them in a 9X13in baking dish you will need to remove them to a wire rack to cool.  Serve warm and try your best to not eat the whole pan!

Heather

1 Comment

Side Dishes Thanksgiving

Thanksgiving Sides: Sweet Potato Casserole

sweet-potato-casserole
Do you love Sweet Potato Casserole? I definitely do. I know people either love or hate sweet potatoes, but this is my all time favorite recipe.  It comes from my mother-in-law Jolene and she is an awesome cook.  The first time I tried these, it was one of those moments where I could not get enough. These are perfect for Thanksgiving because they are so quick to put together, but make them as a side dish with any dinner, and you will not be disappointed.

I hope you love them as much as I do-enjoy.

Sweet Potato Casserole
4 1/2 pounds Sweet Potatoes, cooked
1/2 cup softened butter
1 cup sugar
2 eggs beaten
1/3 cup evaporated milk
1 tsp vanilla (Mexican is my favorite)

Topping
1 cup brown sugar
1/3 cup softened butter
1/3 cup flour
1 cup chopped pecans

Directions– Preheat oven 350 degrees.  Remove sweet potato skins and place potatoes in a large mixing bowl. (If using using canned make sure and drain) Add remaining ingredients and mix well. Place in a 9X13in. baking dish.  Mix topping together in a small bowl and sprinkle on top.  (Pecans are optional, but so so good!) Bake for 25-35 minutes until top is slightly crispy.

Quick, but so delicious people will never know how easy these were!

Heather

2 Comments

Side Dishes Thanksgiving

Thanksgiving Sides: Sweet Creamed Corn

Cream Corn
How many of you have tried the old school canned cream corn? Well, I remember the first time I tried that… it was not my fondest memory! Needless to say, I did not try it again for many many years.  This recipe comes from my mother-in-law, Jolene, who has shared countless recipes with me.  When she put it on the table and said it was a family favorite, I politely put a very small portion on my plate. I didn’t want to be rude, so I took a bite, and was so surprised! It was delicious! I quickly added a heaping spoonful to my plate-no need to pretend now! This is the perfect combination of a little salty, a little sweet and it really equals  a completely scrumptious side dish. It is the sweeter version of this creamed corn recipe posted awhile back. It is really quick and simple too.  Feel free to try and lighten it up if you choose, but for Thanksgiving I’m all about that cream!

Sweet Creamed Corn

30 ounces of frozen corn
1 cup whipping cream
1/2 cup milk
1 tsp salt
6 tsp sugar

Allow corn to thaw some before adding whipping cream (otherwise the cream turns to ice).  Bring all ingredients to boil 5 minutes.  Mix 2 Tbls melted butter together with 2 Tbls of flour.  Add this mixture to the corn mixture.  Reduce heat and it is ready to serve after about 10 minutes.
* If it seems thick add more milk and/or more whipping cream until it becomes a nice smooth consistency.

For Au Gratin, place corn in a 9 or 10inch shallow casserole dish.  Sprinkle corn with 1/4 cup freshly grated Parmesan Cheese.  Brown under broiler.  Serves 4-6

Easy peasy, lemon squeezy as my daughter would say!

Heather

Leave a Comment

Fall Pies and Tarts Thanksgiving

Homemade Apple Pie

Apple pie

One of my all time favorite things about fall is going to the orchards. I love the apple cider, the donuts, and of course, picking delicious apples. I must confess, that in my younger years I wasn’t a huge fan of apple pie.  It seemed like most of the ones I tried were just too mushy or too tart.  Well I am here to tell you that I have finally come up with a recipe for the best apple pie.  It’s a great blend of sweet and tart, and the apples are just right (not too hard, not too soft).  I have included a pie pastry recipe at the bottom.  If you have never made a pie crust before, I encourage you to try!  It is a lot of fun and the more you do it the better you will get. Hope you like it!
Apple Pie
6-8 tart apples ( I always use at least two kinds of apples. These are some that work great for pie- Honey crisp, Granny Smith, Jonathan, Rome, Macintosh
1 ¼ cup sugar
1 heaping tsp. cinnamon
dash of cloves (1/8 tsp)
dash of nutmeg (1/8 tsp)
3 Tbls flour
Preheat oven to 425 degrees. Peel apples and slice thinly in large bowl and set aside. Mix together in another bowl the remaining ingredients. Pour and toss mixture over the apples. Arrange the apple mixture in pie shell, and dot with one tablespoon of butter. Place top pastry on and sprinkle top of pie with sugar.  Place in hot oven at 425 degrees for 15 minutes.  Turn down oven to 350 degrees and continue to bake until apples are tender but not mushy (about 45-60 minutes.
* If the edges start getting dark and the apples are not tender you can either use an edge shield or gently place foil around the edges of the pie.*
Here is a pie crust that works for me all the time:
Pastry Dough

(makes two 9- inch shells or one double crust pie)
2 cups sifted unbleached flour
1 teaspoon salt
½ cup butter or shortening

4 tablespoons water

Mix flour and salt in bowl. cut  in Crisco using a pastry cutter or fork until mixture is uniform and fine (pea-like shaped). Sprinkle water over mixture 1 teaspoon at a time, tossing lightly with a fork.  Mix until dough holds together.  Divide dough into two parts.  Roll half of the pastry 1/8 inch thick on a floured board or pastry cloth (a large piece of canvas in my favorite thing to roll my pies on). Line a 9” pie shell with pastry and trim off at the edge.  Roll out other portion and place on top of fruit filled pie shell and cut off pastry 1” from edge of pie pan.  Fold under the top pastry under the bottom and flute the edges. (sealing it with fingers or fork).
**Two secrets when making pie crust-  1) Always use cold shortening, butter, or lard, and cold water. (use cold water with ice cubes in it. Just make sure not to use actual ice cubes in the pastry. 2) Do not over mix.  What gives a pie crust the flakey, yummy layers are the clumps of  Crisco, butter, or lard.  If they are completely mixed you will have a very heavy pastry, which is why you cut the butter into the flour making small pea-like sized pieces of butter coated in flour. 

Apple pie 2What are your favorite apples to use in Apple Pie?


Heather

Leave a Comment

Breads, Quick Breads and Rolls Thanksgiving

Buttery Herbed Biscuits

butterbiscutis2

I am still over on Little Lake County today-writing up some more delicious Thanksgiving side dishes. Today I am bringing you these buttery herbed biscuits. They are so light and fluffy, and the flavor is perfect.

I know, I know, homemade rolls? Doing the whole homemade bread thing can be daunting, but I promise you, these are easy. If you are going to work with yeast for the first time, these are the rolls to do. They are simple, impressive and delicious.

I always made the same bread recipe for Thanksgiving every year, but felt a need for change. After playing around with a few different recipes, these little beauties were born. Slather them with some butter and you have a true Thanksgiving indulgence.

Check out the recipe on Little Lake County, or scroll down to read it here. If you try them, let me know what you think in the comments below. Or, tell me what your favorite holiday bread recipe is. I love hearing what everyone else is making!

Save Print
Buttery Herbed Biscuits
Author: Heather
Serves: 20
 
These biscuits are yeasted and really easy to make. Light, fluffy with a delicious herby taste-they are sure to be a hit on your Thanksgiving table or for any simple meal!
Ingredients
  • ½ cup warm water
  • 2½ tsp active dry yeast
  • 1 tsp sugar
  • 5 cups all-purpose flour
  • 3 tbsp sugar
  • 2 tbsp baking powder
  • 2 tsp salt
  • 1 tsp baking soda
  • 1½ tbsp fresh rosemary, chopped
  • 2 tsp dried thyme
  • ½ cup cold, unsalted butter, cut into very small pieces
  • ½ cup coconut oil (if you do not want to use coconut oil, just sub in another ½ cup cold butter)
  • 2 cups buttermilk
  • melted butter, for brushing
  • butter for serving
  • Rosemary sprigs for serving
Instructions
  1. In a small bowl, combine warm water, yeast, and 1 tsp sugar. Let sit for five minutes.
  2. In a large bowl combine flour, sugar, baking powder, salt, baking soda, rosemary, and thyme. Add in butter and coconut oil. Work it with your hands until it is all combined and looks and feels like coarse crumbs.
  3. Add yeast mixture and buttermilk slowly. Stir until a sticky dough forms.
  4. Cover bowl with plastic wrap and chill for 2 hours.
  5. When the dough is ready, preheat oven to 400 degrees. Take the dough out of the fridge, knead a few times with hands and then roll out on a floured surface and cut using a cookie cutter into ¾ inch thick rounds. Continue to rework dough and continue cutting.
  6. Place in a buttered baking dish very close together. Brush with melted butter and bake for 20 minutes or until lightly browned.
  7. Garnish with rosemary sprigs and serve with butter.
3.5.3251


Enjoy!

butter biscuit3


Heather

Leave a Comment

Side Dishes Thanksgiving Vegetables and Fruit

Green Beans with Bacon and Shallots

Green beansphoto-2

I am doing a series over on Little Lake County this week on Thanksgiving -“out of the box”. It is all about making delicious Thanksgiving recipes, but without all the canned, boxed, and processed ingredients. The first recipe I shared is a fresh recipe for green beans with bacons and shallots. It is a tasty alternative to green bean casserole and full of flavor. I usually double or even triple this recipe and it goes really fast!

Check it out on Little Lake County today and stay tuned for some more delicious recipes in the Thanksgiving-“out of the box” series!

Heather

Leave a Comment

  • « Previous Page
  • 1
  • …
  • 12
  • 13
  • 14
  • 15
  • 16
  • …
  • 38
  • Next Page »

Heather

I am a midwestern girl who grew up in the big city, but now enjoys her days as a stay at home mom in the suburbs. Who says spending time in the kitchen has to be boring? I hope to inspire your family kitchen with some new ideas, fun recipes and great tips.

Stay Up to Date

Get all the latest tasty goodness straight to your inbox!

Girl and her Kitchen

Join us!

Hey! I am the GIRL in the kitchen and I am so glad you decided to visit. Love to cook and eat? You will find some great recipes on this site, whether you are looking to eat healthy, splurge on a dessert, make dinner or host a party-I have it all! Sometimes I’ll give you a story along with my recipe, other times, I want to take you straight to the food!  Whatever the reason that you decided to visit, I am so glad you joined me in the kitchen! Feel free to take a look around the site, and please…stay awhile!

Archives

Popular Categories

  • Appetizers
  • Breakfast
  • Crafts
  • Salads and Dressings
  • Side Dishes
  • Vegetables and Fruit

Most Popular Posts

Corner Bakery Cafe Giveaway!

Corner Bakery Cafe Giveaway!

Filed Under: Reviews

Bacon Cheddar Skillet Cornbread

Bacon Cheddar Skillet Cornbread

Filed Under: Breads, Quick Breads and Rolls, Side Dishes

Puffy Pancakes {Perfect for Valentine’s Day!}

Puffy Pancakes {Perfect for Valentine’s Day!}

Filed Under: Breakfast, Valentine's Day

100 Days of Real Food Cookbook Review {and Giveaway!}

100 Days of Real Food Cookbook Review {and Giveaway!}

Filed Under: Vegetarian

Copyright © 2026 · Divine theme by Restored 316