• Email
    • Facebook
    • Instagram
    • Pinterest
    • Twitter

Girl and Her Kitchen

Plan. Make. Eat. Design. Craft. Create. Celebrate. Life.

  • Home
  • About the Girl
  • Recipe Index
  • We LOVE
  • Weekly Menu

Breakfast Snacks

Crunchy Quinoa Granola

I have always had this thing for granola. I love it! Why, oh why does it have to have like a zillion calories, tons of fat and sugar that surpasses a few pieces of cake? I seriously don’t get it.
Anyways, I made granola a long time ago and it did not compare to that stuff from the store…in a bad way. It is not often that I claim store bought goodies are better, but in this case, I have to surrender. I hated it. It was soft. Seriously? I did something wrong there, but let me tell you, there is nothing more disappointing when you make a batch of granola to bite down on something soft and chewy. UGH.
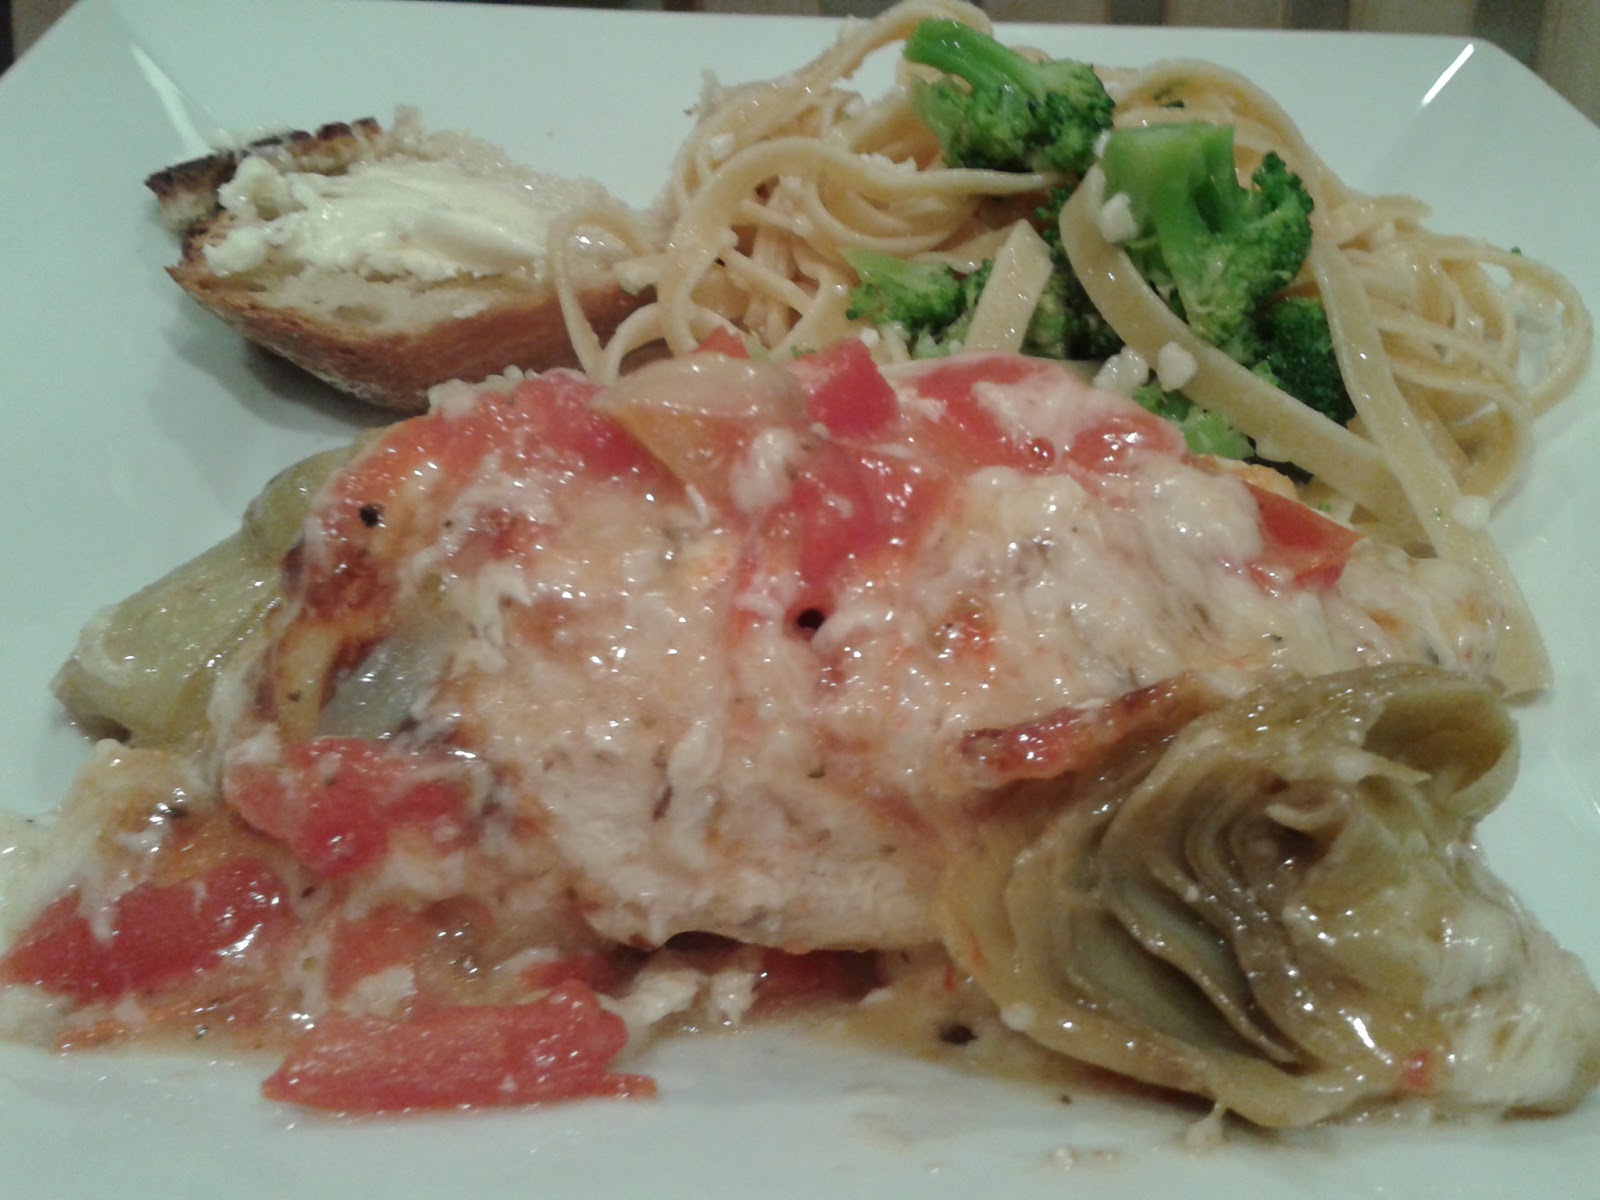
The other thing I didn’t like about it was that it was too cinnamon-y. Is that a word? Well, on this blog, anything goes (obviously…I mean did you see my picture for my Cheesy Tomato Artichoke Chicken?). So today, I proclaim that the granola I made back then was way too cinnamon-y…and of course, I just cannot get past the soft part, so here I am mentioning it again. UGH.
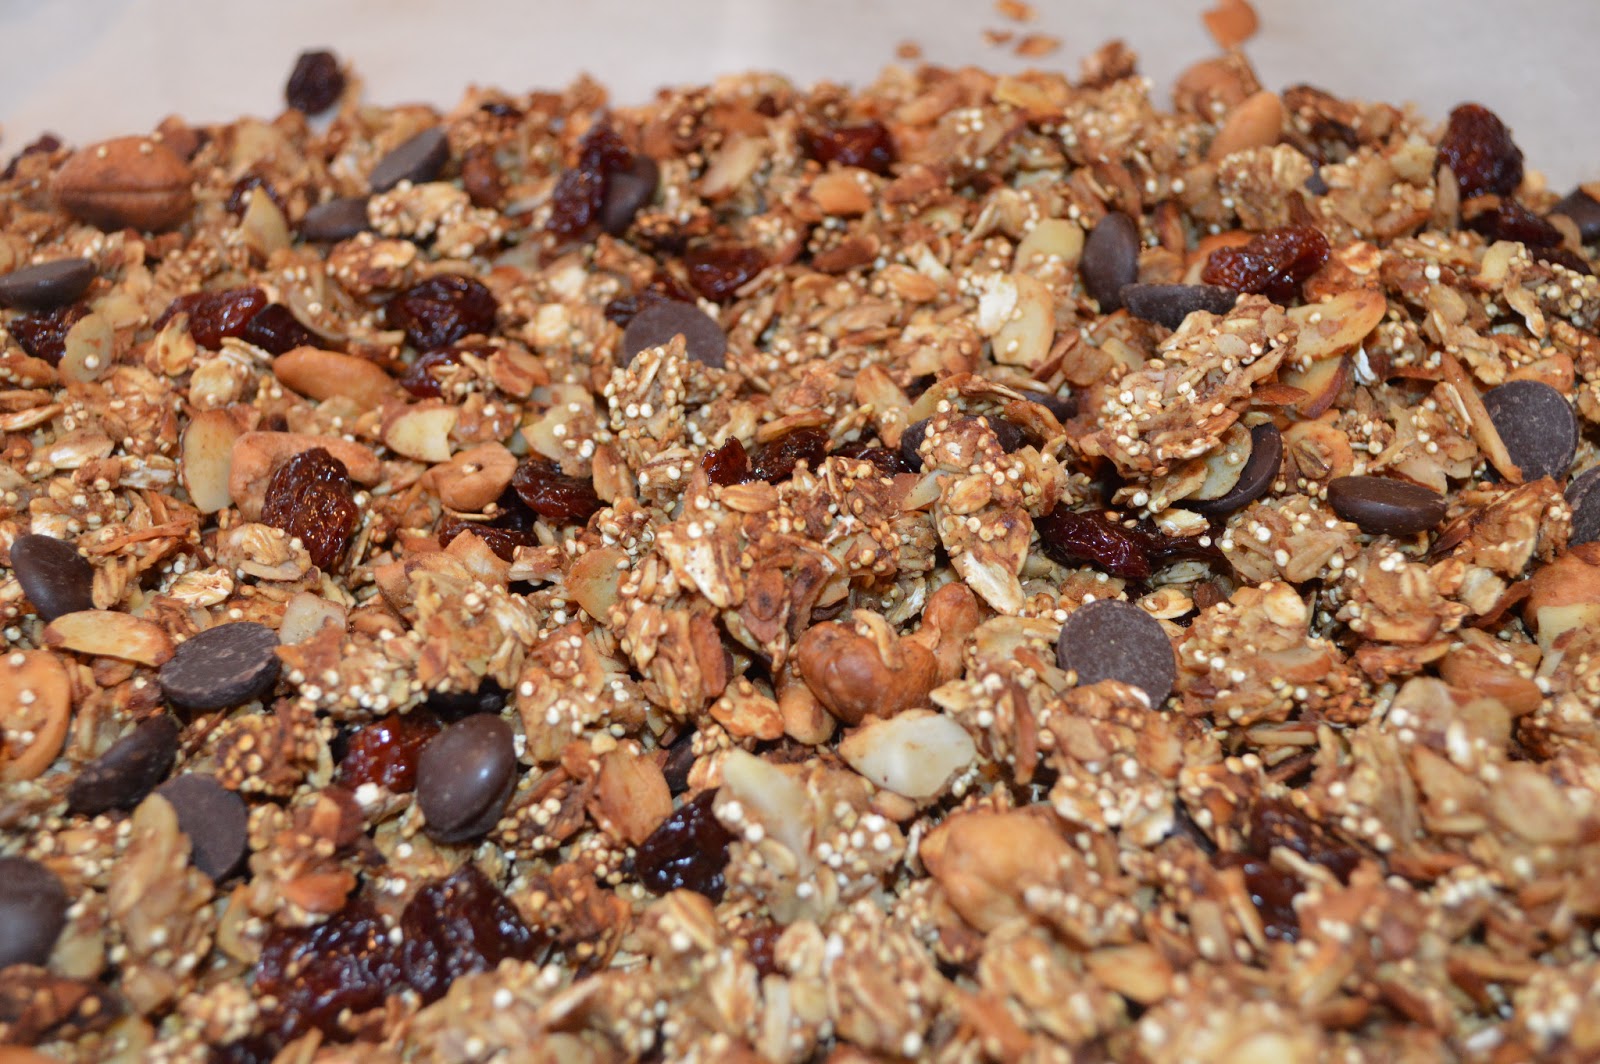
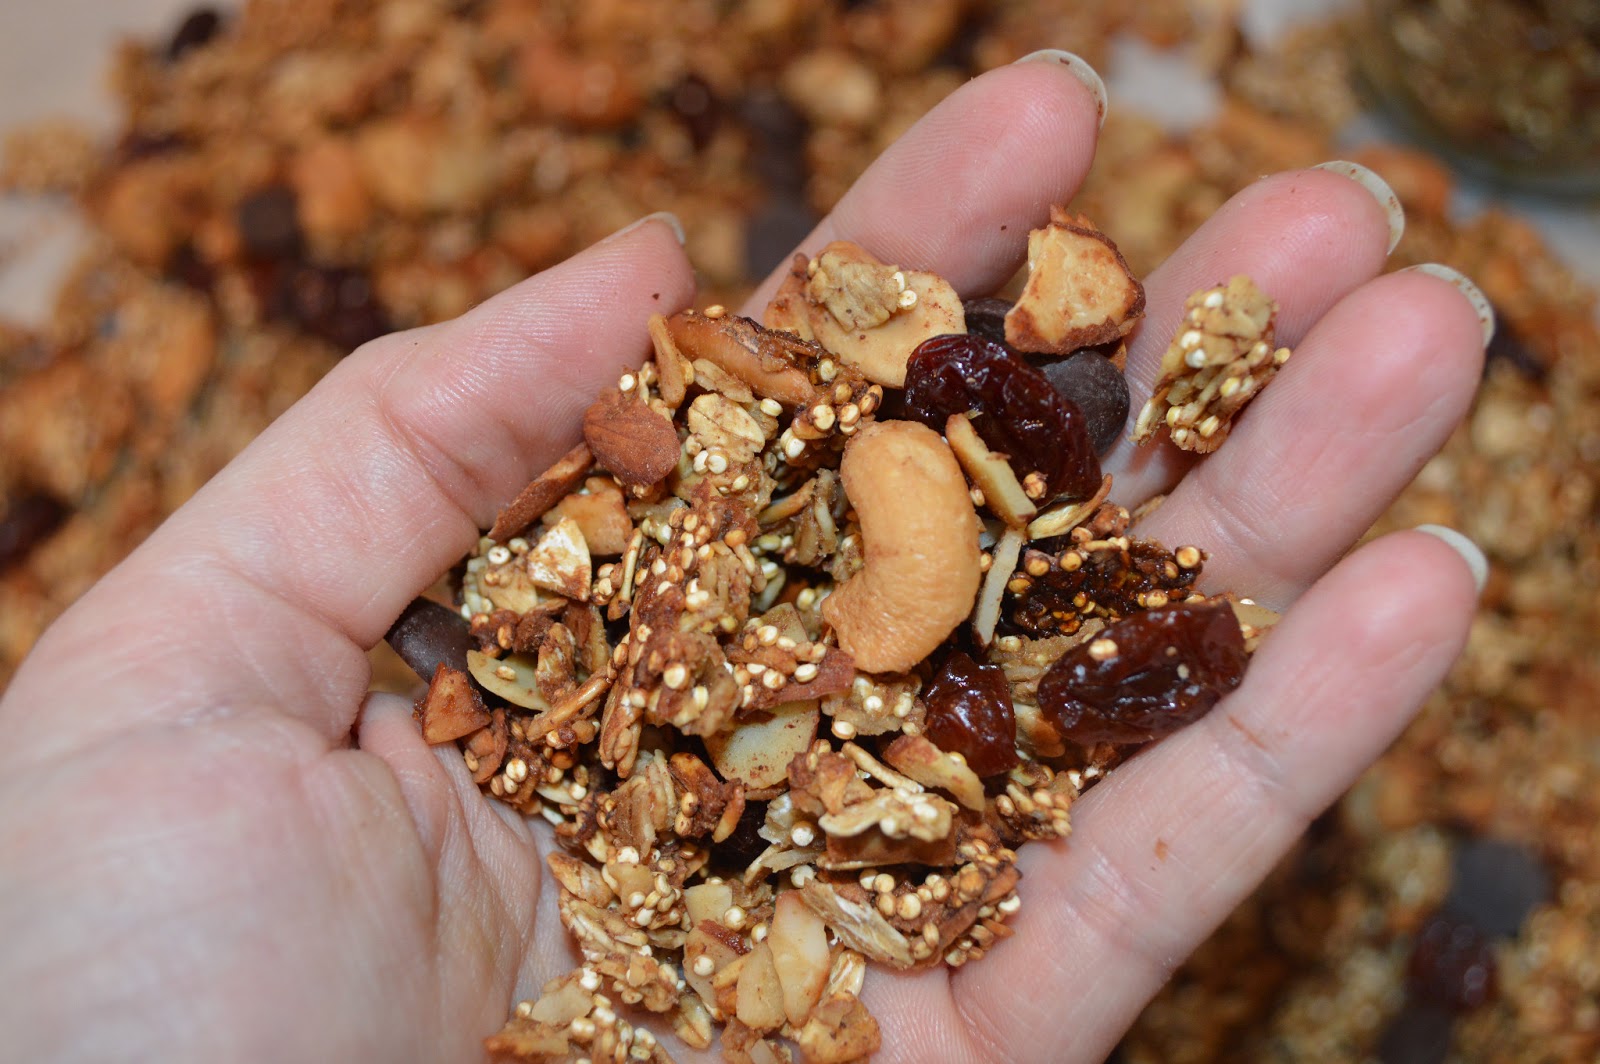
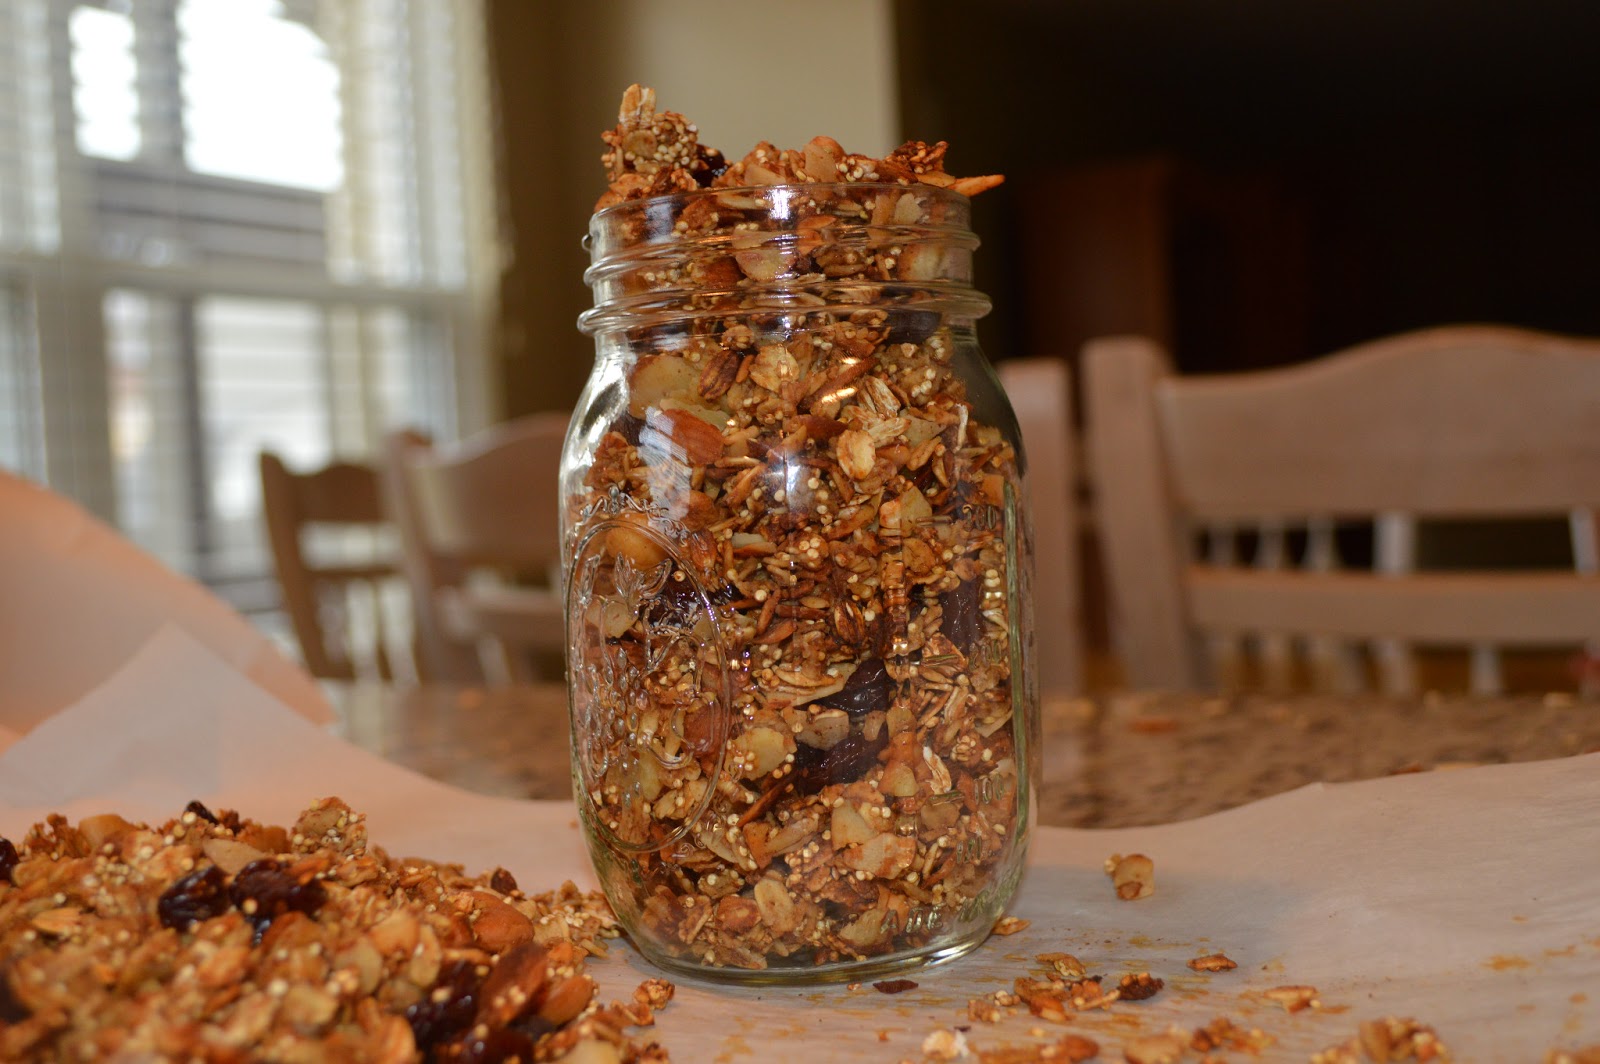
So…it has taken me almost 10 years to get back in the saddle again and test out some more granola. Tragic huh? Luckily this time my result was a crunchy, flavorful, not too cinnamon-y…did I say crunchy? granola. It was so good. The best part? EASY. The quinoa does not even have to be cooked! Pretty much you just throw most of these ingredients together, bake, let cool and toss in a few more ingredients. Better yet? Much better for you than the store bought brands, and did I mention the quinoa gives it an unbelievable crunch? Not to mention a nice protein boost. Leave out the chocolate chips and have it for breakfast, or pack it along for a midday snack. It is sure to satisfy with every crunchy bite.

Crunchy Granola

3/4 cup quinoa
2 1/2 cups rolled oats (NOT quick oats)
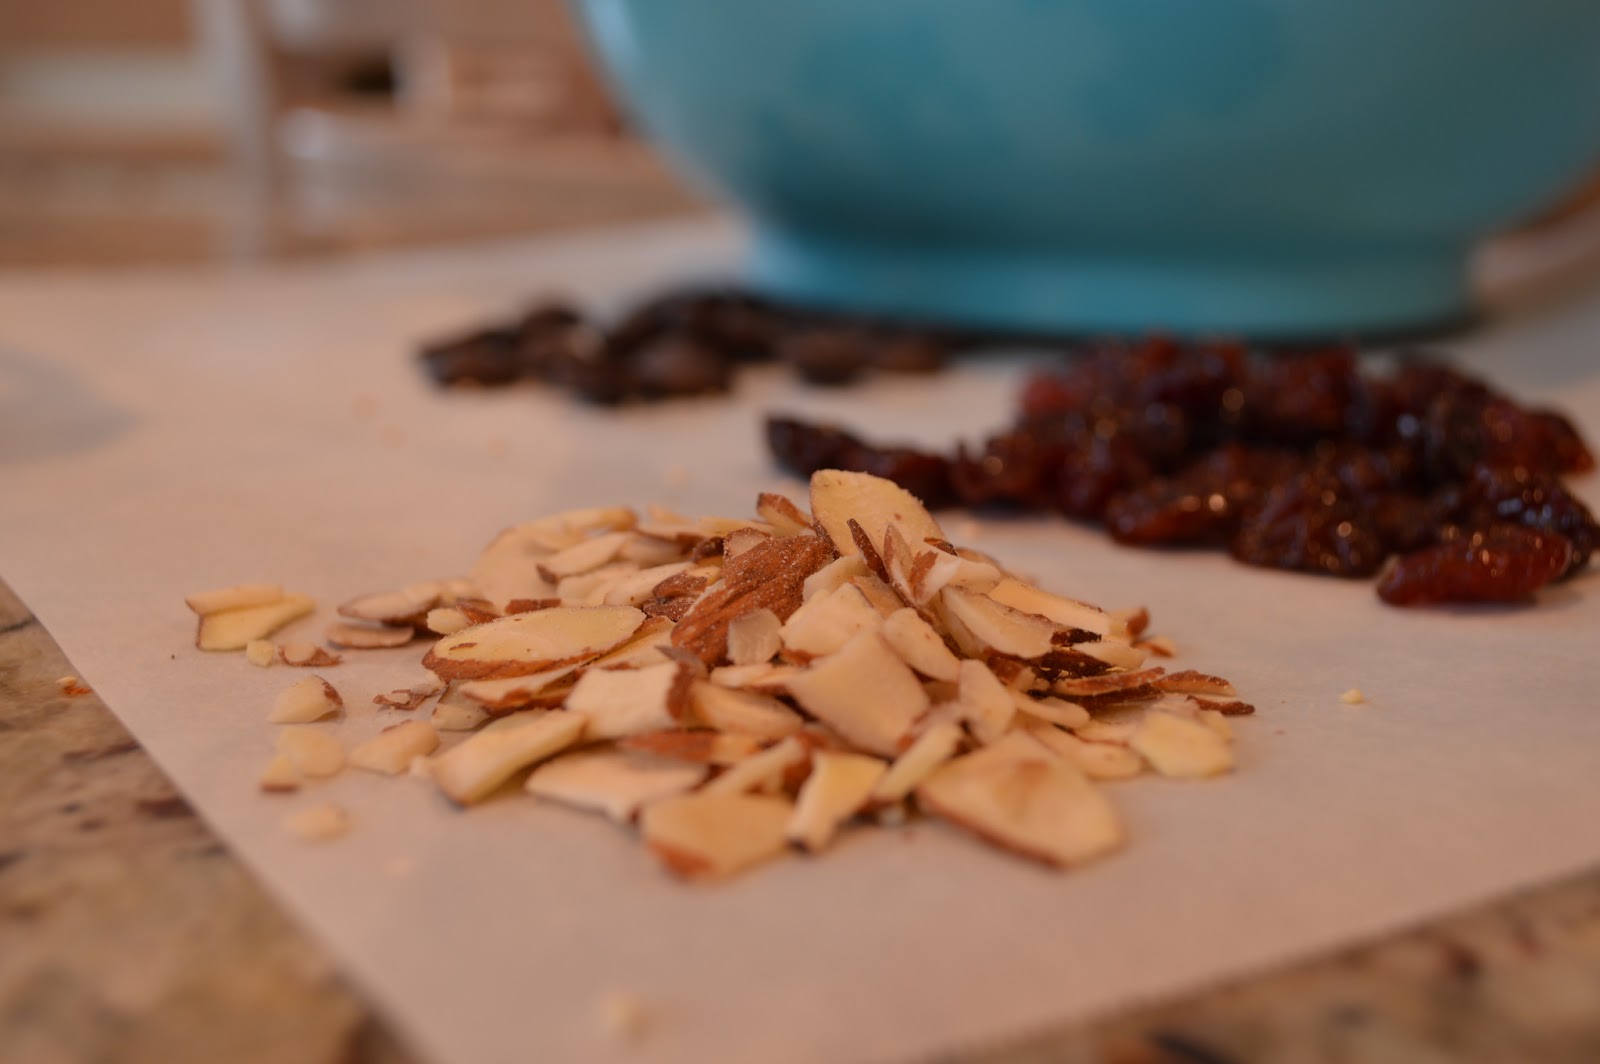
1 cup slivered almonds
1/2 cup cashew pieces
1/4 cup brown sugar
1 tsp cinnamon
1 cup unsweetened applesauce
2 tblsp honey
1 tblsp canola oil
1 tsp vanilla
1/3 cup dried tart cherries
1/3 cup dark chocolate chips

Preheat oven to 300 degrees. Rinse quinoa well and squeeze all excess water out. Pat dry with a paper towel. Mix quinoa, oats, almonds, and cashews together in a large bowl. In a small bowl, whisk together brown sugar, cinnamon, applesauce, honey, canola oil and vanilla.

 Pour into oat mixture and toss until completely coated. Line a large baking sheet with parchment paper. Pour granola onto baking sheet making sure it is spread out and not clumped together.

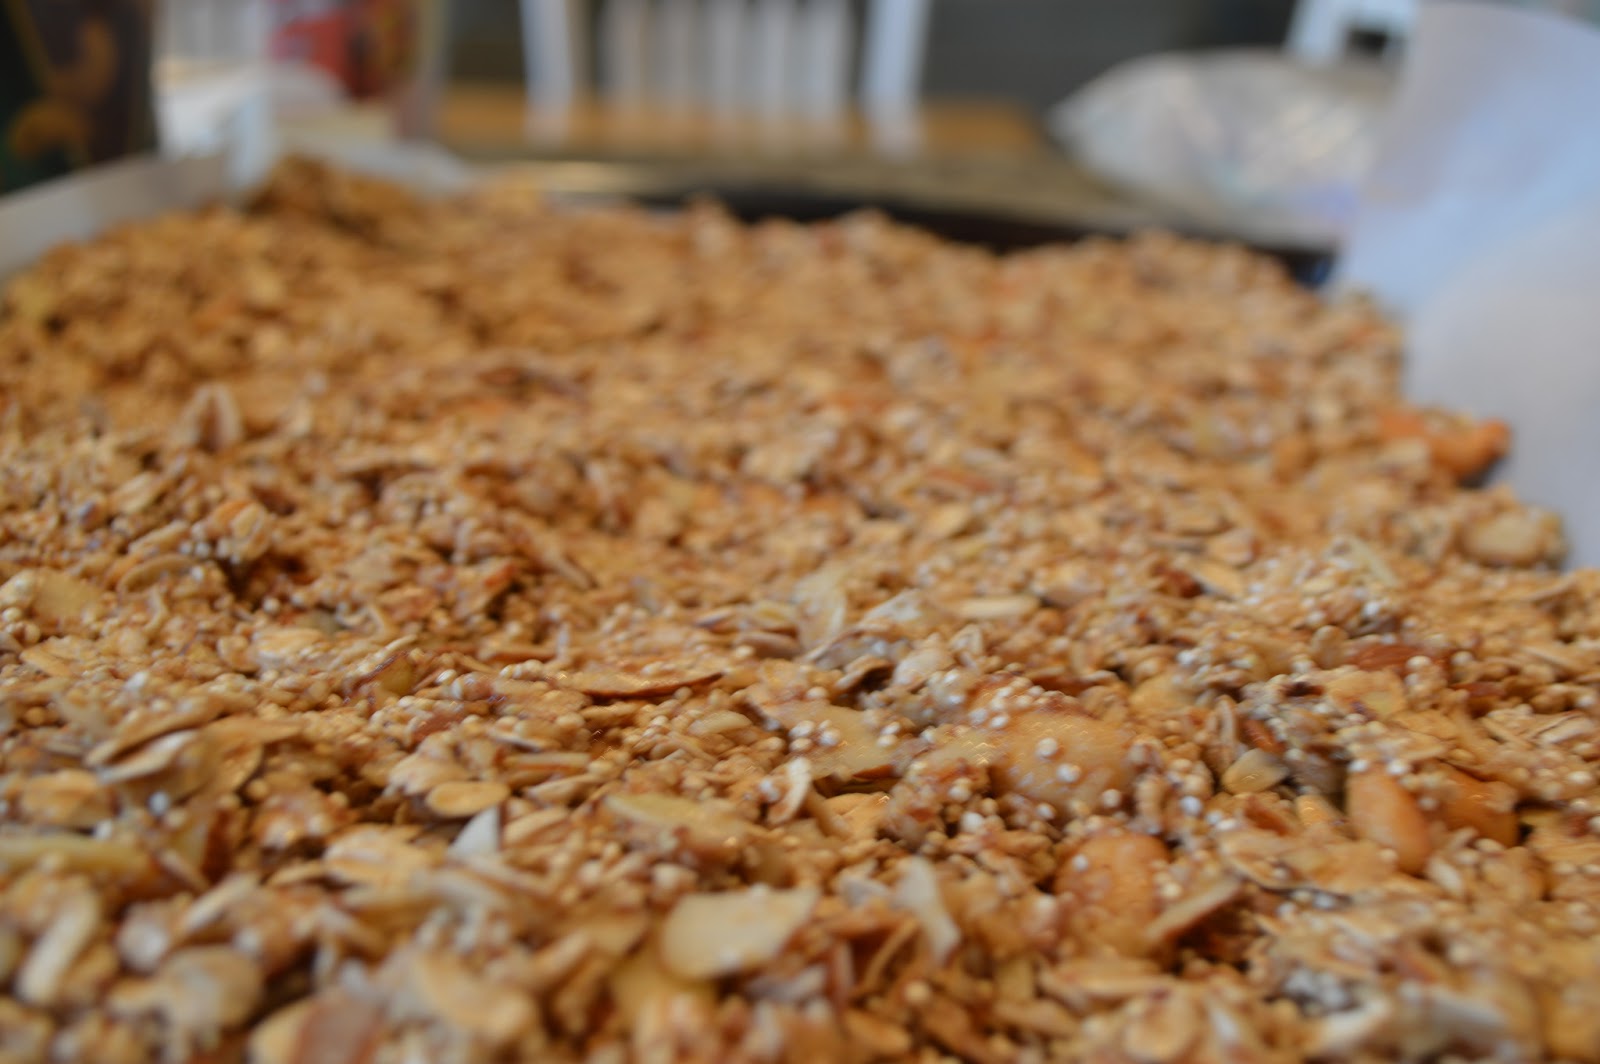
It should be in a single layer on the sheet. Bake for 40-50 minutes stirring every ten minutes. It should be golden brown and toasted. If edges start to darken, take out of the oven. Cool completely. Toss with cherries and dark chocolate.

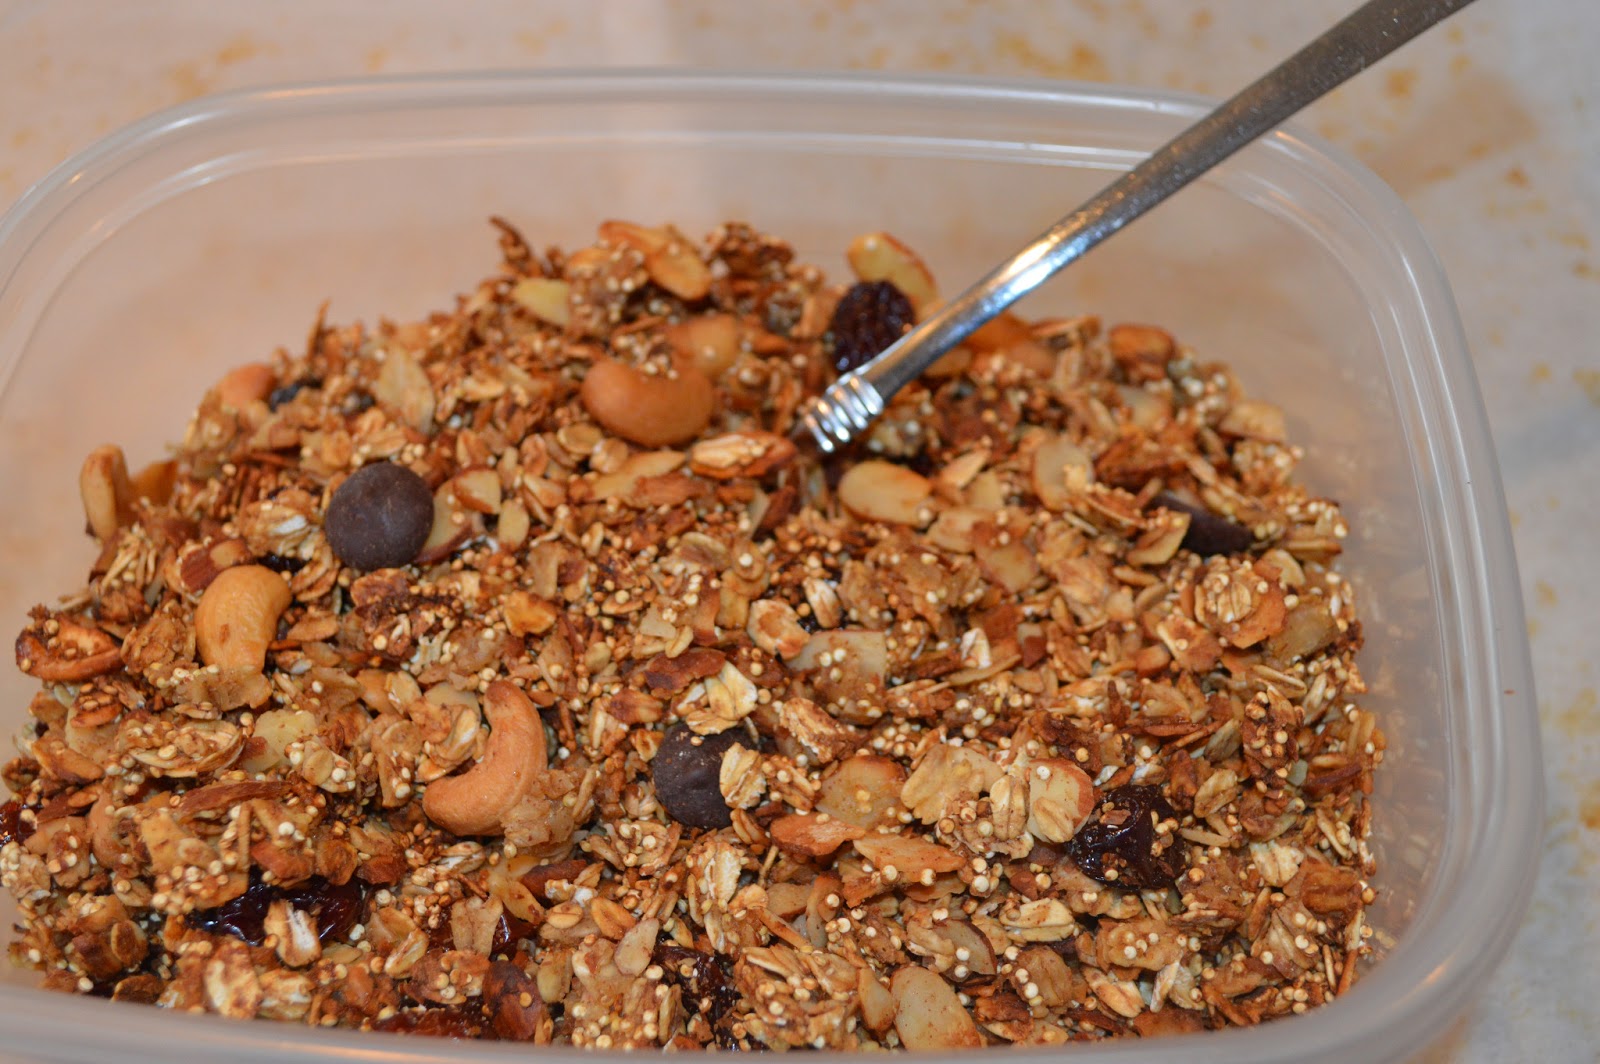
Store into a sealed container for up to a week.

*Feel free to play around with this recipe: walnuts, pecans, pumpkin seeds would all be great. You can substitute cherries with raisins, cranberries or any dried fruit.

 Have fun making your own combinations and enjoy!

Follow Me on Pinterest

Heather

Leave a Comment

Chicken & Turkey

Cheesy Tomato Artichoke Chicken


Yum.
You know how you can make chicken night after night for dinner, and pretty soon you honestly feel like there cannot be one more chicken recipe that exists out there that you haven’t tried yet?
Well…I feel that way all the time. When I came across a version of this on pinterest, I thought, okay, I will give it a try! As usual, I tweaked it in the way that I usually do…a change here…a change there.
I was so pleased, and my family was too. It was really good! And different too. That is what I really liked about the recipe.
My kids do not like artichokes, although my husband and I adore them. So, needless to say, they picked the artichokes out of this recipe.That’s okay-more for me! Otherwise, it was a hit for the whole family.
Take the boring out of your chicken. (Wow! That could be a slogan or something!)You won’t be disappointed!
Oh and this falls under the “you might not want to look at the picture” recipe category. Ugh. I need a photography workshop-asap! Seriously. The pics are really not doing this recipe justice at all. Take my word for it–it was really good.
I think I will have to make this again and retake the pic! In the meantime-enjoy!
Oh geez…I just looked at the pic again. Look away! Look away!

Cheesy Tomato Artichoke Chicken

4 -5 oz chicken breasts
Salt and pepper
5 plum tomatoes, chopped
1- 9 oz box of frozen artichokes, thawed
2 tblsp olive oil
1 tblsp dried italian seasoning
1 tsp salt
1/2 tsp pepper
1/3 cup flour
2 cups shredded mozzarella cheese

Preheat oven to 400 degrees. Spray the bottom of a baking pan with olive oil cooking spray. Place chicken breasts in pan and sprinkle with salt and pepper. In a medium bowl combine tomatoes, artichokes, olive oil, italian seasoning, salt, and pepper.  Sprinkle in flour and toss to combine. Pour over chicken. Bake 35 minutes and check for doneness. Right before it is almost done, (slightly, slightly pink in the center), cover with mozzarella cheese. Return to oven, broil for 10 minutes or until cheese is brown and bubbly.

Heather

Leave a Comment

Beef Pasta Soups & Stews

Hearty Tuscan Soup

As the weather turns colder and colder, comfort food is on our table more and more. Comfort food is usually known as being heavy and fattening and altogether not good for you. I like comfort food that is wholesome, made with real ingredients, filling and satisfying. Food doesn’t have to be filled with bad things to be considered “comfort”.
This soup is sort of adapted from the Olive Garden soup recipe with a few of my own changes. It is so good and best served with freshly grated pecorino romano cheese and some crusty bread.
Comfort food should bring your family to the table. This soup did just that with mine and I am sure your family will enjoy it too. It is not hard to make, and it makes a lot. Get ready to invite some friends or family over, or freeze the leftovers for a day that cooking is not on the agenda.
People always joke with me about how I am always cooking for an army…and I do! There is something comforting to me about cooking a whole big pot of soup. I mean, if a little drop of soup was simmering in a tiny saucepan, would that make you feel good?
Um…no.
But when you walk in and see a big stock pot simmering on the stove filled with a hearty soup you will probably want to stay for dinner.
And….um…please do.
Because I literally cooked for an army.

Hearty Tuscan Soup

1 lb extra lean ground beef
1 small onion, diced
2 large carrots, diced
2 stalks of celery, diced
2 cloves of garlic, minced
2 -14.5 oz cans of diced tomatoes
1 -15 oz can of red kidney beans, undrained
1-15 oz can of white northern beans, undrained
1 tbslp white vinegar
2 tsp salt
1 tblsp dried Italian seasoning
1 tsp dried thyme
1/2 tsp pepper
1/2 lb cooked ditalini pasta
pecorino romano for serving

In a large stock pot, brown ground beef until lightly browned and cooked through. Add carrots, onion, celery and garlic and saute for 5 minutes on medium heat. Add tomatoes, beans with the liquid, vinegar, salt, pepper and spices. Stir well and simmer for one hour on low heat. Serve hot soup over cooked pasta. Sprinkle with cheese and serve with warm, crusty bread.

Heather

Leave a Comment

Uncategorized

Happy New Year!

I wish you all the best as we enter into 2013! I sincerely thank all of you for supporting me, trying out my recipes, commenting (I love to hear your voice!) and reading all of my nonsense on this thing I call a food blog! I have been having a lot of fun since I started this in February and I have all of you to thank! Here is to a great NEW YEAR with a ton of great new recipes! 🙂

HAPPY NEW YEAR!


SEE YOU NEXT YEAR!


(C’mon…you know I had to say that one!)

Heather

Leave a Comment

Appetizers Pies and Tarts Snacks

Appetizer Round Up!

What other time of year is it socially acceptable to enjoy appetizers as frequently as Christmas time? Well, at least that is the way it is with my family! I have compiled a list of some yummy appetizers. Hope you find one that will wow at your next party or get together! Just click on the name of the appetizer for the recipe…and of course, my story behind it! ENJOY!

Buffalo Chicken Meatballs

Buffalo Shrimp Tarts

Caprese Dip

Carmelized Onion Yogurt Dip

Cheesy Stuffed Mushrooms

Enchilada Dip

Jalapeno Popper Dip

Roasted Garlic Bread

Sweet Mustard Dip

Tomato Cheese Tarts with Carmelized Onions

I hope you find one that you love! The holidays are almost here!

Heather

Leave a Comment

Christmas Cookies & Bars Desserts

Raspberry Jam Thumbprints {Updated!}

I
 I absolutely LOVE this cookie! It is funny that I love it so much, because I have yet to create the perfect one. It must be my love of raspberry jam (I really only have it when I make these cookies, but I do love it), that I constantly over fill these cookies. So, instead of the perfect little cookies I am envisioning, instead I get these raspberry explosions coming out of the oven. So…my advice to you. Do not fill these with too much jam. Honestly, they only need about a teaspoon or so of jam if even that. And, make sure to sprinkle generously with powdered sugar when they cool. The dough is not sweet, the jam and sugar add sweetness to the buttery, flaky dough. I hope you like these as much as me…maybe they will even be prettier. One can only hope. Oh well, they taste good, and really? That is all that matters!
Save Print
Raspberry Jam Thumbprints {Updated!}
Author: Heather
Recipe type: Cookies
Cuisine: Dessert
 
Ingredients
  • 2 cups flour, sifted
  • ¼ tsp salt
  • 1 cup butter, softened
  • 8 oz cream cheese, softened
  • 1 cup raspberry jam
  • Powdered Sugar, as desired
Instructions
  1. Preheat oven to 375 degrees.
  2. Sift flour and salt.
  3. Put butter in mixing bowl, add cream cheese and cream together until light and fluffy.
  4. Blend in flour.
  5. Roll into balls and press a "thumbprint" into each one.
  6. Chill for 3 hours or overnight.
  7. Spoon a little bit of raspberry preserves into each cookie (about ½ tsp)
  8. Bake on an cookie sheet at 375 degrees for 15 minutes.
  9. Let cool for 1 minute on cookie sheet.
  10. Cool completely, about 30 minutes.
  11. Sprinkle generously with powdered sugar.
3.5.3226
 

Heather

Leave a Comment

Uncategorized

Pistachio Butter Cookies {Christmas Cookie Recipe #3}

Sometimes it is so hard to let the kids be kids. I see it as a challenge for me very often. My children will come home from school with a project and they have this off the wall idea (one that I KNOW will never work) and I have to sit there, biting my nails, watching them destroy what could have been beautiful. But here is the thing…to them, it is beautiful. I have thirty years on them, they are still innocent. When I sit back and think about how their little minds work and what THEY think is beautiful, I realize what an amazing thing it is. My idea of what should be, is not always right. They do not always want my advice, my opinion, my thoughts. Sometimes, I just need to let them be. It is a hard concept as a parent…to just let them be. To let them figure stuff out for themselves. To let them fall, and pick themselves back up. I struggle with it often. But sometimes, it is so fun to see what they create. When I see how much fun they have being a kid, being themselves, doing what they think is perfect, I realize that I am doing the right thing. Kids should be able to be kids. If they have a project, they should be able to do it in their own kid way. Our way is good for us. Their way is good for them.

A few days ago, my oldest daughter had a playdate and I decided to take my own advice. I was baking some cookies and they were “helping”. It was so fun to spend this time with my daughter and her friend (who is like my “other” daughter). I gave them dough and let them pick the cookie cutters. I zipped my lips when they picked shapes I would have never chosen. When they were baked, I gave them a whole tray of cookies, a piping bag and some chocolate and let them go to town decorating. The results were perfect and they were so proud of themselves.

(Look at these two adorable girls I was lucky enough to bake with!)

Now, don’t get me wrong…I was secretly cutting my own cookies with my back to them on the other counter and using my own piping bag to decorate, but I wasn’t interfering with them, and that is what matters the most.

So, this season, let the kids have free reign on some cookies, a Christmas craft, or whatever. See how happy it makes them to create on their own.

Enjoy these delicious cookies–in whatever shape they turn out!

(The masterpieces created by the girls. They worked long and hard!)
Pistachio Butter Cookies

*Please note-the dough has to be chilled for three hours once it is made.*

1 cup butter, softened
1 cup sugar
1 1/2 tsp baking powder
1 egg
3 tblsp heavy cream
1/2 tsp almond extract
3 cups flour
1/2 cup pistachios, ground in a food processor
Sugar for sprinkling (optional)
Semi sweet or dark chocolate for dipping or drizzling

In a large mixing bowl, beat butter and sugar until smooth and creamy. Add the baking powder and beat in egg, cream and almond extract. Once that mixture is well combined, slowly add flour and then ground nuts. Divide dough into thirds. Wrap tightly in plastic wrap. Chill for 3 hours or overnight.
Once dough is chilled, take it out of the fridge and preheat oven to 37 degrees. Unwrap dough and roll it out on a floured surface with a rolling pin coated in flour. Cut into your desired shape with cookie cutters and place on an ungreased cookie sheet. Sprinkle with a little sugar if you want a little extra sweetness. Bake for 8 minutes or until firm. Let stand on cookie sheet for 2 minutes. Transfer to a wire rack to cool. Once completely cool, dip in chocolate or drizzle chocolate over cookies. Let chocolate set. Serve or if storing, store in a tightly covered container, or freeze up to 3 months.

Heather

Leave a Comment

Cakes and Cupcakes Christmas

Hello Dollies {Christmas Cookie #2}

Remember Magic Cookie Bars? I feel as if I was on a magic cookie bar kick for awhile. So easy to make and really good! Graham cracker crust, lots of delicious things sprinkled over the top baked in the oven and Voila! Cookies!
I feel like I get on a “kick” with certain foods at times. I swear in 2001 I made about a hundred chocolate turtle cakes. Really I did. In laws coming over for dinner? Let’s make that! Friend had a baby-chocolate turtle cake sounds good. Party to go to? How about a…um….chocolate turtle cake? Wow. I swear I am honestly getting a craving right now for chocolate turtle cake.
Anyways….I think the same thing happened to me with magic cookie bars too. Then, just like the chocolate turtle cake of 2001, I just stopped making them!
Along comes this recipe that is JUST like magic cookie bars but with a twist….a chocolate cake crust! Now, I loved the graham cracker crust of the originals, but I thought it sounded good to have a buttery, chocolatey crust on the bottom of the gooey chocolate, butterscotch and coconut topping. I tried it. YUM. Delicious. The name…I am not sure. I adapted this recipe from a recipe in the newspaper. A change here, a change there, but the name? I kinda like it.
You just might be on a kick too. This might be the start of Hello Dollies – 2012. You only have less than a month left of the year. Live it up.

Hello Dollies

1 box of chocolate cake mix
1 1/2 sticks of  butter, softened, cut into tablespoon size pieces
1 cup chocolate chips
1 cup butterscotch chips
1 cup flaked, sweetened coconut
1 can of sweetened condensed milk

Preheat oven to 350 degrees. Mix chocolate cake mix and butter until mixture is crumbly. Press into the bottom of a a 15×10 inch jelly roll pan.

 Sprinkle butterscotch and chocolate chips and coconut over the top.

 Drizzle with can of sweetened condensed milk.

Bake for 25-30 minutes. Cool for 30 minutes. Cut into squares and enjoy!

*These can be frozen. Allow to cool. Cut into squares. Carefully place into a freezer safe ziploc bag. Freeze up to 2 months. To thaw: place bag on counter until cookies have thawed. DO NOT microwave. You will end up with a gooey mess!*

Heather

Leave a Comment

Christmas Cookies & Bars

Lemon Cornmeal Cookies {and welcome to the start of my Christmas Cookie posts!}

Years before life got incredibly crazy (three kids, getting involved in way too much stuff, and the kids’ social lives taking over) two of my best friends and I used to get together right before Christmas and have an awesome cookie baking day.

I treasured those moments so much. I mean, it wasn’t only the baking and eating of delicious cookies all day that was so memorable, (oh and we did eat a lot of cookies…all day. This could have backfired and made us swear off cookies for the rest of the season, but…alas….it didn’t) it was the type of moments with friends that even when they are happening, you know they won’t last forever. Those moments that are so wonderful, you have that tugging at your heart when you know they are coming to a close. I remember looking at the clock as the day ticked by, hoping that somehow, by some sort of cheesy cliche Christmas miracle, time could slow down so I could have those precious moments with my friends for just a little longer.

The memories still seem so vivid even though we haven’t done it in years. The Christmas music that began, blaring on the (probably stereo?) radio, seeming festive and joyful for so long, only to be violently turned off at the end of the day as our ears could not take one more syrupy sweet song. The cookie recipes that we shared, some familiar, some brand new. Some with the strangest names (swedish lips anyone?). The meals we shared as the day went by, not believing we had all this time to spend together.  I am not sure if it went through their minds, but it always went through mine. How did we not realize that we would miss this time so much? How come when we had the time to do this in high school, college and those years after both when you were just free to do as you pleased, we didn’t do it everyday?

It’s these memories with these friends that I hold close to my heart. I will always treasure the holidays and how it brings friends and family closer, and helps you to remember how much you treasure them.

This story kicks off my Christmas cookie week. As you are baking cookies this year, invite a friend over to join you. Share a glass of wine, a heart to heart chat, and a lot of cookies. You will treasure it forever.

I have so many favorite cookie recipes, many of which I will share with you. This one is one of my new favorite Christmas cookie recipes. I just tried it this year, and we love it already.
Happy Baking!

Lemon Cornmeal Cookies

1 8.5 ounce package of corn muffin mix ( I always use Jiffy)
1/2 cup quick cooking rolled oats
1/4 cup sugar
2 tblsp butter, softened
2 tsp milk
1 egg, beaten
2 tsp finely shredded lemon peel

Preheat oven to 375 degrees. Line a cookie sheet with parchment paper. In a medium bowl, stir together muffin mix, oats, sugar, butter, milk, egg, and lemon peel until well combined.

Form a tablespoon sized ball of dough and evenly space on cookie sheet. These do spread while baking more than you would anticipate so space them well.

 Bake for 8-10 minutes or until lightly browned. Transfer to a wire rack and let cool. You may store them at room temperature for up to 3 days or freeze them for later use. (Which I always do!)

Heather

Leave a Comment

Appetizers Chicken & Turkey Snacks

Buffalo Chicken Meatballs

Appetizer heaven over here! 
Don’t you just wish some nights you could just have a complete appetizer dinner INSTEAD of dinner? Well, I do. Guilt free of course. I mean, an appetizer dinner is no light fare. Especially when you are like me and usually dip a carrot or two to make myself feel better, but completely indulge in the cheesiest of dips the appetizer table has to offer.
Anyone with me on that one?
Well, these little beauties “sort of” give you the best of both worlds. No, the buttery buffalo sauce is not exactly what you would call health food, but compared to say, the cheesy Jalapeno Popper Dip I posted yesterday, this recipe is a little lighter.
I love anything buffalo…except wings. I am just not a gnaw meat off of bones type of girl. Seriously. It just is not my thing. So if I can get anything buffalo without the intrusion of bones, I am all for it! This meatball is delicious and smothered in the buffalo sauce-yum. Now, when you dip it into the blue cheese dressing I suggest for the side…well, you are back to the really cheesy (but oh so delicious) appetizers again.
Oh well!
‘Tis the season!
Enjoy!
 
Buffalo Chicken Meatballs

1 lb ground chicken
1/4 cup crumbled blue cheese
2 tblsp cream cheese, softened
1 egg
1 /2 cup plain breadcrumbs
1/2 tsp celery seed
1 tsp salt
1/2 tsp black pepper
1 cup buffalo wing sauce
1/4 cup butter
blue cheese dressing and celery sticks for serving

Preheat oven to 350 degrees. Mix chicken, blue cheese, cream cheese, egg, breadcrumbs, celery seed, salt and pepper together making sure all ingredients are combined. Form mixture into small mini meatballs and place evenly on a baking sheet. Bake for 15-20 minutes, or until meatballs are completely cooked through. Meanwhile melt butter in a microwave safe bowl by breaking it into small pieces and heating on medium heat for 30 seconds at a time until completely melted. Mix with buffalo sauce. Place cooked meatballs in a serving bowl and pour sauce over them, making sure all the meatballs are covered. Serve immediately, or chill and reheat for later. Serve with blue cheese dressing and celery sticks. Don’t forget the toothpicks or small forks!

Heather

Leave a Comment

  • « Previous Page
  • 1
  • …
  • 25
  • 26
  • 27
  • 28
  • 29
  • …
  • 38
  • Next Page »

Heather

I am a midwestern girl who grew up in the big city, but now enjoys her days as a stay at home mom in the suburbs. Who says spending time in the kitchen has to be boring? I hope to inspire your family kitchen with some new ideas, fun recipes and great tips.

Stay Up to Date

Get all the latest tasty goodness straight to your inbox!

Girl and her Kitchen

Join us!

Hey! I am the GIRL in the kitchen and I am so glad you decided to visit. Love to cook and eat? You will find some great recipes on this site, whether you are looking to eat healthy, splurge on a dessert, make dinner or host a party-I have it all! Sometimes I’ll give you a story along with my recipe, other times, I want to take you straight to the food!  Whatever the reason that you decided to visit, I am so glad you joined me in the kitchen! Feel free to take a look around the site, and please…stay awhile!

Archives

Popular Categories

  • Appetizers
  • Breakfast
  • Crafts
  • Salads and Dressings
  • Side Dishes
  • Vegetables and Fruit

Most Popular Posts

Corner Bakery Cafe Giveaway!

Corner Bakery Cafe Giveaway!

Filed Under: Reviews

Bacon Cheddar Skillet Cornbread

Bacon Cheddar Skillet Cornbread

Filed Under: Breads, Quick Breads and Rolls, Side Dishes

Puffy Pancakes {Perfect for Valentine’s Day!}

Puffy Pancakes {Perfect for Valentine’s Day!}

Filed Under: Breakfast, Valentine's Day

100 Days of Real Food Cookbook Review {and Giveaway!}

100 Days of Real Food Cookbook Review {and Giveaway!}

Filed Under: Vegetarian

Copyright © 2026 · Divine theme by Restored 316