• Email
    • Facebook
    • Instagram
    • Pinterest
    • Twitter

Girl and Her Kitchen

Plan. Make. Eat. Design. Craft. Create. Celebrate. Life.

  • Home
  • About the Girl
  • Recipe Index
  • We LOVE
  • Weekly Menu

Uncategorized

Dark Chocolate Brownies ~ {Good For You}

So, I had a sick kid at home today who was super content just sitting and watching television all day while I periodically shoved liquids down his throat. I think the idea of sitting around all day and watching television sounds simply divine, and I would have joined him, say, if he was watching Revenge or Vampire Diaries or even some fun to watch ridiculous show on MTV.
Needless to say, I don’t let my little guy watch those things.
So…the option was watch the CARS movie three times in a row, OR, bake an obscene amount of goodies.
I chose the latter.
Now, I had to experiment with some healthy recipes. I mean it would be bad for everyone involved when I they eat it all if it was all super delicious fattening. So….I found this really delicious brownie recipe online, but one problem. It was filled with white flour, butter and lots and lots of sugar. I decided to try to remake it with some healthier ingredients.
The result?
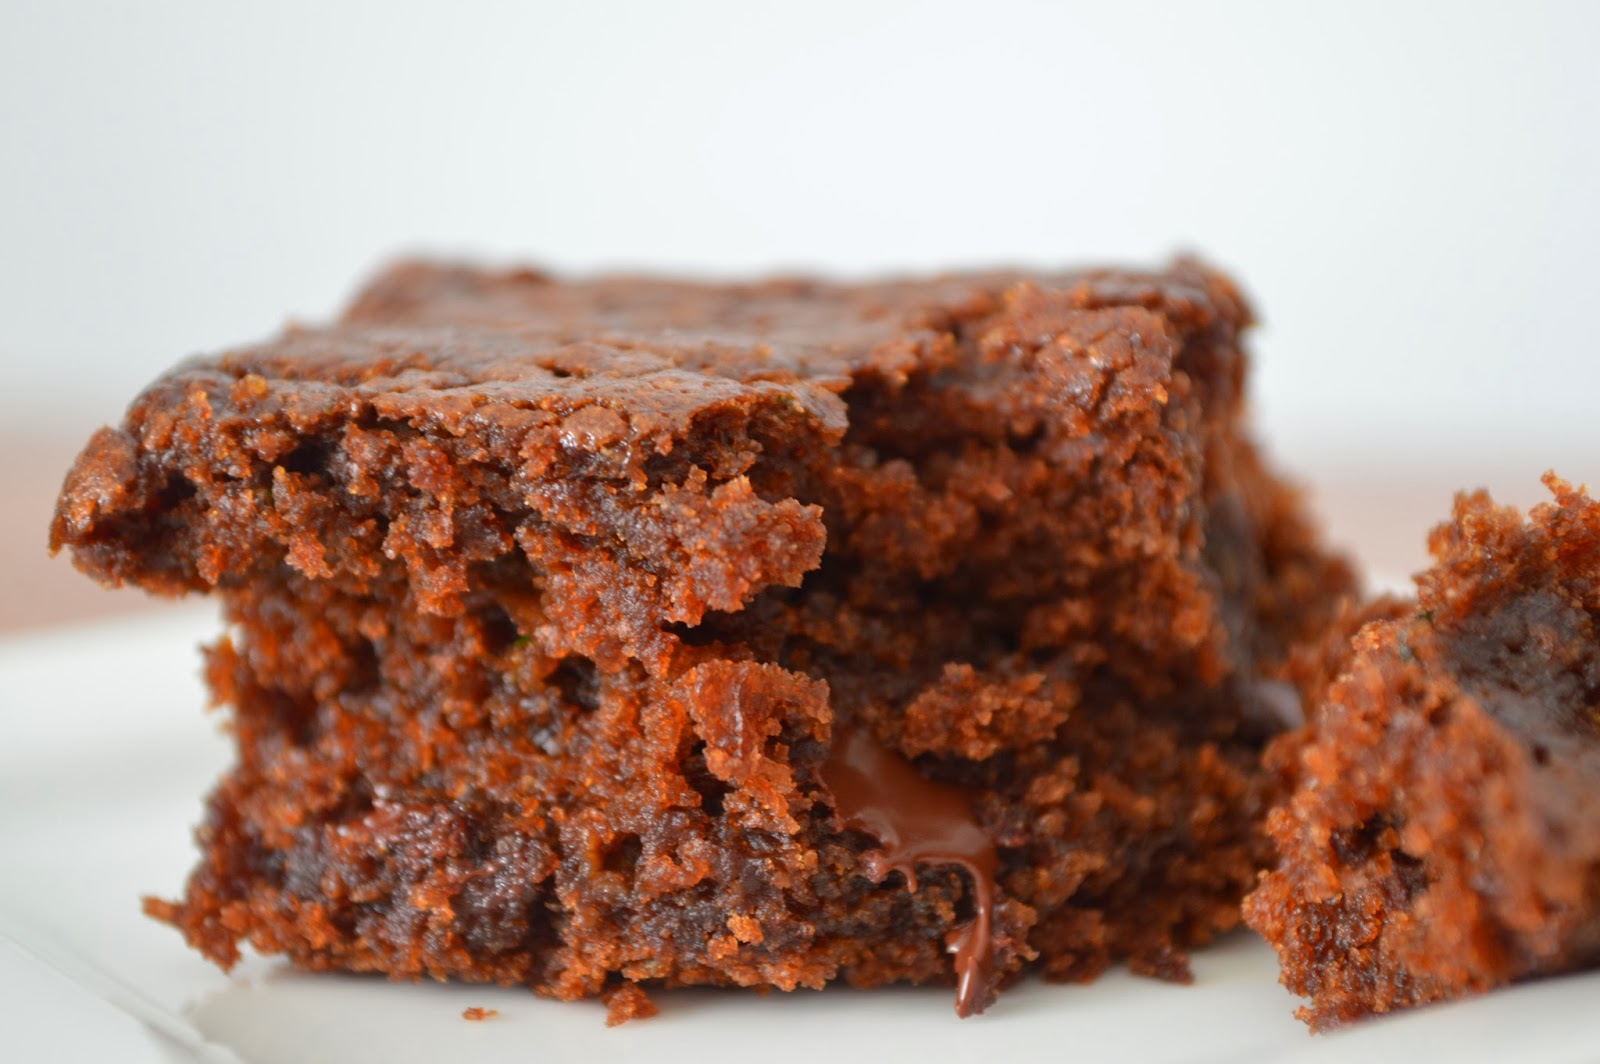
Delicious, chocolatey, perfect brownies.
Now, I am a chewy brownie type of girl, and these were a little more cake-y, but I noticed that the longer I let them cool, they became a little more chewy. Still definitely on the cake-y side, but simply delicious so it did not bother me at all.
Give them a try-with all these healthy ingredients, you could probably have a brownie for breakfast.
Why not?

Looking for other better for you chocolate treats? Try our Healthier Brownie recipe or our Skinny Chocolate Cake. Not in the mood to bake? These no bake Chocolate Peanut Butter Oat Clusters are super easy and good for you too. Win Win! 🙂

Dark Chocolate Brownies

1 cup coconut sugar (you can find this on Amazon, Whole Foods, Trader Joes or any health food store)
1/2 cup honey
1/2 cup light olive oil
3 tblsp unsweetened applesauce
2 cups whole wheat pastry flour
1/4 cup dark cocoa
2 cups shredded zucchini
2 tsp pure vanilla extract
1 tsp salt
1 1/2  tsp baking soda
1 cup dark chocolate chips

Preheat oven to 350 degrees. Spray a 13×9 baking pan with baking spray. In a large bowl, mix sugar, honey, olive oil, applesauce and flour until the consistency is like wet sand. Add cocoa, vanilla and baking soda and stir until well blended with other ingredients. Fold in chocolate chips and stir until just combined. Spread in prepared baking pan. Bake for 25-30 minutes or until middle is set. Cool. Cut into squares and serve. Enjoy!

Have you liked Girl and Her Kitchen on Facebook yet? Click here to keep up with great recipes, fun updates and everything going on in our kitchen! 

Heather

Leave a Comment

Uncategorized

Under Construction….But Will Be Back Soon!

Thank you for your patience our loyal readers! We are making some exciting changes to Girl and Her  Kitchen and will be back soon with a lot more great stuff to share! We will soon welcome some more contributors and even have a new look! We will be bringing you some crafty fun and some homeopathic, natural recipes for beauty, home and health. We will (try our best!) to resurrect our weekly menu section and be bringing you some wonderful recipes as usual! Please know we value you so much and love all of you dearly! We are so happy you check out Girl and Her Kitchen frequently and when we come back…which will be very soon….we will be better than ever!

Love in the kitchen—-
Heather

Heather

Leave a Comment

Uncategorized

Things I am loving right now…

These are just a few things that I am loving out in the blogosphere right now! Check them out and enjoy.

This story. It honestly makes me laugh harder each and every time I read it. I don’t even know why. I think it just reminds me of my good friend Rachael for some reason. Not that she ever did this. But she totally would. 
This blog. If you are local, you will love this blog filled with amazing things to do with kids. I write for them, so I know, I know, I am biased, but it is really awesome.
This gluten free/vegan coconut ice cream. Seriously. I am not vegan, nor do I need to eat gluten free, but I dream about this ice cream.
This post about changing things one little step at a time. It is inspiring! 
This whole blog. I just love what she writes every single day!

ENJOY~~~~

Heather

Leave a Comment

Fourth of July Snacks Vegetables and Fruit

Something a little patriotic…Fruit Kabobs with Cheesecake Dip

dsc_0355_00.jpg

During the summer, there are a few holidays we pull out all the stops with the red, white and blue. We learn about what these holidays are really about, then we celebrate with family or friends and enjoy the extra day off or two. I always try to come up with fun and interesting ideas using those great colors and this year on the fourth of July, I surprised my little ones with a very patriotic healthy snack. 🙂 This snack and any fun touches you might want to add can be a Memorial Day, 4th of July or Labor Day treat…or just anytime you are feeling patriotic!
Have a safe and fun Labor Day!

dsc_0356_00.jpg


Fruit Kabobs with Cheesecake Dip

Cheesecake Dip:

8 oz cream cheese, softened
1 cup Low Fat Vanilla Greek Yogurt
1 tsp pure vanilla extract
1-2 tblsp honey, optional

With an electric mixer on medium speed, mix cream cheese and yogurt until smooth and creamy. Add vanilla. Mix on low until just combined. Taste for sweetness and consistency. If it is too thick for your preference, add another 1/4 cup greek yogurt. If it is not sweet enough, add honey, 1 tblsp at a time until desired taste is achieved. Mix until whipped and fluffy. Serve with fruit, graham crackers or pretzels.

Fruit Kabobs:
Skewer your favorite combinations of fruit on a wooden skewer stick. Serve with cheesecake dip or eat on its own!

Kid Approved!!

Heather

1 Comment

Chicken & Turkey Pasta

Pasta with Tomatoes, Broccoli and Chicken    

I swore, when I was younger, that I would never say this, but things were different when I was a kid. Mom was always there when I got home and dinner was a family event. She always served it at the same time and dinner was always homemade.

Times change though. Moms work, dads work, kids have school and are involved in after school activities, and sometimes, schedules collide. I look at women now and think, “How do they ever get everything done?” Women of today are adept at juggling. And not just their schedules, but work schedules, household schedules, and kid schedules. While dads are helping more and more, it typically still falls to mom to hold most of the home life together. That means keeping everyone on schedule and on time. It’s a challenge.

It’s hard to get the laundry done some days, let alone put a homemade dinner on the table every night. Some nights it probably feels like your feet hit the ground running from the moment you wake up until your head hits the pillow at night.

So, it’s Girl and Her Kitchen to the rescue. Here is a dinner that’s fresh, tasty, and family friendly.

And the best part: It takes only about 20 minutes from walking into the house to putting dinner on the table. (Give or take a few minutes to take off your coat and give greetings!) It’s full of flavors that will satisfy everyone’s hunger…and their taste buds. You won’t have to give up anything with this one. Cherry tomatoes burst with juicy sweetness, the chicken is savory and satisfying, and the broccoli adds that fresh green you crave and your body needs. Plus, it’s pasta, and who doesn’t love that?

So, take your coat off, hug the kids and husband, get a pot of water on the boil, and let’s get dinner on the table.

Pasta with Tomatoes, Broccoli and Chicken

1/2 pound pasta
1 1/2 cups fresh broccoli
1 Tsp olive oil
2 cloves garlic minced
1/2 cup red cherry tomatoes, halved
1/2 cup yellow cherry tomatoes, halved
2 cups cooked diced chicken
salt and pepper

Cook pasta according to package directions

Heat the oil in a large nonstick skillet over medium heat. Add garlic and sauté for one minute. Add tomatoes and cook until the skin begins to pucker and they soften a bit, about 2 minutes.

Add in chicken (I like to use rotisserie chicken available at grocery stores or leftover chicken. More time saved.) and heat through. Salt and pepper to taste.

Steam Broccoli until it’s bright green and slightly softened. Pour cooked broccoli into serving dish. Add cooked and drained pasta.

Pour in tomato and chicken mixture and stir, gently, until blended. Serve with Parmesan cheese.

That’s all there is to it. A lovely homemade dinner on the table in 20 minutes. Now, off to that ball game, or play, or night class, or yoga class or…

Heather

Leave a Comment

Vegetables and Fruit

Let’s Talk Lunch! Making the Best Healthy Lunch For Your Child

Ahhh…the school lunch. Can there be a more dreaded task? In my house, the answer was no. Until now. I found a way to make school lunches a little more interesting…and because I like all of you so much-I am going to share!

I have always dreaded making lunches. I am not exactly sure why that is. It is not like it is the hardest job out there, it was just so annoying to me. I think it stemmed from a few things:

1—I always decided to do it after dinner. After cooking, cleaning, putting away leftovers, the thought of taking stuff out again and making a mess was always a downer.

2—I get bored easily and the fact that I felt like I was making the same, boring lunch every day, was getting to me.

3—I hated using all those plastic baggies! I felt like I was literally destroying the earth, one plastic baggie at a time.

So, I made a change. I found some awesome new school lunch supplies and got creative! The Ziploc container is BPA Free, Leak Proof and designed to pack your child perfect portions of their favorite healthy foods. I have more fun packing their lunches and I feel more free to go beyond the sandwich/fruit/snack routine that we used to follow.

I have pictured some of our school lunches here for some ideas for you. Get your creativity flowing with some of my ideas below, and for more school lunch ideas, tips on how to prep ahead for school lunch making and ways to get your child involved with the process, check out my feature on Little Lake County.  To purchase any of the products I use in my school lunches, click here. and scroll down to the lunch supplies section. Happy Lunch-making!

Sliced strawberries, organic vanilla yogurt, whole grain blueberry muffin, roasted cashews, carrot sticks, cheese stick
Chery Tomatoes, Blue Corn Chips, Turkey Slices, Cheese Wheel, Cantaloupe, Sour Cream with green salsa for dipping
Colby Cheese Stick, Pistachios, apple, Yogurt, popcorn
Strawberries, Cucumber slices, Homemade granola, Vanilla Yogurt, Taco (leftover from dinner the night before-chopped up)
Mixed fresh fruit (pineapple, cantaloupe, watermelon), whole grain crackers,salad with olive oil, sea salt and sunflower seeds, mozzarella cheese cubes, dark chocolate squares
Whole grain bagel with cream cheese, carrot sticks, dark chocolate covered almonds, strawberries, cucumbers
Make your own pizza: whole grain pita bread, shredded mozzarella cheese, organic pepperoni, tomato sauce, cherries
Yogurt drink, turkey slice, veggie straws, cheese wheel, cherry tomatoes, berry mix (strawberries and blueberries)
Pear chunks, carrots, orange peppers and black olives, bagel with cream cheese, organic cheddar bunnies snack, dark chocolate squares
Raspberries and blueberries, salsa/sour cream dipping sauce, cheese quesadillas, red peppers, whole fruit bar
Whole grain banana blueberry muffin, colby cheese cubes, turkey slice, cherry tomatoes, nectarines, green grapes
These are just a few of my many lunch creations. You may be thinking that these look way harder than a simple sandwich lunch, but the truth is, they really aren’t! It is so easy to throw these lunches together and they are much more fun! I do some prep work when I get home from the grocery, such as washing and chopping fruits and veggies. I also bake muffins and other healthy goodies and keep them frozen for easy use. If you are interested in recipes for some great muffins, breads and other healthy goodies, check out the recipe index to get you started. You don’t have to be a baker or a cook to pull this off though. There are plenty of healthy snacks out there and the combinations for lunches are endless. I don’t think my kids have had the same lunch twice!
What do you make for your kids’ lunch? Please share your ideas in the comments below!

Heather

Leave a Comment

Uncategorized

Getting to the Point: A Practical Guide to Kitchen Cutlery

When my daughter was preparing to get married, one of the items on her to-do list was set up a gift registry. We did it together since I was more knowledgeable in the cooking department. She cooks, but I’ve been cooking for a few years more.

The first thing I suggested is that she register for a good set of kitchen knives. I reminded her of what Irma S. Rombauer says in the classic and timeless Joy of Cooking: “Without a doubt, the most important tool in the kitchen, next to a copy of this book, is a sharp knife.”

So today, just like I did with my daughter on the day she registered, you’re going to learn the basic knife set every kitchen needs…and why you need them. Don’t be intimidated by the high price tag on some of the knives you will see while shopping. You can probably find a good knife in a reasonable price range if you look for the following features.

1. Hold the knife and feel its weight. Make sure it feels comfortable in your hand. Knives come in several sizes because all hands are not equal. Find the one for your hand.

2. The blade should feel balanced. The blade and handle should feel balanced in your hand.

3. When choosing your knife, pay attention to the handle as well as the blade. A good knife will will be slip resistant and will make you feel like you could chop and dice all day without getting cramped or uncomfortable.

4. Look for a knife where the metal blade extends through the handle rather than simple attached to the handle. This construction method will make it more balanced and aid in its ability to last longer and remain sturdy.

Now, for the knives themselves. First of all, if you can afford it, buy the whole set in a block. It will have the basic knives plus a few extras and the block is by far the best way to store your knives. In addition, if you’ve taken the time to evaluate a good knife and find one you really like, then getting the whole set will guarantee you’ll like all the types and sizes in the block. If you can’t afford the block then, by all means, make sure you at least purchase the following selection of knives to properly equip your kitchen.

    •    First, you need a good chef’s knife. This is the knife I reach for most often. I love it. It chops, it slices, it can be used for big items or small and it just feels so comfortable in my hand. It has a curved blade so that you can use a sort of rocking motion when cutting. It comes in several sizes, from a 6-inch blade to a 12-incher and about 2 inches in width. I own an 8-inch model and it feels just right in my hand.

    •    Second, you will want a good paring knife. This is the go-to knife to do delicate cutting for smaller food items such as taking the stem off a strawberry or mincing garlic or shallots. It’s also good for cutting items directly into a pot or for peeling potatoes. It’s great for those fine detail jobs, like deveining shrimp, as well. A paring knife is best for small jobs where you need a little more control. A typical blade will be about 3 inches long. A small thin knife, it fits well in your hand.

    •    Third, you’ll need a good serrated knife. Sometimes called a bread knife, it has a serrated edge and is ideal for cutting trough the outer shell of your food without smashing the soft interior. Because it’s designed to be a delicate cut, you can use it on bread, tomatoes, eggplant, or squash. The blade is usual 8 to 10 inches. If you like big, rustic loaves of bakery bread, you may want the bigger blade, but I find the 8-inch works best for me.

    •    Fourth, you will want a good carving (slicing) knife. This is the best knife for slicing meat. Carving knives are about 10 inches long with either a pointed or rounded tip. You can find these either with or without a scalloped edge. My personal preference is without. I find it easier to keep it sharp when it’s not scalloped. Again, pick what works best for you.

 
I also recommend a good set of kitchen shears. These have come in handy so many times in my kitchen. I use them for everything from trimming fat to opening packages of food. I have a pair that separates at the blade so I can wash them thoroughly between uses to avoid any cross contamination. Get stainless steal shears for best quality. Remember, though, that these are kitchen shears and should not be used anywhere else.

And last, but not least, let’s not forget the cutting board. “You’re only as good as your weakest link” applies very aptly to the cutting board. If you have a cheap or old cutting board, it will make your great knife set perform pretty poorly. Make sure you pick a sturdy, good quality cutting board. They are made of many materials and sizes. Pick the one that best suits your needs. If you can afford it, buy a special one just for meats and fish and different board for vegetables, fruit, and herbs. Whatever kind you choose, be sure to keep it clean. The Joy of Cooking  recommends an occasional soak in a solution of 2 Tbs. bleach per quart of water.

As for storing your knives, I have already mentioned the knife block, if you have one, is best. You can also purchase a magnetic rail which can be fastened to your wall and holds the knives separately and within easy reach. You can also find drawer separators at most stores that sell knives. The most important tip to remember with your new knives is to keep them separated. Having knives all in a jumble in a drawer is not only dangerous, it dulls the blades because they keep rubbing against each other.

Try to wash your knives by hand, as the dishwasher tends to wreak havoc on knife handles and can ruin a good knife pretty quickly. And dry completely before storing.

Once you have the perfect knife for you and your kitchen, you’ll be amazed at the difference it makes in your cooking. You will actually become a better cook and enjoy prep time so much more, just like my daughter is now doing with her high-quality knife set that she got at her wedding shower.

Heather

Leave a Comment

Salads and Dressings Side Dishes

Garden Tomato Panzanella Salad

So right about now, you should be harvesting loads and loads of tomatoes from your garden. Cherry tomatoes, plum tomatoes, beefsteak, sweet…tons of different varieties, all just waiting for the right recipe, a sandwich, or just to be eaten as is.

Well…that is, if you HAVE a garden.

Which I, unfortunately do not.

You see, besides my children, I cannot be responsible to take care of anything alive. I am literally the worst at taking care of any plant. Flowers, greenery, herbs, vegetables, fruits, anything! If you want your plant to die, give it to me. You are literally guaranteed that it will die.

I tried a garden a few years ago and I got one pepper at the end of August and it was about the size of a grape. I harvested a few tomatoes that were mealy and, well, really not good.

I wish I was good at gardening. I really, really want to be good at it. I am just not. I know I need to give it another try, but in the meantime, I have a delicious recipe for all of you green thumbs. This was given to me by my friend Vickie, and I am so happy every time she makes it. I finally asked her for the recipe so I could make it anytime I want. It is different from my usual panzanella which uses some different veggies and dressing. This recipe calls for celery, which I am normally not a fan, but for some reason–I love it in here! I really like the crunch the croutons give the salad and the dressing is perfect. Fresh garden tomatoes are perfect to complete the recipe.

Not that I would know or anything about things that come from a garden. 

Humor me. What kinds of things do you grow in your garden?

Garden Tomato Panzanella Salad
3 cups cherry tomatoes, halved or 5 tomatoes, cut into small wedges
1/2 cup sliced olives
1 cup celery, sliced
1/4 cup red onion, very thinly sliced
2 cloves of garlic
1 tsp salt
freshly ground black pepper
1 tsp dijon mustard
1/4 cup red wine vinegar
1/2 cup olive oil
2 1/2 cups croutons, any variety
In a bowl, combine tomatoes, olives, celery and red onion. In a separate small bowl, mash garlic cloves with salt and pepper. Whisk in dijon mustard and red wine vinegar until smooth. Slowly whisk in olive oil until fully combined. Drizzle over tomato mixture. Add croutons right before serving.  

Heather

Leave a Comment

Pasta

Fettuccine with Crispy Pancetta, Sauteed Mushrooms and Cherry Tomatoes {And A Giveaway!}

This falls under that category of: YOU MUST MAKE THIS.

It is everything you would want from a pasta. Flavorful, with loads of delicious things in it. LOADS.

Unfortunately, I cannot  take credit for this recipe.

Yep. It is true.

I wish I could…I really do. It is that good. This dish boasts fresh pasta, topped with sauteed mushrooms and tomatoes roasted in the oven until they are bursting with so much sweetness you could just eat them up before you even throw them in the pasta bowl. The crispy pancetta? It just takes this completely over the top. When you add color by sprinkling the fresh parsley on top, it even looks beautiful. This is perfect for a weeknight dinner or fancy enough for entertaining. It is really an easy dish, looks lovely, and tastes divine. What else could you want?

Although this pasta is no fuss, it is really tops when it comes to pasta. And  believe me. I know. It’s me over here. You know, the pasta lover? I mean, I am the person who could eat pasta every day and never get sick of it. I mean, of course I would have to make it a different way each night, but as long as it contained that one ingredient…you know, pasta, I would be perfectly happy.

Alas, this recipe belongs to a really talented guy. You know that little (huge) show Top Chef? Well, Fabio Viviani from Top Chef 5 and Top Chef All-Stars can take credit for this one. The best part? If you are local, you can come and see him in action! He will be visiting some local Mariano’s Fresh Markets this weekend and whipping up this pasta dish. He will also be sharing some tips on how to create healthy and delicious recipes at home using olive oil. Fettuccine samples will be given out to the first 50 people in attendance, and complimentary olive oil sachets and recipe cards will be on hand for attendees so they can try some recipes in their own kitchens.

Come out and join the fun! Chef Fabio Viviani earned the title of “fan favorite” on the show, and is known to be a wonderfully vivacious individual who loves to share stories from his Italian family, and who truly has a passion for food and cooking.

Here are the event details if you are in the Chicagoland area:

Chef Fabio Viviani
Saturday, August 17th
Mariano’s Fresh Market
1720 N. Milwaukee Avenue
Vernon Hills, IL 60061
11 am-12:30 pm
Mariano’s Fresh Market
40 S. Halsted Street
Chicago, IL 60661
3 pm-4:30 pm
Check out the recipe, and enter our giveaway for a bottle of Bertolli® Extra Virgin Olive Oil! Make any dish perfect by adding Bertolli® Extra Virgin Olive Oil! 


Fettuccine with Crispy Pancetta, Sauteed Mushrooms and Cherry Tomatoes
By: Chef Fabio Viviani
Serves 2, double ingredients for 4 servings
Prep Time: 20 minutes
Cook Time: 30 minutes
               
2 cups cherry tomatoes (20 small), halved and seeded
2 Tbsp. Bertolli® Extra Virgin Olive Oil
Salt and fresh ground black pepper
2 ounces pancetta or bacon, diced
1 Tbsp. Bertolli® Extra Light Tasting Olive Oil
4 to 5 cloves garlic, finely chopped
12 ounces oyster mushrooms, very thinly sliced
1/2 cup chicken broth, divided
8 ounces fresh fettuccine
2 Tbsp. chopped fresh parsley
Shaved Parmesan cheese

Preheat oven to 475°. Drizzle tomatoes with Bertolli Extra Virgin Olive Oil. Season with salt and fresh ground black pepper to taste. Arrange in baking pan and roast 5 to 10 minutes or until wilted.
 
Sauté pancetta with Bertolli Extra Light Tasting Olive Oil over medium-high heat until crisp. Season with fresh ground black pepper and very little salt. Add garlic and mushrooms and sauté until golden brown.
 
Add roasted tomatoes and 1/4 cup broth to sauté pan. Reduce heat and simmer uncovered.

Add fettuccini to boiling water over high heat, stirring occasionally until it floats, approx. 5 to 8 minutes.
 
Add cooked fettuccine to sauté pan and remaining broth. Increase heat and drizzle with Bertolli Extra Virgin Olive Oil. Add parsley. Simmer 2 to 5 minutes.
 
Top with shaved Parmesan and serve.

Would you like to make this flavorful recipe and make Chef Viviani {and Girl and Her Kitchen} proud? Enter below on the rafflecopter to have a chance to win a bottle of 
Bertolli®Olive Oil!
Want a second chance to win? Tag our Facebook Page in your facebook status for an extra chance to win!


a Rafflecopter giveaway


Heather

2 Comments

Uncategorized

“Moms”Apple Slices

I can still remember sitting in the front yard of our family farmhouse shucking corn, peeling potatoes, or pulling string beans from the vine with my mom while we talked about life’s little worries. That’s what’s great about moms! And my mom was an amazing woman. She was born in an era when all things were made from scratch. That was the way her mother taught her to cook and she never forgot how it was done. She taught me to be that way, too. She was one of the original farm-to-table cooks. Even when the food industry began to create and market ready-made items, she remained true to the way of cooking that she learned at her mother’s knee.  
My niece, Stacy, (who has an amazing blog of her own called Girl With a View), used to say my mother could take a seed, grow a pumpkin, pluck it from the garden, and turn it into a pie with no trouble at all. And she often did just that!

Mom made it look easy. She had the ability to make everything turn out “just right.” Some of it stuck with me, but some–I’m afraid–did not. She tried to teach me, but I just couldn’t get the hang of some things. I sat at her knee just like she did with her mom, but I, apparently was not an astute student.

Take pie crust. Hers were light, flaky, and delicious. She had a gift. I don’t. And because of that I like ready-made pie crusts. Not just because they’re so much faster than making my own, but because my pie crust never turn out like mom’s. They are either too dry and hard or too soft and mushy. Unlike my mom, mine are NEVER just right! It’s not that I shun the ways of cooking from scratch; I love it when I can achieve something wonderful made from my own hands. But some ready-made items are well worth using.

So, for me, the packaged crust was a great gift. And I utilize that gift whenever I make these apple slices. I make it my way: fast and easy, with a good crust and a tasty filling. Disclaimer: It’s not as good as my mom’s. Hers was amazing! I really loved it, but she spent so much time peeling apples, making dough, assembling this treat that I get exhausted just thinking about it. Don’t worry though, because my version is a pretty great substitute. I think you will enjoy it, too.

As you bite into the light, flaky crust filled with juicy apple filling, you’ll be so glad it didn’t take very long to make, because you’ll want to make it again and again for dessert. It’s great for potlucks and picnics, too. Now get the oven preheating and get ready for “Mom’s” Apple Slices.

2 ready-made pie crusts (the kind you roll out
1- 20oz can apple pie filling (you may want two cans for a really fruit filled take on this classic)
1 tbs lemon juice
1 cup powdered sugar
2 tbs milk
Preheat the oven to 350 degrees. Roll out the pie dough so that it will fit into an 7×12 baking sheet. Place one sheet of pie crust on the bottom of the baking sheet and prick with a fork. Pour over apple pie filling. Cover with remaining pie crust. Bake at 350 for 45 minutes or until crust is golden brown.

While it’s baking, mix together the milk, lemon juice, and powdered sugar to create the icing. If you would like your glaze thicker, feel free to add more powdered sugar. After removing the baked apple slices from the oven, while still warm, drizzle with the glaze.

I like to add a sprinkling of cinnamon or apple pie spice to the top. Mostly because I think it’s prettier!You can also make this with other fillings if you like. Perhaps peaches are your passion or you get bonkers over blueberries. Whatever you like is okay. Add a little dollop of ice cream or whipped cream, too, if you want a bit more substantial dessert. My hat is off to my mom and her garden and kitchen talents, but here’s to an updated, quick-take version of her apple slices.

Heather

Leave a Comment

  • « Previous Page
  • 1
  • …
  • 18
  • 19
  • 20
  • 21
  • 22
  • …
  • 38
  • Next Page »

Heather

I am a midwestern girl who grew up in the big city, but now enjoys her days as a stay at home mom in the suburbs. Who says spending time in the kitchen has to be boring? I hope to inspire your family kitchen with some new ideas, fun recipes and great tips.

Stay Up to Date

Get all the latest tasty goodness straight to your inbox!

Girl and her Kitchen

Join us!

Hey! I am the GIRL in the kitchen and I am so glad you decided to visit. Love to cook and eat? You will find some great recipes on this site, whether you are looking to eat healthy, splurge on a dessert, make dinner or host a party-I have it all! Sometimes I’ll give you a story along with my recipe, other times, I want to take you straight to the food!  Whatever the reason that you decided to visit, I am so glad you joined me in the kitchen! Feel free to take a look around the site, and please…stay awhile!

Archives

Popular Categories

  • Appetizers
  • Breakfast
  • Crafts
  • Salads and Dressings
  • Side Dishes
  • Vegetables and Fruit

Most Popular Posts

Corner Bakery Cafe Giveaway!

Corner Bakery Cafe Giveaway!

Filed Under: Reviews

Bacon Cheddar Skillet Cornbread

Bacon Cheddar Skillet Cornbread

Filed Under: Breads, Quick Breads and Rolls, Side Dishes

Puffy Pancakes {Perfect for Valentine’s Day!}

Puffy Pancakes {Perfect for Valentine’s Day!}

Filed Under: Breakfast, Valentine's Day

100 Days of Real Food Cookbook Review {and Giveaway!}

100 Days of Real Food Cookbook Review {and Giveaway!}

Filed Under: Vegetarian

Copyright © 2026 · Divine theme by Restored 316